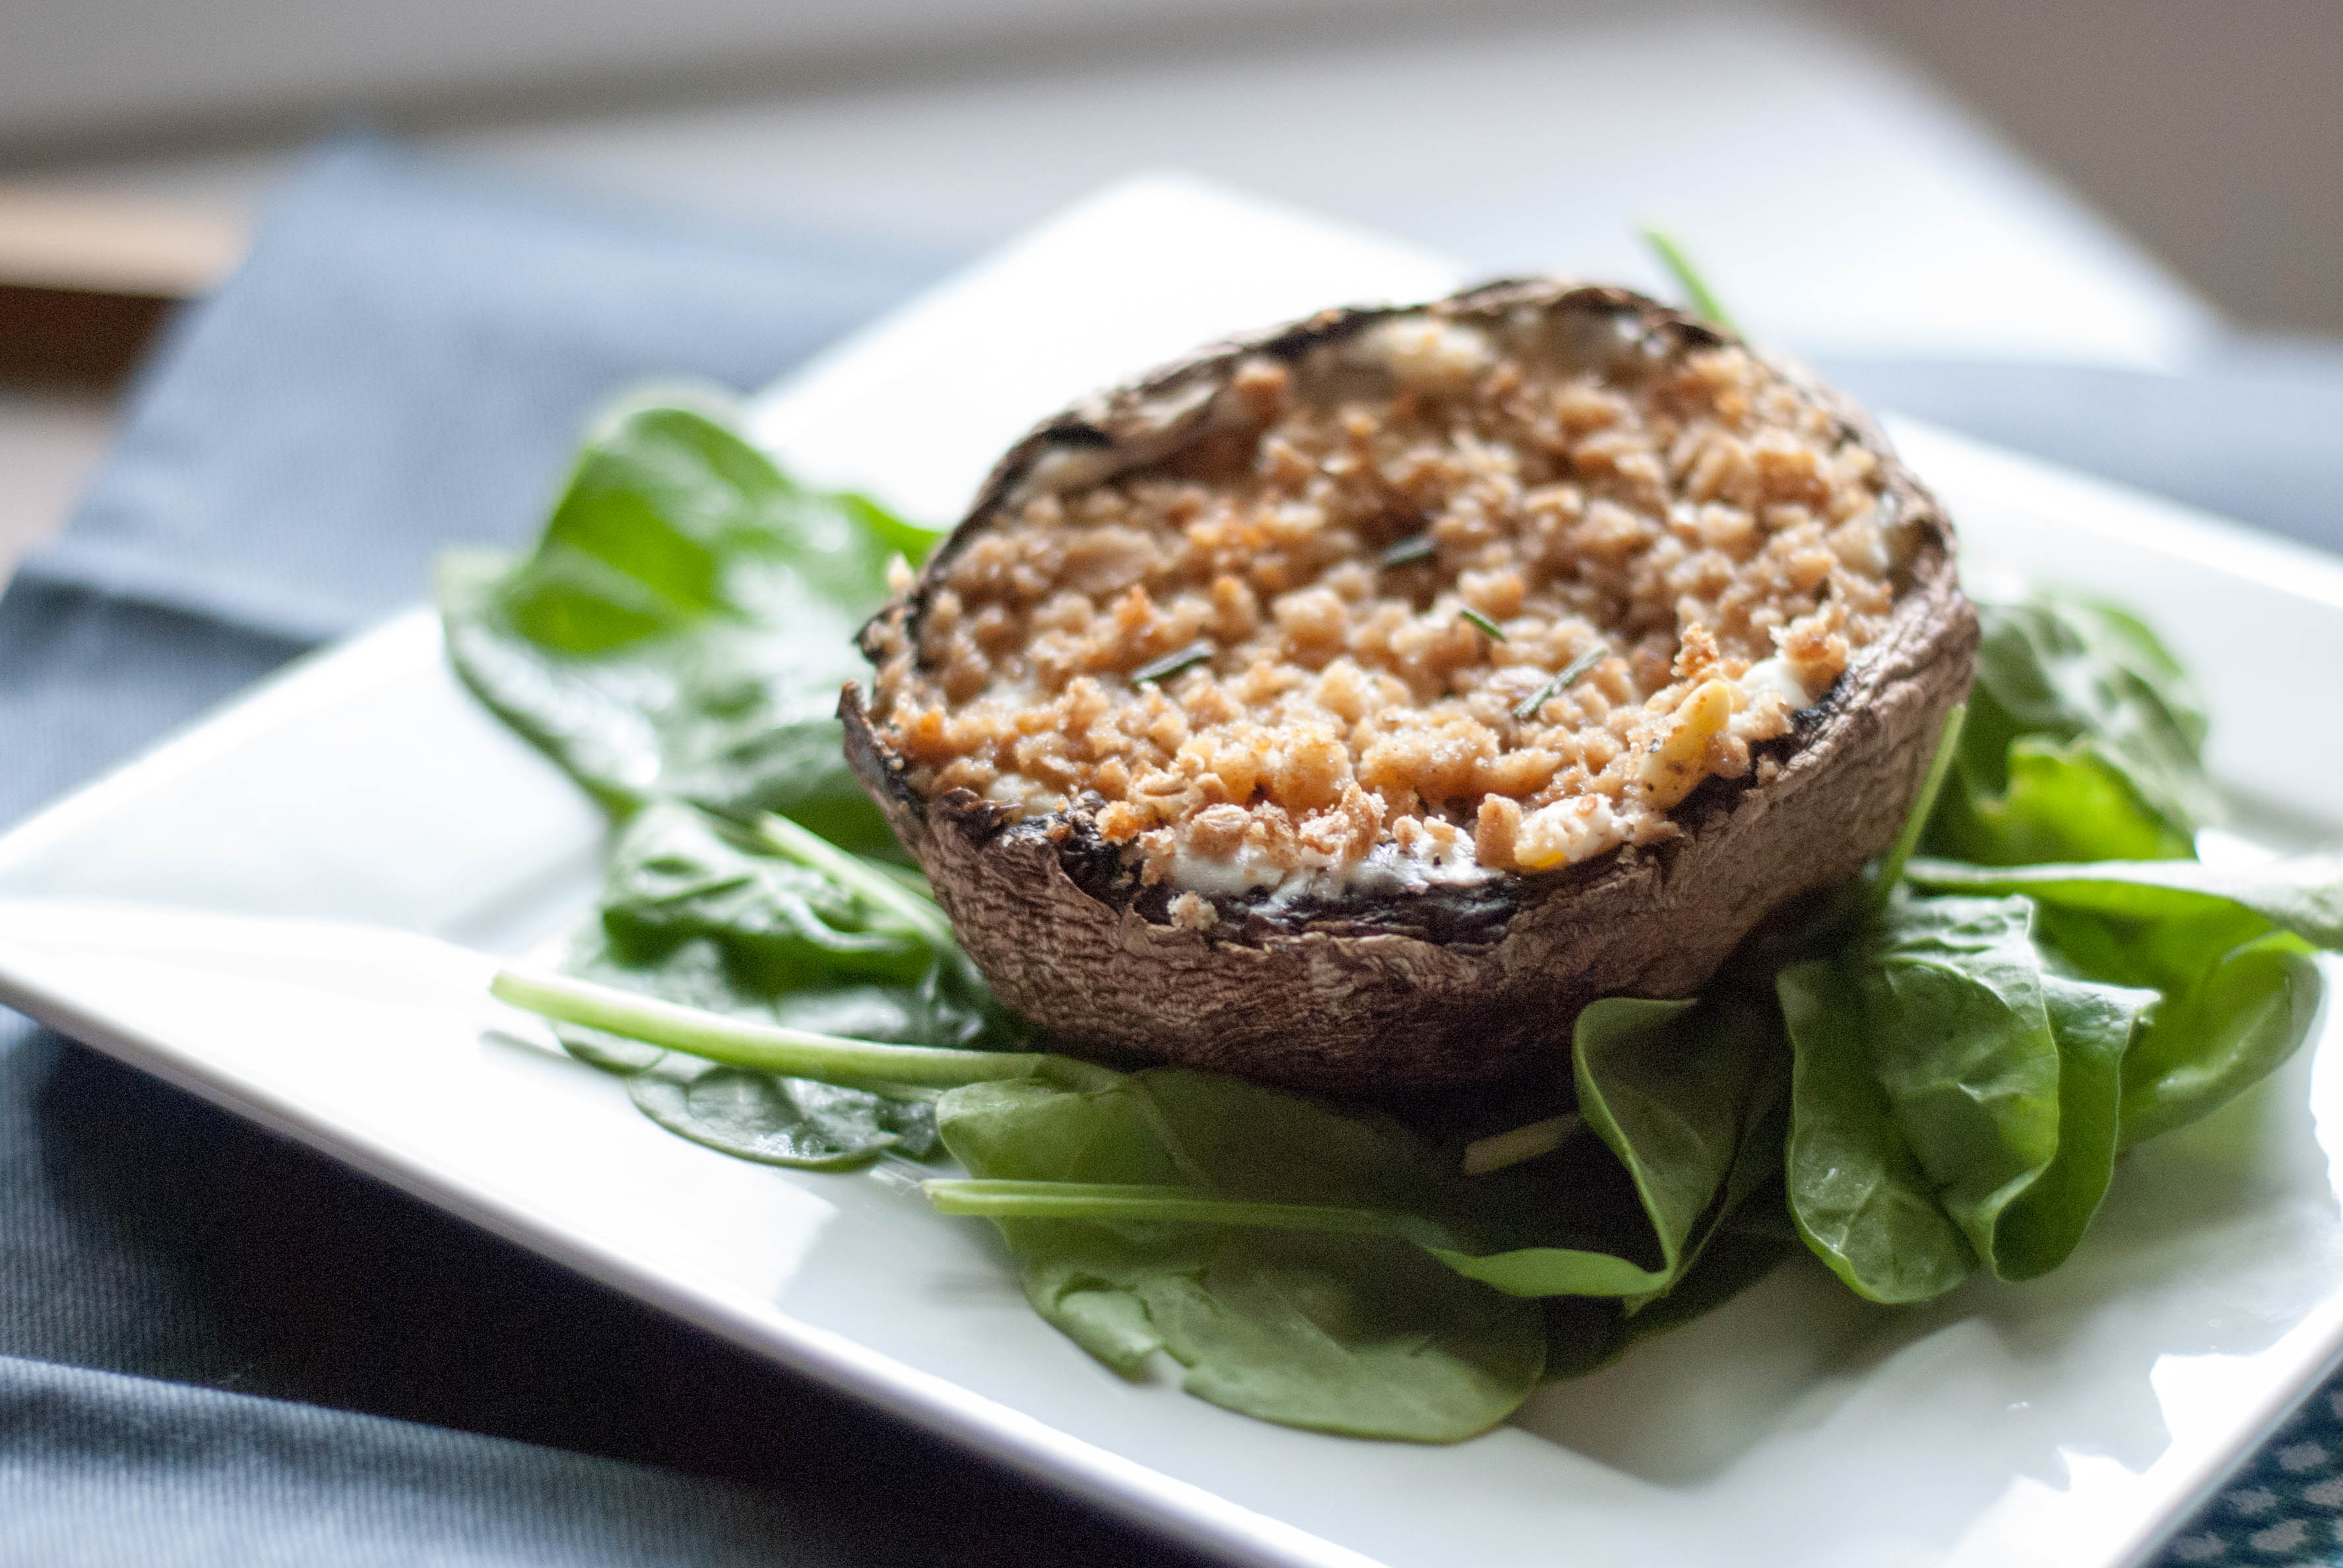
 Goat cheese makes everything delicious and these Goat Cheese and Herb Portabellas are no exception. I could do a write up of how amazing they are, etc. but I’m not even going to go there. These are beyond amazing.. end of story! I could have eaten 10 more if I wouldn’t have been thinking in the back of my mind that I needed to save some for my family (plus there is a lot of cheese in them!)
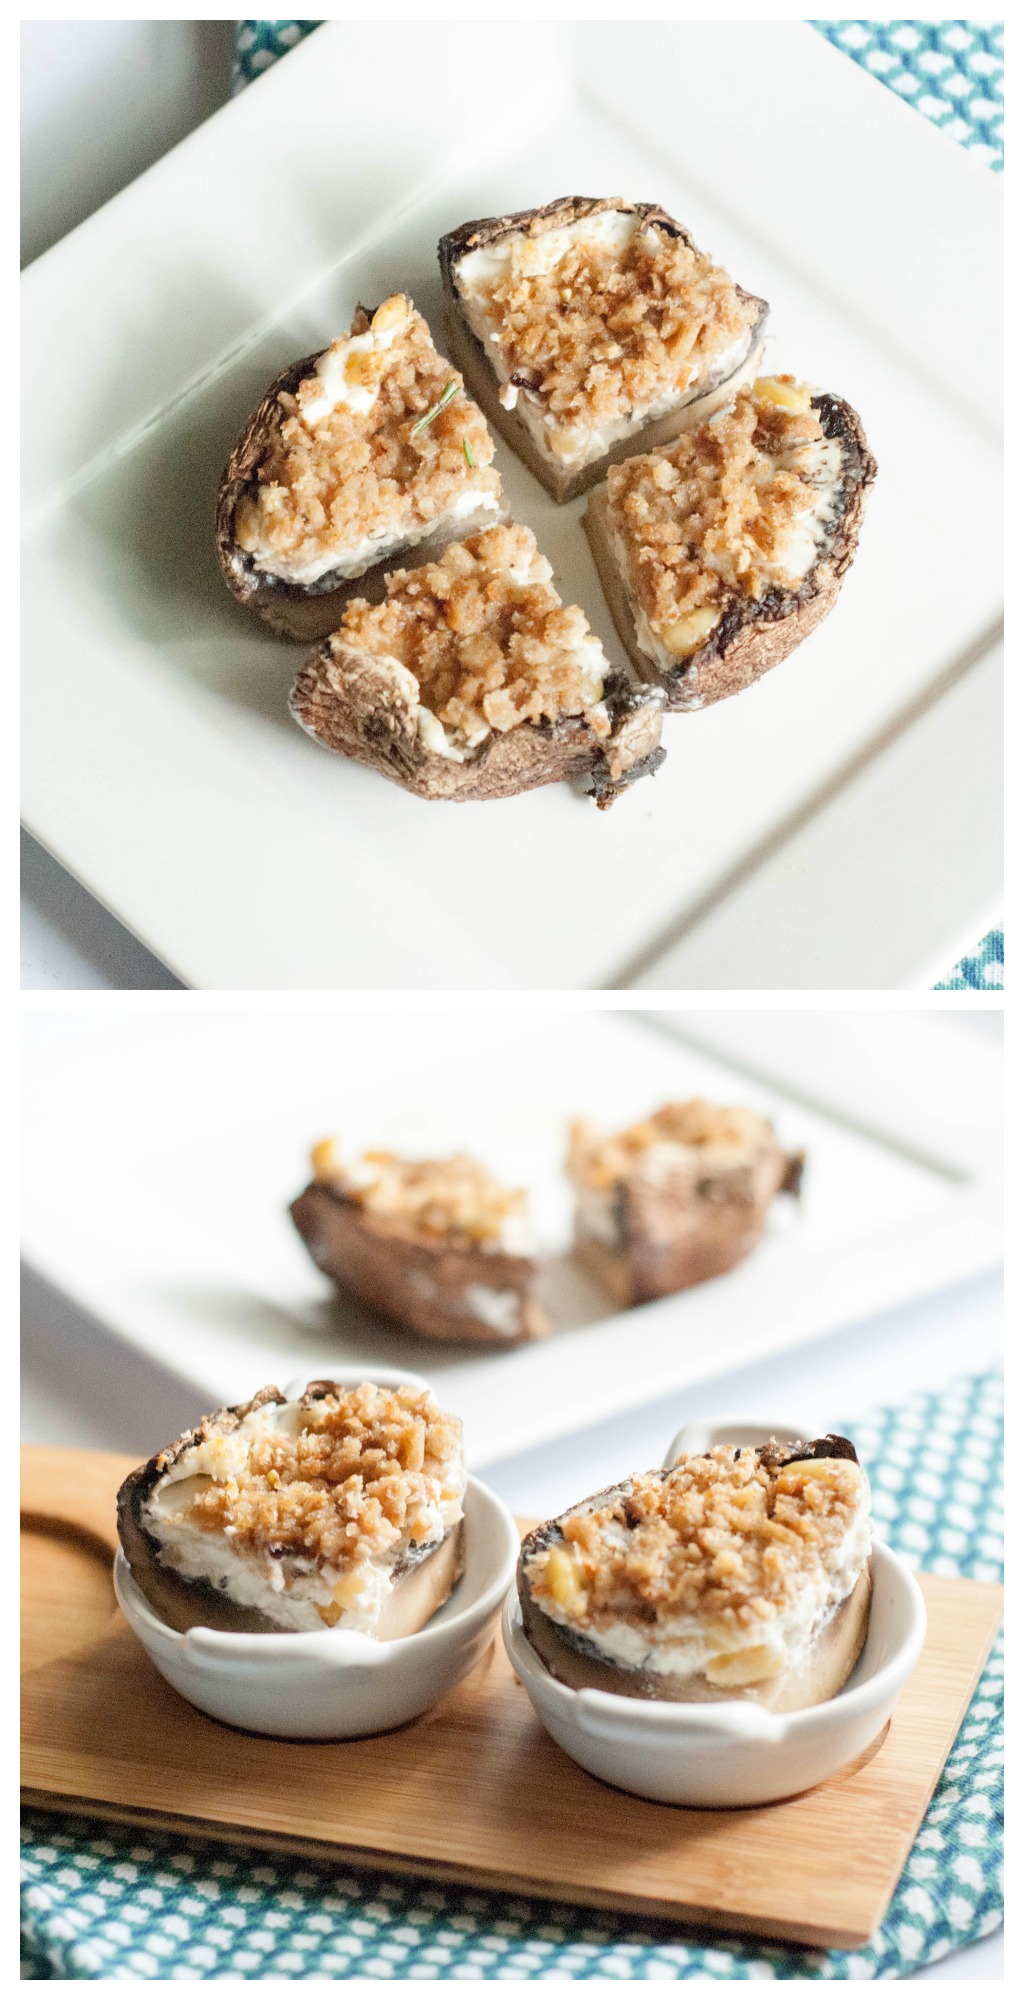 What I would like to address is how to make these on a budget. Believe me, I have 3 kids and I don’t have a day job! I know how important it is to pinch every penny and when I create a recipe like this one, money is in the back of my mind. I never want to provide recipes to people that cost a ton of money to make, and that can be eaten in a matter of a minute. Goat cheese, pine nuts, portabella caps…. all grocery store items that do cost a bit more money. However, my family has found Aldi, the grocery store where you can buy real food on a budget (some even organic) and not spend a fortune! I got the goat cheese for $1.99, as opposed to $5.00 at Giant. I got a whole bag of pine nuts for $2.00, and the portabella caps for $2.50, which are $4.99 at Giant. I was able to make this delicious recipe for less money by shopping smart. Believe me, there is a lot of junk food at Aldi too, just like any other grocery store. However, their produce prices are ridiculously cheap and we have found some great stuff there that helps us save money on groceries. We even found the same organic carrots there that they sell at a pricey “health food” store in my area for $5.00 cheaper. How stupid did I feel when I saw the same exact product at Aldi for so much less! This isn’t in any way endorsed by them, I’m actually just a real mom with a family and know all too well how expensive it is to eat good food. Just wanted to let everyone know, check it out! Speaking of discounts I found these cute little appetizer dishes at TJ MAXX. I need to remind myself NEVER to go in that place because they have so much kitchen stuff it is just too much for me to handle, I want everything! Even broken things in the clearance isle appeal to me because I can still photograph an item that is chipped or cracked without it being seen. If I buy one more prop my husband might disown me so I need to stay far, far away from TJ MAXX. But seriously how cute are these little appetizer dishes?
 One last note, the breadcrumbs. Please, I beg of you, do not use standard store bought breadcrumbs! They are one of the worst products I have ever seen on grocery store shelves, and if you haven’t noticed you can keep them for YEARS without them going bad. Instead, I would suggest just making your own with a piece of whole grain bread (real whole grain bread, not Sara Lee’s crap with 30 ingredients), salt, pepper, and whatever spices you’d like to throw in. I have a step by step guide on my Whole Grain Breadcrumb recipe so check that out. If you are completely scared by that idea I would suggest looking for an organic product because the Progresso-type brands all contain trans fats, high fructose corn syrup, and MSG.
Archives for July 2014
Planetbox Vs Lunchbots Lunchbox Review
**The views and opinions expressed in the post Planetbox vs Lunchbots are my own. I am not affiliated with either company, I just love their products! This post does contain affiliate links and I receive a small commission for referring purchase.

***Review update 2018: I am completely revamping this post with new information as I feel what I wrote a couple years back is outdated now! I have also reviewed other lunch boxes and gear on my Best Lunch Boxes for Kids post. Go check that out for some other options!
**Review update 2017: Can summer slow down already? How is it even August? With “Back to School” back again I noticed this post was getting a lot of new traffic and I wanted to give an update. Last school year my son was in 2nd grade. We used the LunchBots system for the whole year. Just to clarify, I used the PlanetBox Rover during his 1st grade year. I gained a ton of knowledge about both systems during my first two years packing school lunches! We learned what worked and what didn’t.
This coming school year I will be packing for my now 3rd grade son, as well as occasionally packing for my pre-school aged son who is starting pre-school in September. My family will also be welcoming a new baby boy so packing lunches will likely be done the night before. I will definitely be looking for time saving tips! Both companies have made a few changes over the past year that I should note:
- LunchBots added a line of colorful Dots covers that fit over the lids. I believe this change was made due to color chipping complaints, as well as the logo wearing off the top of the lid. I do not own any of the Dots covers but they are SUPER CUTE and I must get my hands on one this year!
- LunchBots also added a line of smaller, snack-sized containers called Pico, as well as two new “clicks” containers that are round.
- PlanetBox changed their website completely and it is so much more fabulous then it was before. Bravo PlanetBox!
- PlanetBox updated their bags, some appear to have prints.
- PlanetBox also now offers a more “one-stop-shop” by offering their new “Bottle Rocket” water bottle with their kits. I really love that they made this update because the kits are pricey and the more you get for the price, the better! I would be interested to see if the new Bottle Rocket solves the water bottle issue I discuss below (water bottles not fitting into front pouch, slipping out of bag, getting lost continuously!) If anyone has an update on this, please share in the comments!
*Review Update 2016: We are still going strong with our Lunchbots! Started packing lunches again this week and saw this post was trending as it does at the start of every school year. This year is a very different start to the school year for us as we are moving into a new home shortly and things are a little chaotic!
I have noticed LunchBots has added a few new items including a deeper box and newly styled lunchbox. I did happen to get my hands on a dots lid this year and it is fabulous! We also added a few more of the rounds to our LunchBots collection as I provide snacks in them to my two younger boys. I noticed they did away with the plastic on the lid of the rounds, and that is awesome! All in all we still love our whole collection and our pieces are in great shape!
****************************************************************************************************
While browsing at Target today I noticed the dreaded “Back to School” section has sprung up out of nowhere, ready to remind me that there are only a few short weeks of summer left. Am I the only one who is super depressed about this? Not only will I have to face the fact that my son is no longer a little 1st grader, I will also have to face the “Back to School” schedule. I wouldn’t mind it so much if pick-up time wasn’t smack dab in the middle of naptime, but that’s a totally different story!
Last year was my first year packing lunches and I have to admit it was a learning experience! The first thing I realized was that Ziplock baggies and little containers weren’t going to cut it. I can’t explain how disgusting my son’s lunchbox would be when it came home. Every night I would reluctantly unzip the lunchbox and find a slimy mess of half eaten food and wet baggies waiting for me.
Thoughts of dirty little hands would run through my mind as I touched the slime inside the lunchbox. One long weekend I forgot about the box of horrors in my son’s backpack and I had a nice moldy mess waiting for me on Monday morning. What a blessing in disguise that moldy mess was, because it prompted me to search for a better solution to lunch packing.
I had seen the Planetbox all over social media and knew I wanted to go the stainless steel route because I’m not 100% on board with plastics. Too many studies are now showing even BPA free plastics are laden with chemicals that can leach into food even if it isn’t hot. After I purchased the Planetbox I’ll admit, I became a lunchbox junkie! I found the LunchBots line and loved the look so I purchased a few of their boxes to switch things up once in a while.
Positives of Both Systems
- No more slime- My son would come home with just one thing for me to clean up that wasn’t covered in goo and other unknowns. Cleanup was a breeze, even if the lunchbox was forgotten about over the weekend. I didn’t have to dig around the box to pick up all the pieces that were left. It was simply one piece that I could easily wash up for the next day.
- My lunches got healthier- Don’t get me wrong, I wasn’t packing highly processed junk food to begin with but with the food spread out nicely in front of me it was easier to see where I needed to add nutrition. I also got more creative and started packing hot lunches with a thermos. This was an awesome way to switch things up and not fall into a boring lunchbox routine.
- My son started eating more of his lunch- With all of his food right in front of him he could dig right in. He is a talker and I knew a lot of his time was wasted during lunch talking. I also knew having to open a bunch of containers and baggies wouldn’t distract him. I know that sounds silly but my son is easily distracted and their lunch time is short.
- No more plastics- When I started using the Planetbox and LunchBots lunchboxes I was also inspired to get rid of the plastic water bottles and utensils my son was using for lunch as well. I can now pack his lunch knowing there are no harmful chemicals that are leaching into his food and potentially hurting his growing body.
- It made the teacher’s job easier- I’m not actually there during my son’s lunch but I’ve heard from him that teachers on duty essentially spend their time opening things for the kids. There is one exception to this with the Planetbox, and I will get there later, but these lunchboxes eliminate frustrating packaging.
- No more throwing away baggies- If everyone cut those stupid plastic baggies from their routine think of how much landfill space we could save. It honestly feels really good to know that I’m sending my son to school with a lunch that contains no waste. No baggies, no single serve packets, no single serve containers. Just one box that I reuse everyday that creates zero waste.
- Speaking of single serve packets- Seriously, who hasn’t been begged by their child to purchase those lousy, expensive, and totally not worth your money single serve packets!?!? Can I just say I hate those things? Not only are they expensive, all you really are paying for is packaging. You get lots of packaging and a little product. But for some reason, there is a market for them. Not to mention 99% of those packets are filled with nothing but junk. These lunchbox systems eliminate the idea in your child’s mind that they NEED to have the single serve packets, and if they ask, you have a really reasonable reason why you don’t need them!
LunchBots


Pricing
The LunchBots pricing differs from the Planetbox as it is more of a whole system of containers rather then just one box. The box sizes are great for mixing and matching, but that also means you have to buy more then one container. By all means, you could just purchase one box if that was all you were looking for, and Lunchbots has made it easier then ever by coming out with new boxes to suit the needs of just about everyone. Their recent addition, the small protein packer is perfect for a mix of nuts, protein, cheeses, chicken, etc.
With that being said, I highly recommend getting at the very least a box and one rounds set. The reason I recommend a rounds is that the box is NOT leakproof, so if you’d like to send anything even slightly wet, you need a separate container.
I have several rounds sets and they are one of my most used kitchen items! They are easy to throw in a bag quick if we are going somewhere and I think the kids will need a snack. Both of my sons also took snacks to school daily, and we used the rounds instead of plastic baggies or a big thermos that was a bit too big for a quick snack. Our rounds are indeed leakproof and have a seal around the top.
What I have consistently seen from Lunchbots is that they are always expanding and improving based upon feedback from customers. They listen to what their customers want and they make it happen! I honestly haven’t followed a company that was as accommodating as Lunchbots!
Pros:
- Customizable lunch with different pieces.
- Fun design, perfect for adults or kids.
- The durability of these containers has proven to be amazing over and over again. My kids abuse the heck out of these containers and they look nearly identical to what they did when I first purchased them. We have been using them for over 5 years now, and that speaks to how durable and loved our Lunchbots are. As I researched a couple of other lunch boxes I saw the word mold over and over again.
- These are super easy to clean, and dishwasher safe. I have never had any issues with cleaning, mold, weird smalls, discoloration, etc.
- Lightweight compared to other stainless steel lunch boxes.
Cons:
- The LunchBots system doesn’t have an icepack specifically designed to go overtop of the boxes. However, they do offer an insulated carrying bag that can fit one or two boxes along with utensils and a drink container. To be brutally honey, I don’t love the look of the bag they offer, but their boxes are sized to fit into many many other lunch carrying boxes. Here is a look at their bag to make your own decision about i
- The only other con I have as far as the Lunchbots system, is that watery food can transfer between sections. There is a really simple fix to this, and that is to use little silicone cups under anything that is wet (watermelon, pineapple). As I mentioned before, I also use the rounds for wet food.
Planetbox


Pricing
The complete Planetbox Rover Set comes in at a hefty $79.99, which is up $20 from when I initially wrote this post. There are two other Planetbox options that run a bit cheaper, so don’t let the price stop you from checking these out. Planetbox has fixed their dipper lid issue, and has really updated their bags in a nice way since this post was originally written as well. I love the look of the sets and the fact that you can get a bag that matches your magnets. If you really want to get match-y you can also snag a water bottle that also matches.
Add Ons:
Cold Kit: The cold kit is an essential part of this system in my opinion. The icepack slips right into a mesh flap on the lid of the carrying case and lays against the whole top of the Planetbox. It is designed perfectly for the box, and I would highly recommend it!
Utensils: These aren’t quite as essential but they are an add on that we used and my son liked taking his own utensils. This utensil set also comes with a cold kit so you could purchase one or the other and still get a cold kit.
Pros:
- The lunch box itself is super durable stainless steel. Planetbox offers 3 different boxes so depending on how much your child eats, you can find something to fit your needs.
- The design is super cute and versatile. When I bought my sons set I grabbed a couple extra magnet sets and he really loved that. It is different and fun.
- Planetbox offers the whole set together, which is basically a one stop shop.
- The Rocket water bottle is designed to go with the system.
- Planet box now offers little pods that go directly with the box to send even more food and prevent leakage from wet items.
- Easy to clean, dishwasher safe.
Cons:
- The Rover is quite large. I can’t speak for the rest of the systems because I don’t have them, however my son was kind of embarrassed about the size of the rover. The lid does not detach, rather it flips back and in turn takes up double the space. If your child is sitting across from someone else, their lid might be in someone else’s space.
- The whole box is quite heavy.
- I do have an outdated bag, but I kind of hated the bag to be honest. The pockets on the front didn’t really hold anything in good, and we lost several water bottles.
- The dippers appear to have been fixed but my initial set was defective making it impossible to use. For the price that was disappointing.
- No option to send any hot foods.
- Feeling like I have to “fill” every compartment on the rover, which can be irritating to the parent packing.
Which System Is the Right For Me?
I can’t tell you which system will work better for me, however it really depends upon what you want to do with the lunchbox. If you ask yourself these questions, you can probably decide which option will meet your needs better:
- Am I going to pack hot lunches? (Go with LunchBots)
- Will my child be comfortable with a lunchbox that is slightly bigger then some others?
- How many pieces am I looking for?
- Do I really want to pay shipping for something I’m already spending an arm and a leg for?
- How much will I be packing lunches?
- Will I be making freezer lunches?
- Which carrying bag is more appealing to me?
Other Posts You May Like

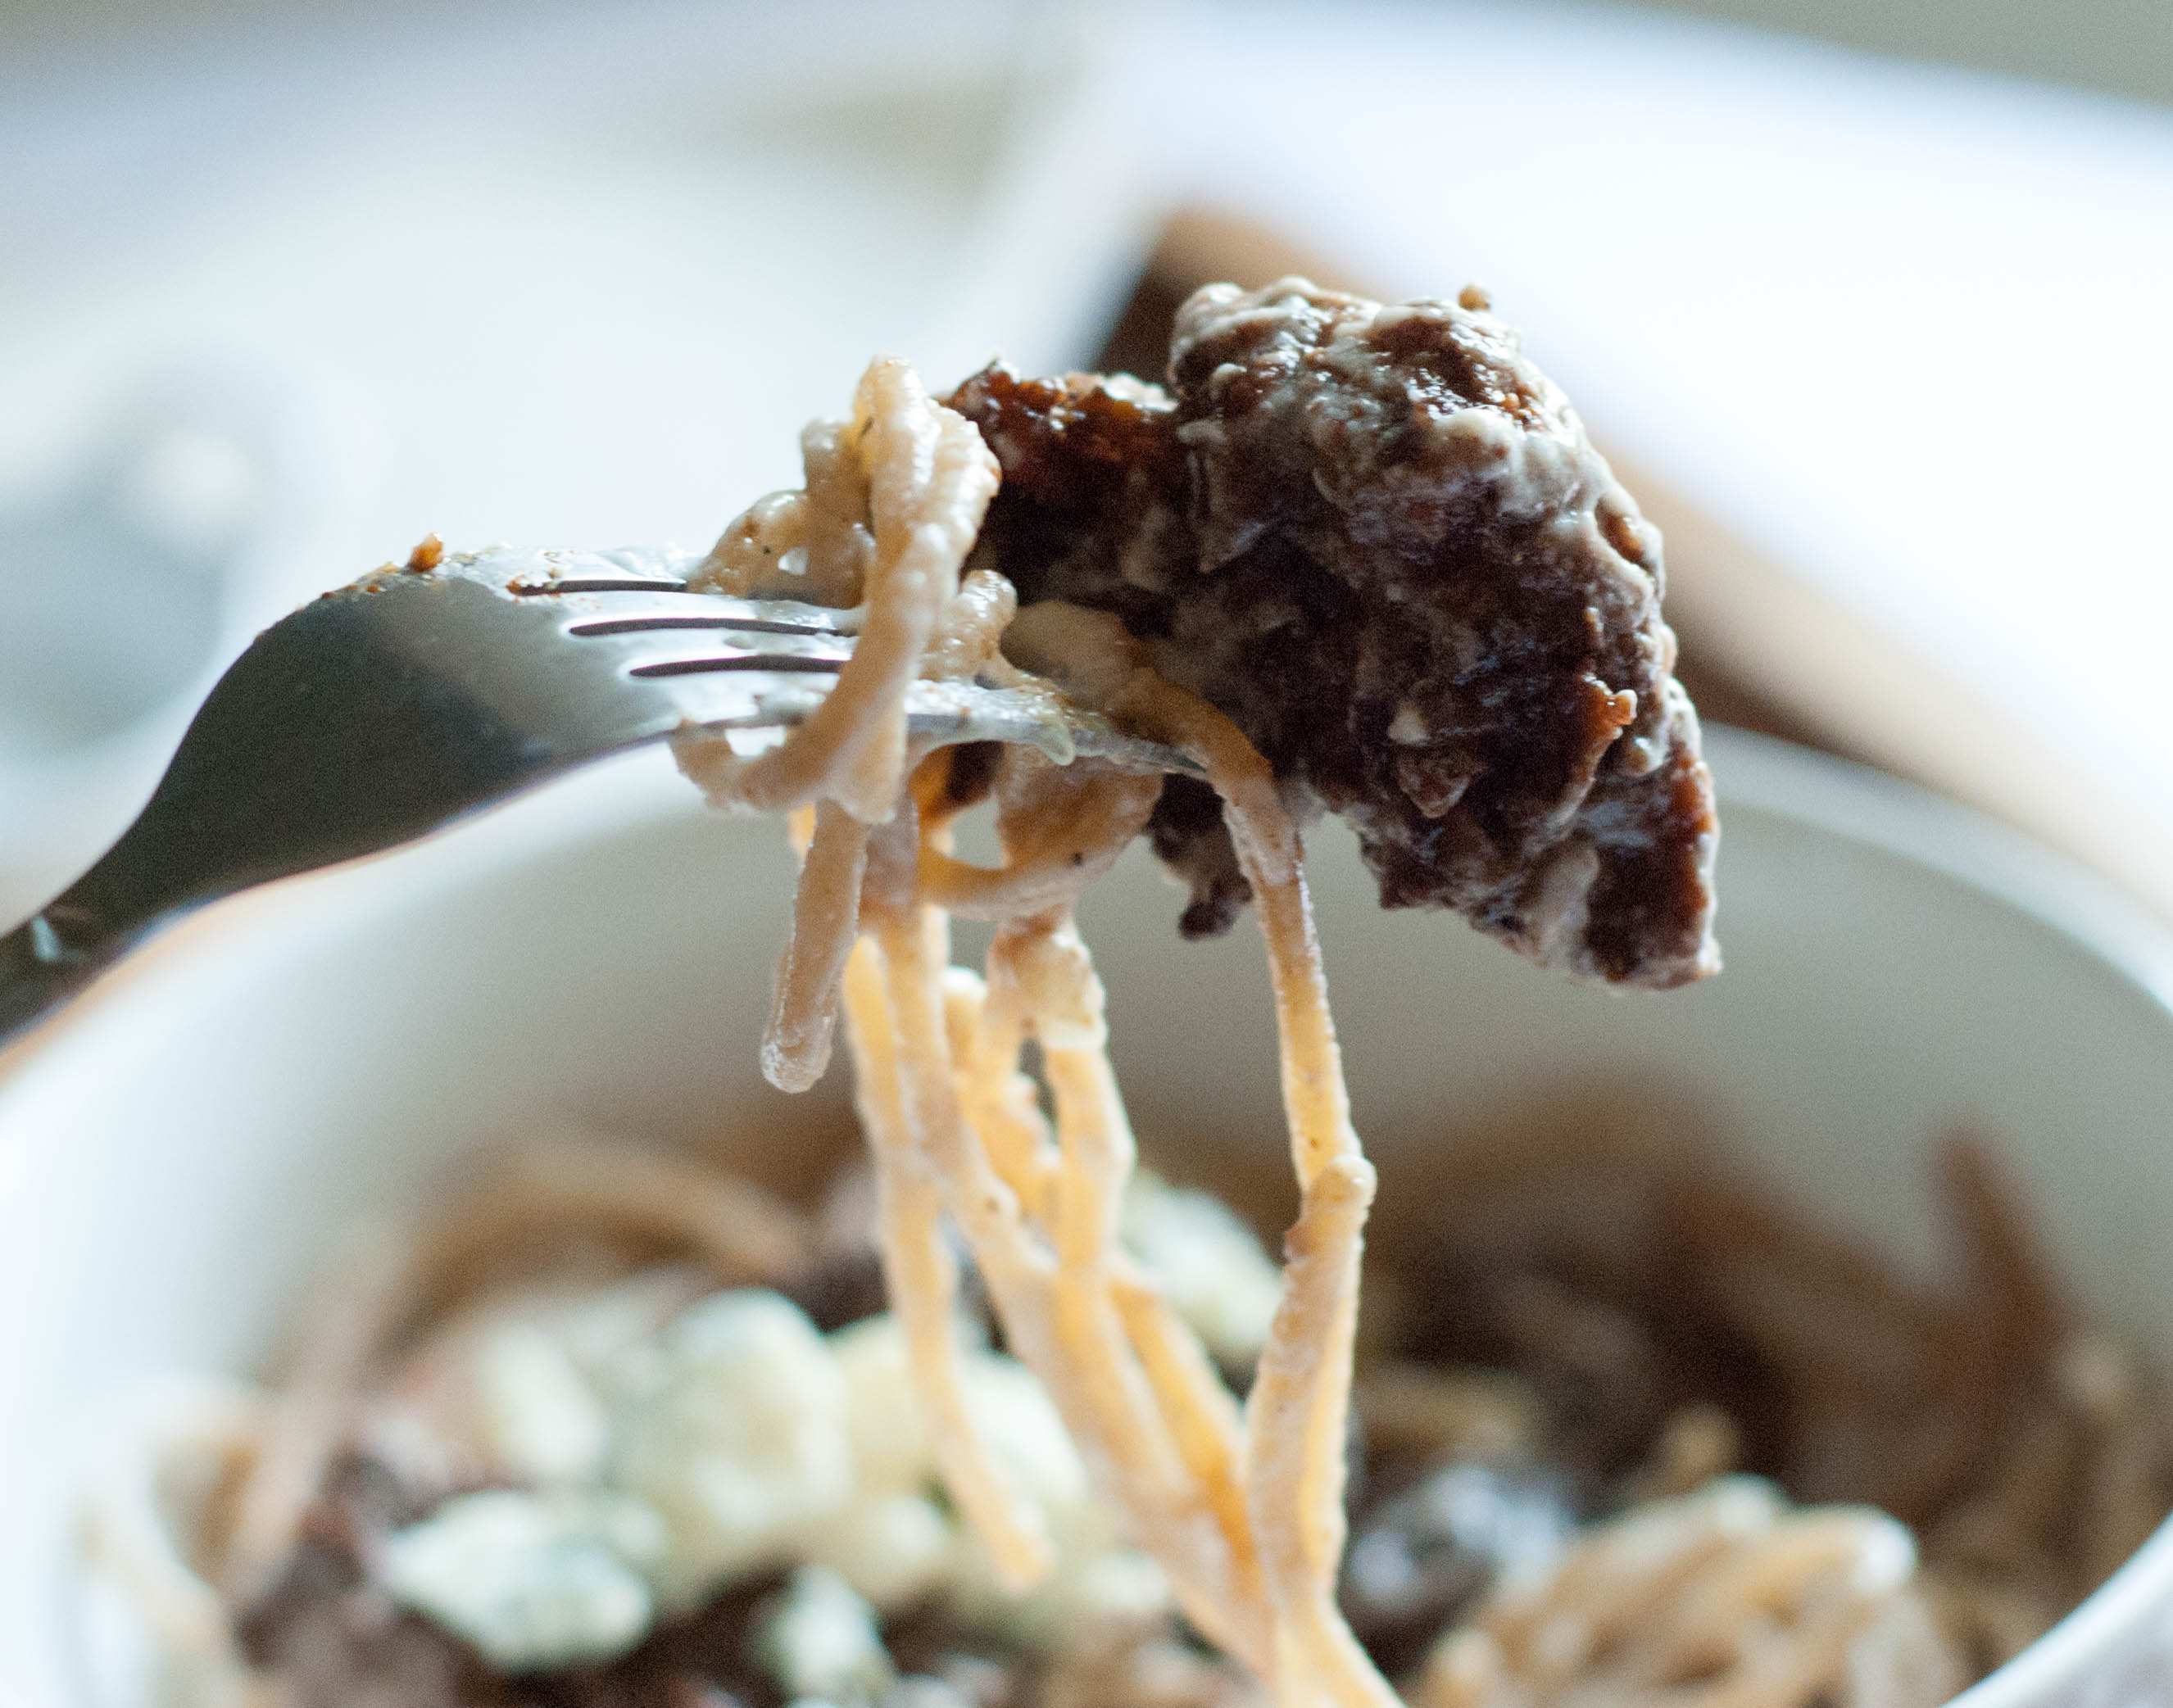
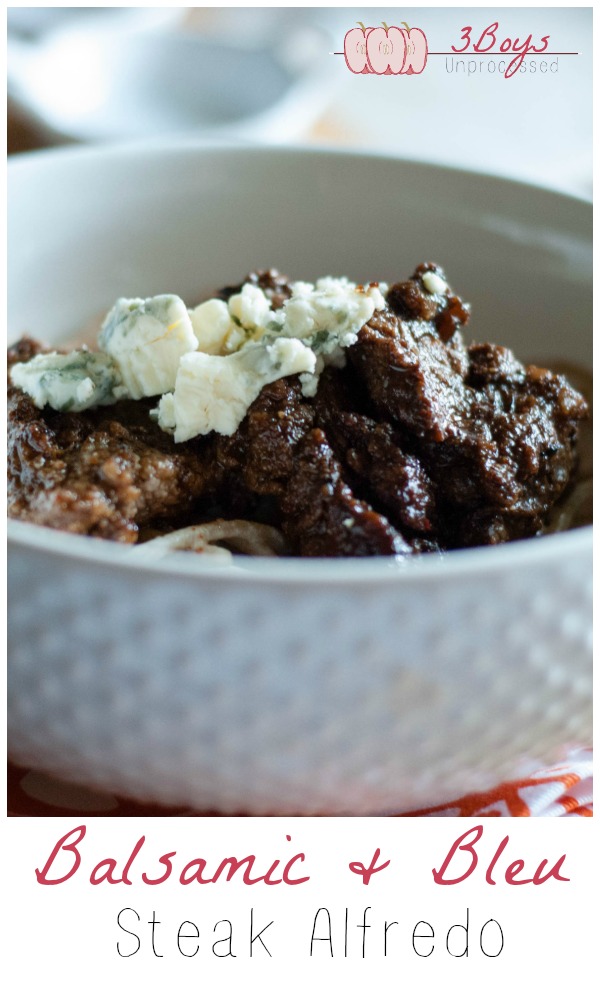
Balsamic and Bleu Steak Alfredo
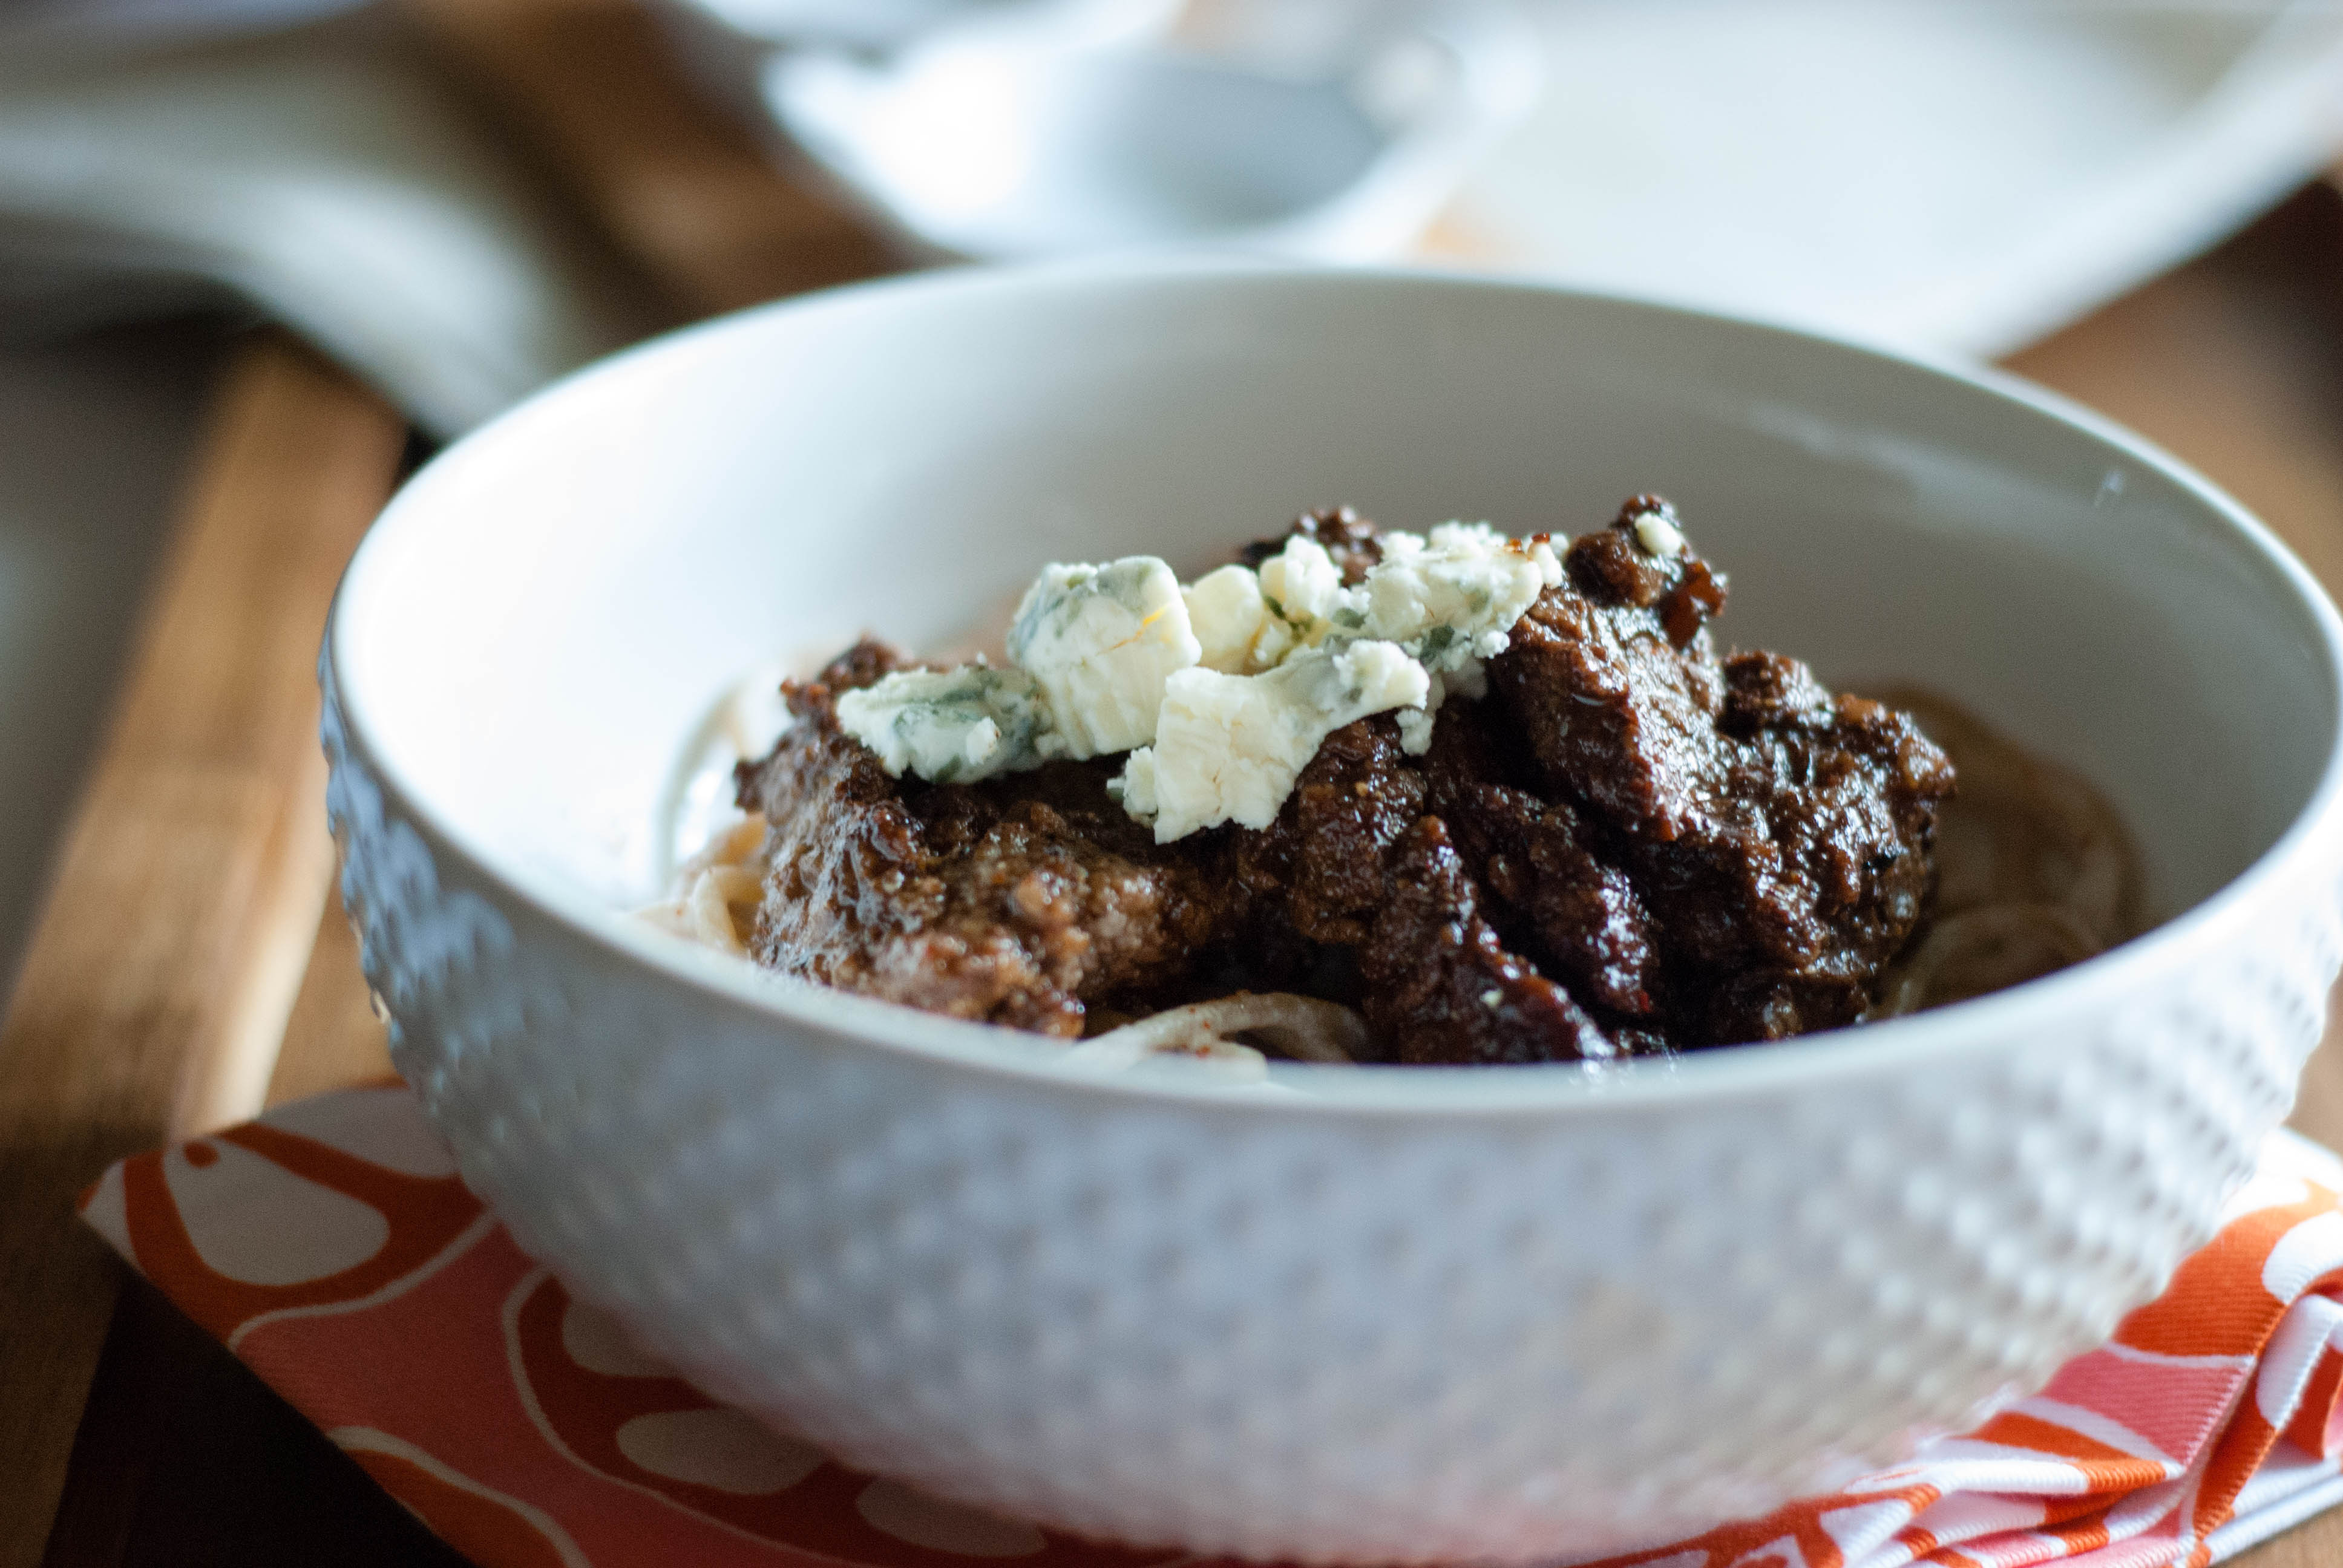
Yesterday was my mom’s birthday and since her friends and co-workers took her out to eat I decided to cook her a meal at home. With 3 young kids going out to eat is an ordeal every…single…time! I know anyone with kids has sat through an excruciating meal at a restaurant thinking “I’m never doing this again” the whole time. One kid is yelling, one kid is under the table, and the other one has to pee… at that very moment you promise yourself NEVER AGAIN! Yet somehow…. someway… you end up right back in that situation, reminding yourself again why going to a restaurant with kids is a horrible idea. On top of that, I know when I go out to eat trying to find something with real ingredients is nearly impossible unless I’m going somewhere that specializes in real food, and I don’t know of any places like that in my area. There are a few small cafes that I trust for some things, but most “from scratch” kitchens still use some ingredients I don’t use at home. The great thing in my situation is that I know how to cook restaurant quality food at home, from scratch with ingredients I don’t feel guilty about eating. This Balsamic and Bleu Alfredo recipe did not disappoint!
I admit, this idea came from Olive Garden’s menu (don’t get me started on their ingredient lists and unethical marketing). My husband’s company had a Christmas party there last year and just about everyone ordered the dish that inspired this recipe. I don’t quite remember what they called it but the flavor combination was a bleu cheese Alfredo sauce, steak, and balsamic reduction. My version of this meal is definitely upscale, from scratch restaurant quality, but hey, Olive Garden gave it a good shot!
I started this recipe by making a balsamic reduction to put on my sirloin before I grilled it. I admit, this part of the recipe stinks, literally, but open a window in your kitchen and have at it! Making a balsamic reduction is really easy and is a flavorful addition to meals, fresh veggies, and even fruit. If you’ve never made a reduction before the name speaks for itself. All you are doing is reducing a liquid into a sauce-like consistency that would coat the back of a spoon when held sideways. Look for a vinegar that contains only naturally occurring sulfites and no preservatives!
After I made the reduction I trimmed the fat from my sirloin, cut it into chunks, and then used a tenderizer to flatten the sirloin a bit. I did this because it makes it a heck of a lot easier to grill, and the acidity from the balsamic reduction will work wonders in all of the little nooks the tenderizer impresses on the meat. Once I had all of the chunks cut and thinned, I GENEROUSLY sprinkled the meat with garlic powder, freshly cracked black pepper, salt, and whole wheat white flour. I really emphasize the word generously because if you don’t season your meat correctly, this dish will be lacking in the flavor department as far as the meat is concerned. You want to see a coating of garlic powder and black pepper on every piece of meat. This will ensure that your meat is not under flavored.
I used a cast iron grill pan to “grill” the sirloin, and it worked wonderfully. When I use cast iron, I always heat it up over medium heat in advance. Once it is nice and hot, I melt some ghee (clarified butter) on the pan, and reduce the heat to low. A temperature that is too high will increase the chances of sticking and that is never a good thing. I would recommend NOT to purchase a grill pan with a non-stick surface because some of the chemicals they use on the non-stick cookware are highly questionable. By using cast iron and a pat of ghee, there is no need for any additional chemicals to prevent sticking. If you’ve tried cast iron and had problems with sticking in the past, don’t give up! Reduce your heat and your sticking problems will probably be resolved.
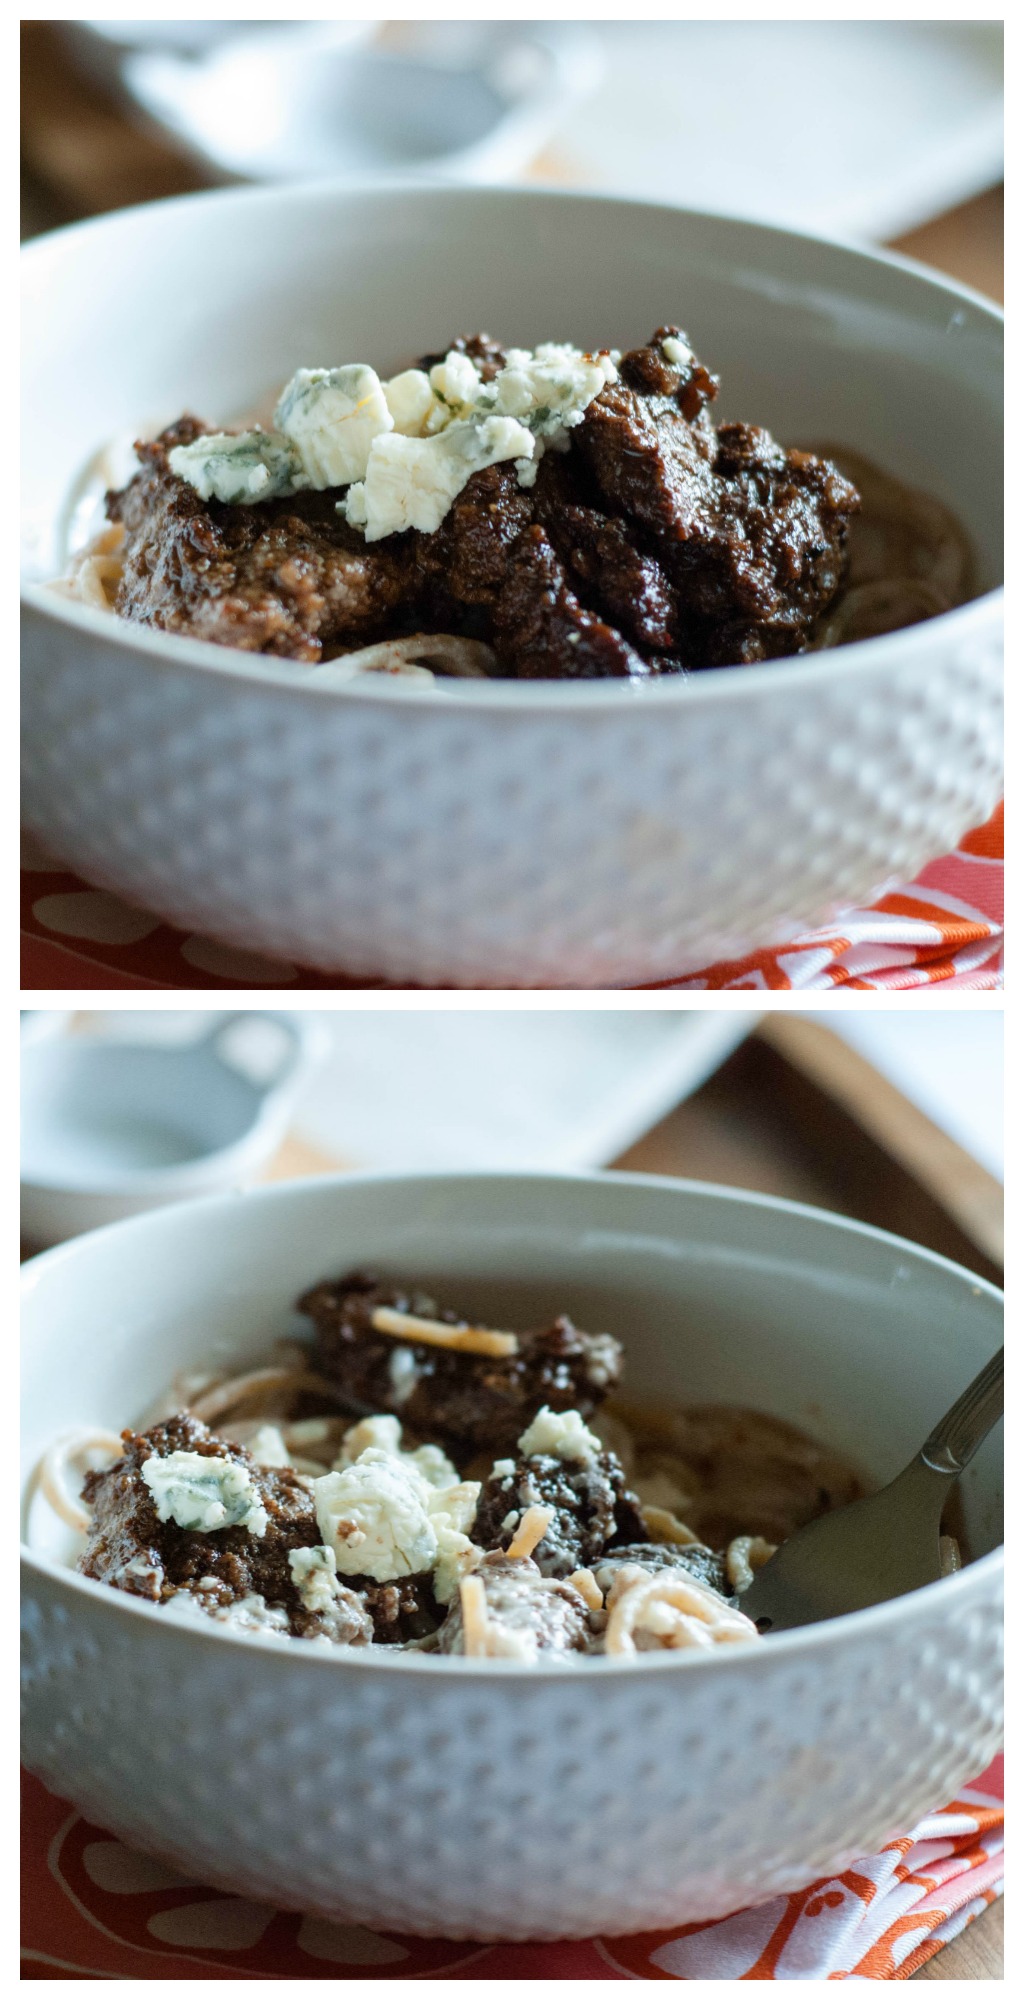
Back to the sirloin! 🙂 Once my sirloin was on the grill I gave each piece a nice drizzle of balsamic reduction, and ohhhhh they were so sticky and delicious! Once I drizzled the balsamic on I turned every piece to get a nice coating and allowed each piece to cook for 2-3 minutes per side. You should have a really sticky, flavorful outside and a tender inside. It doesn’t get much more flavorful then this!
For the Alfredo sauce, I knew I didn’t want to over-do the bleu cheese. I purchased a serious block of bleu cheese a few weeks ago, and I knew I wanted to make an Alfredo sauce with it. The only thing is, my bleu cheese is powerful. It is super stinky and super tangy so a little bit goes a long way. I only used about an ounce of bleu cheese in the recipe, but some bleu cheese’s are different. If your not getting a good hint of bleu cheese in your sauce, go ahead and add more.
*If you are looking for a high quality, relatively inexpensive cast iron grill I highly recommend the brand Lodge! Here is a link to the grill pan I used.
Tex-Mex Potato Wedges

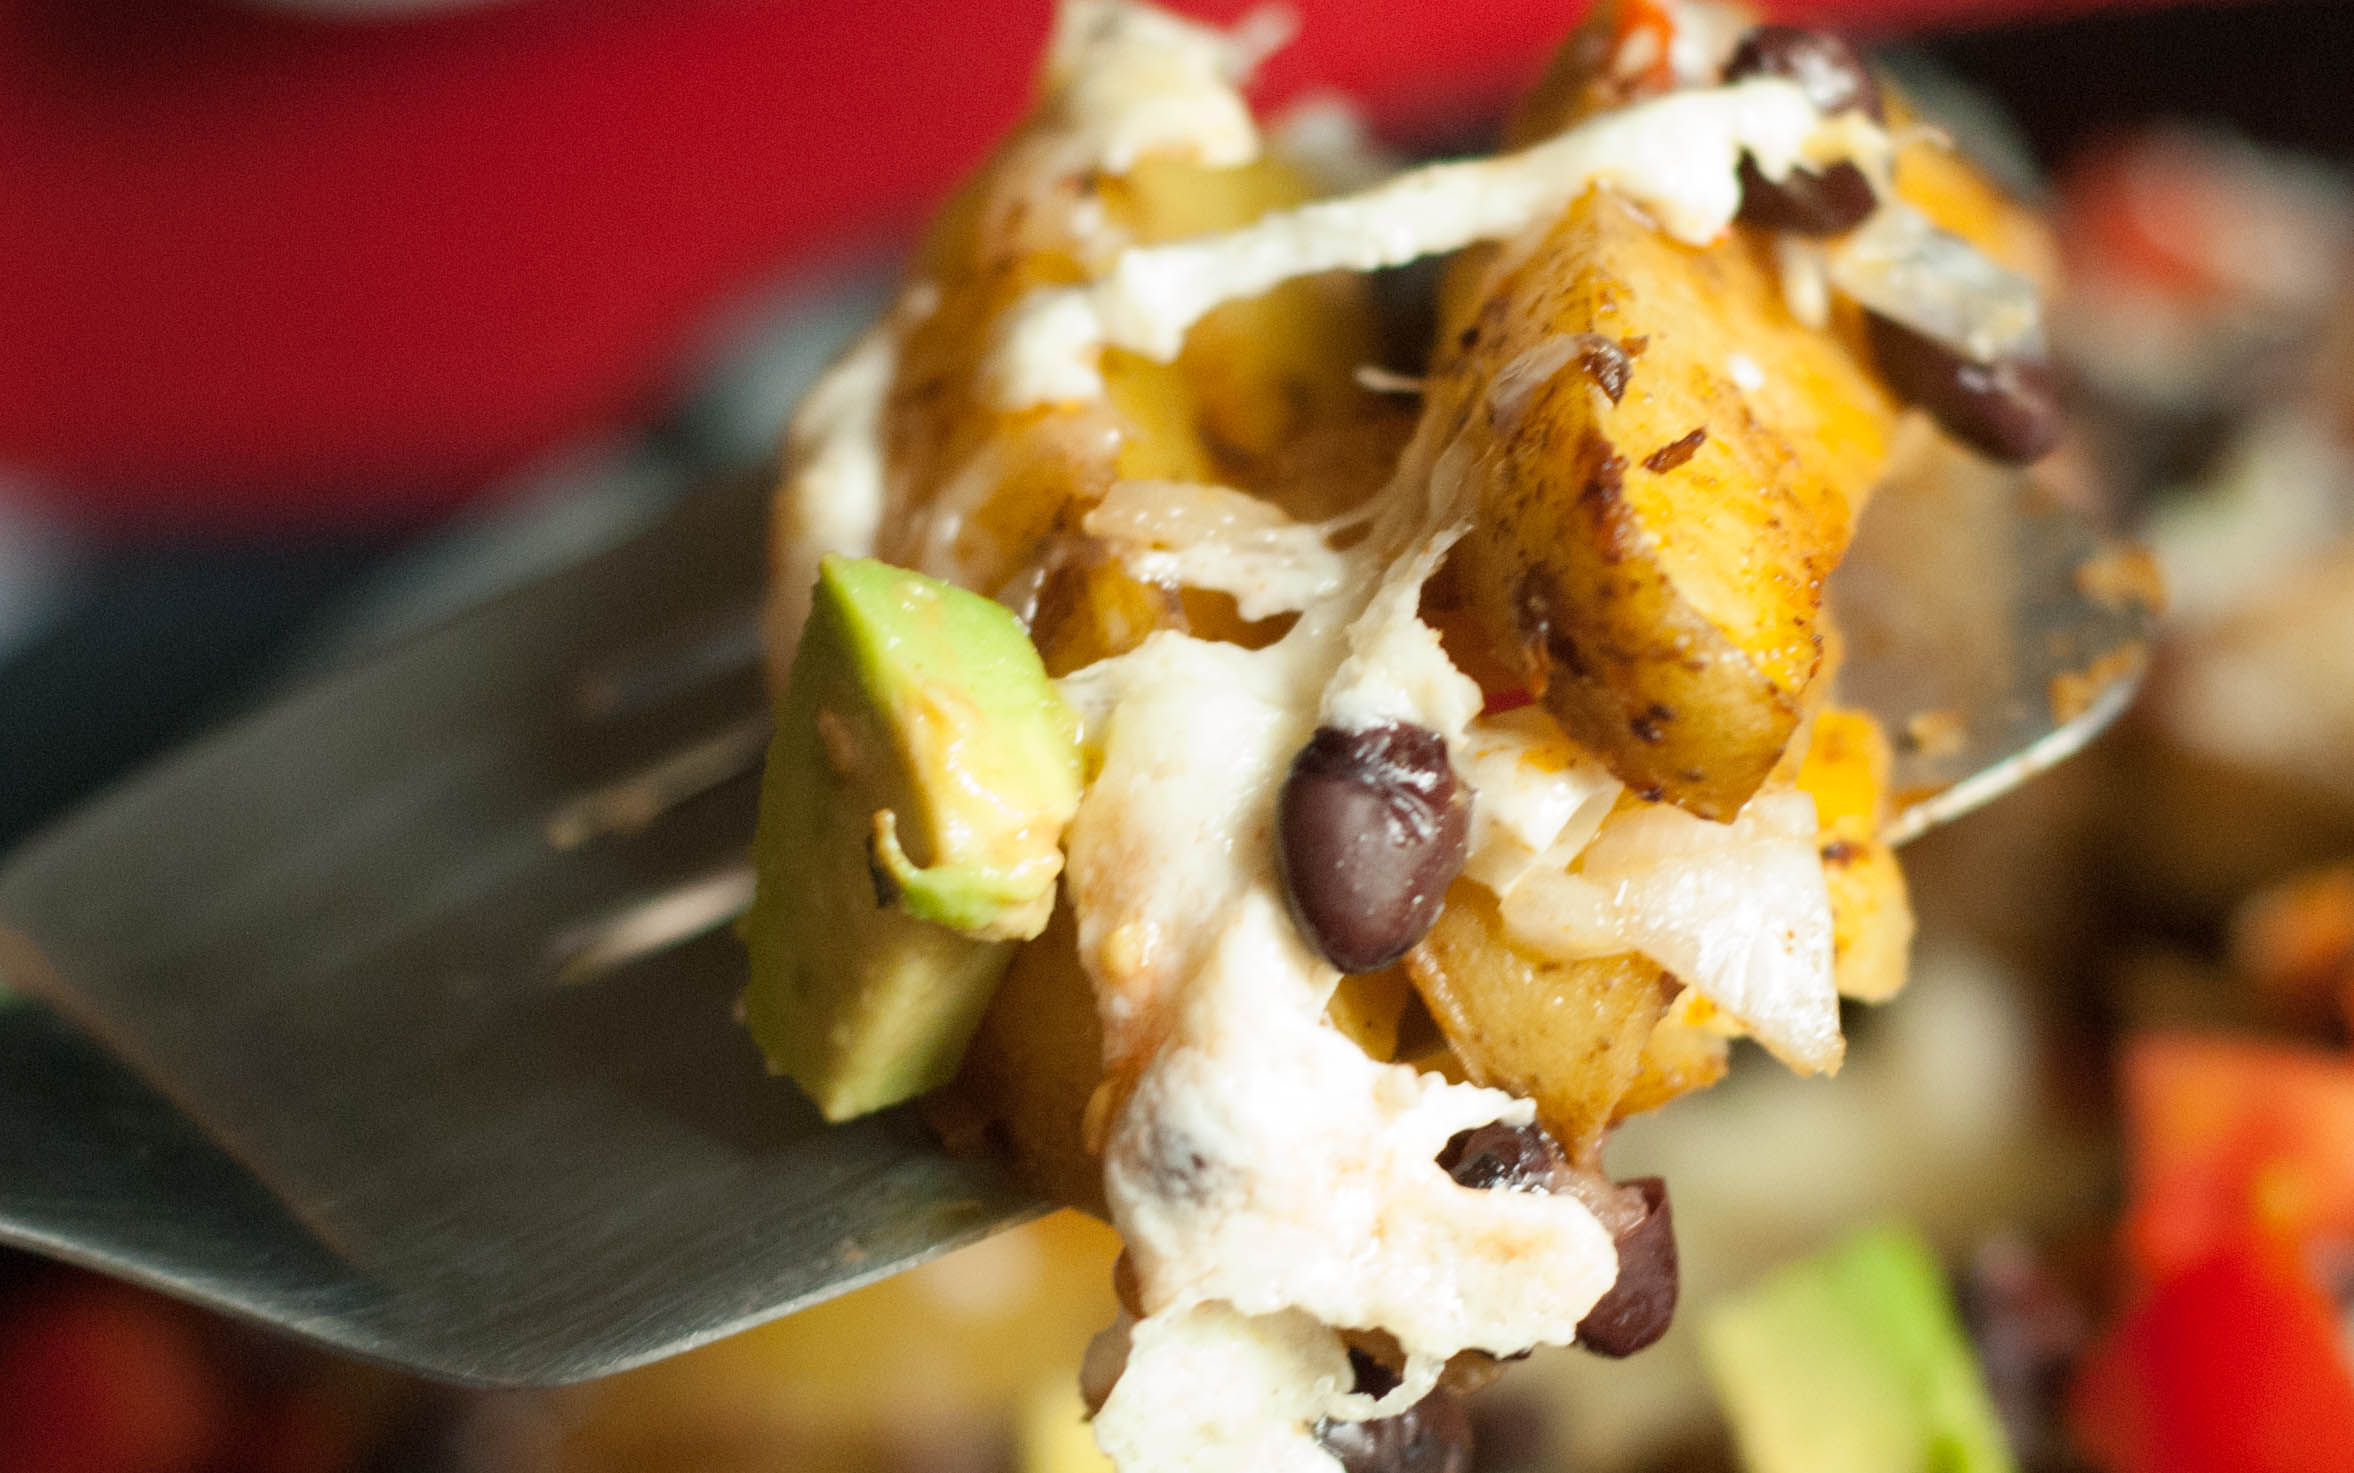
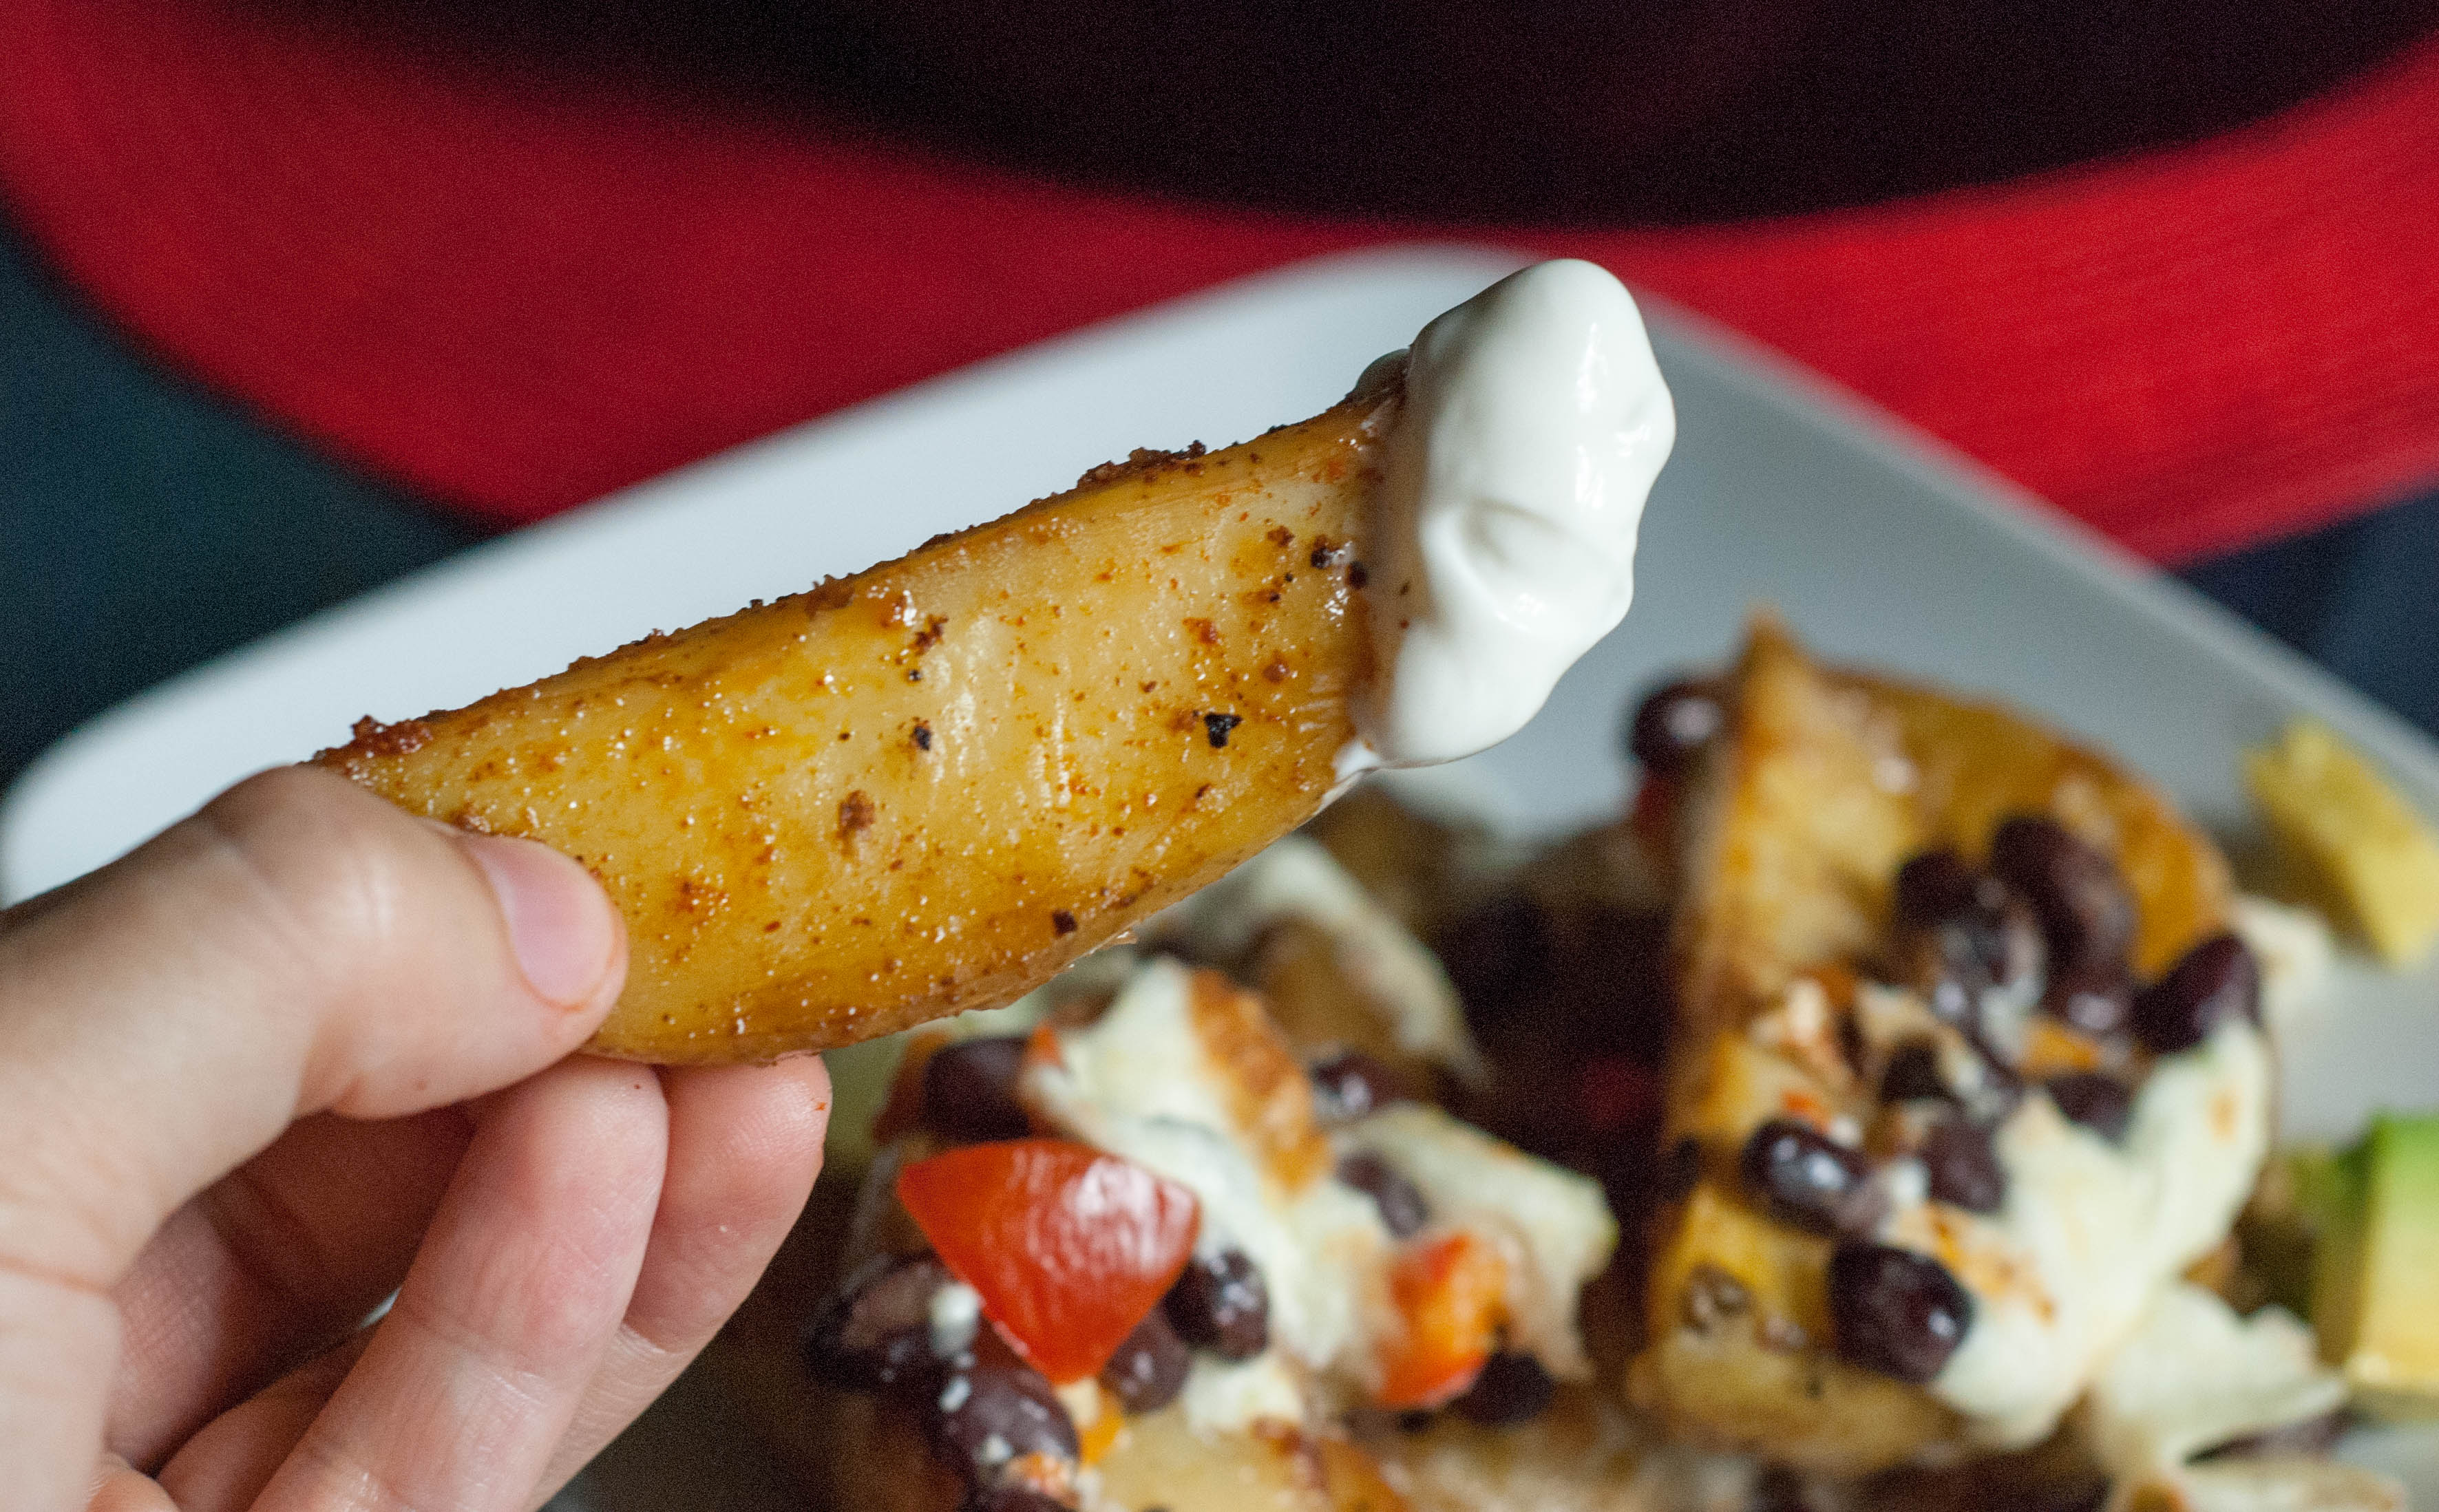
I’m just going to throw this out there…. these Tex-Mex Potato Wedges are epic. So epic I’ve included a ridiculous amount of food porn! They are over the top delicious and possibly one of my all time favorite food creations. These potatoes do take a little bit more time to put together then your average baked potato wedge recipe but they are soooooo worth it in the end!
Here are the steps to making these amazingly cheesy and delicious wedges:
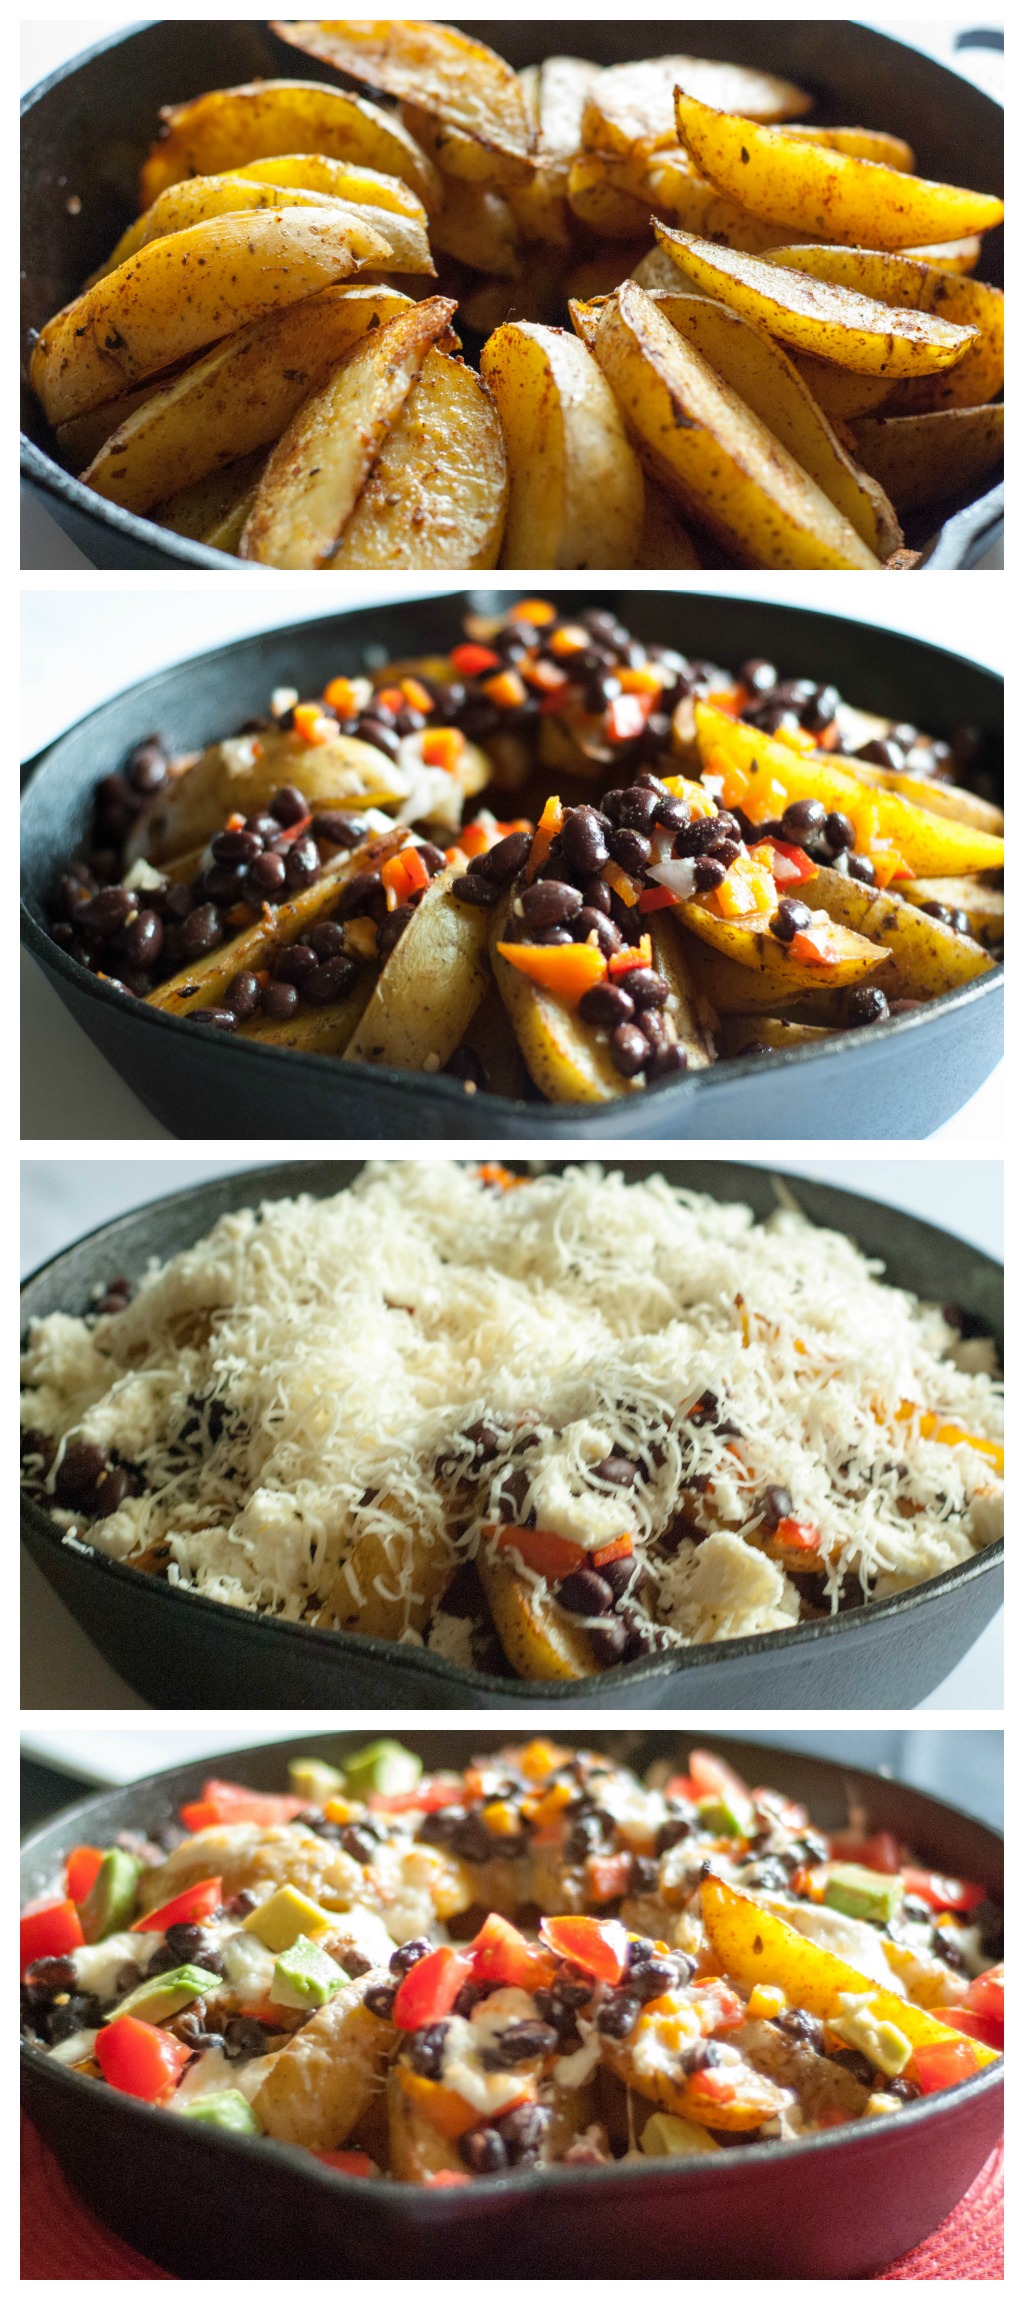
I’ve said this before and I will say it again… the key to the perfect oven baked potato wedges is boiling your potatoes before you bake them. This ensures you are going to get a really nice fluffy inside with a super crispy outside. Essentially that is what the perfect wedge is to me! The other important part of this recipe is seasoning the potatoes correctly. I’ve included the spices that I used, which are pretty standard tex-mex spices.
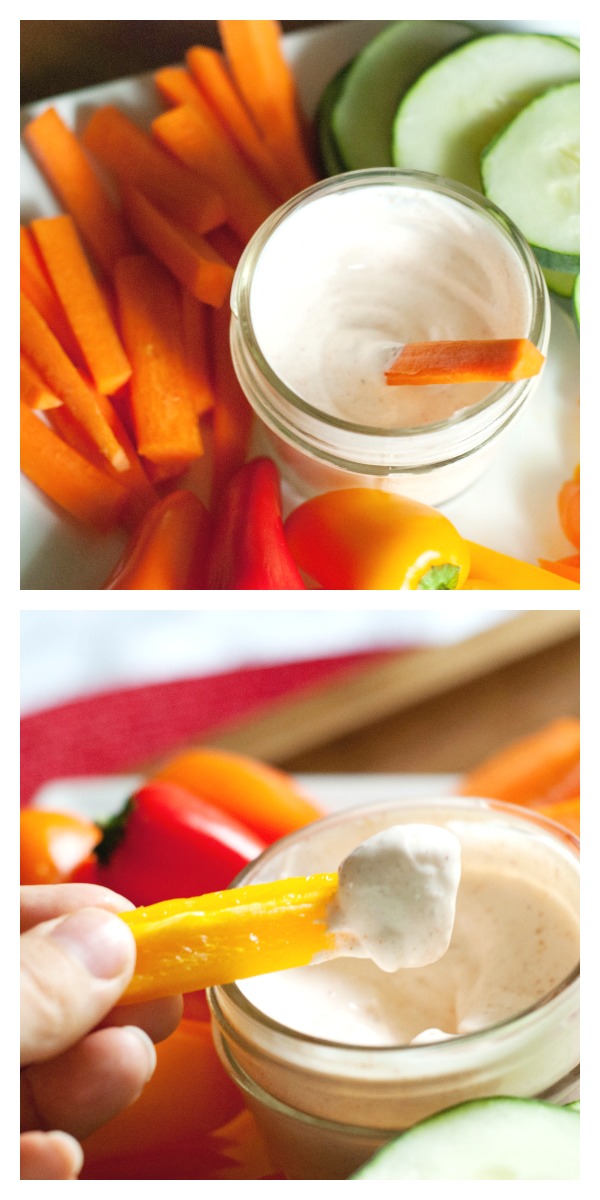
My secret weapon when it comes to the perfect looking potato wedges is paprika. You want color on your potatoes and paprika is going to do that for you. Although this recipe already has chili powder in it, I still sprinkled extra paprika on the potatoes just to bump up the food porn appeal! One last thing to note about the spices… measure your cumin people! Too much cumin will ruin these potatoes so I wouldn’t recommend going over 1/4 tsp.
As for the toppings, the sky is the limit! I topped mine with sour cream (which I consider essential), avocado, and fresh tomatoes. Of course we needed to throw in some fresh produce to combat all of the cheese!
Hand modeling jobs… here’s my audition! Come on… you know you want these beautiful un-manicured hands for your next job! 🙂
Old World Spaghetti and Meat Sauce

This Old World Spaghetti and Meat Sauce recipe is truly a classic! It combines the best of both worlds, an oil based pasta sauce and a tomato based pasta sauce. This is also a really quick and easy way to make a homemade sauce, without spending hours letting it simmer and cooking down a bunch of vegetables. This is a great “beginner” homemade sauce, so if you haven’t made your own sauce in the past, don’t worry… you’ve got this!
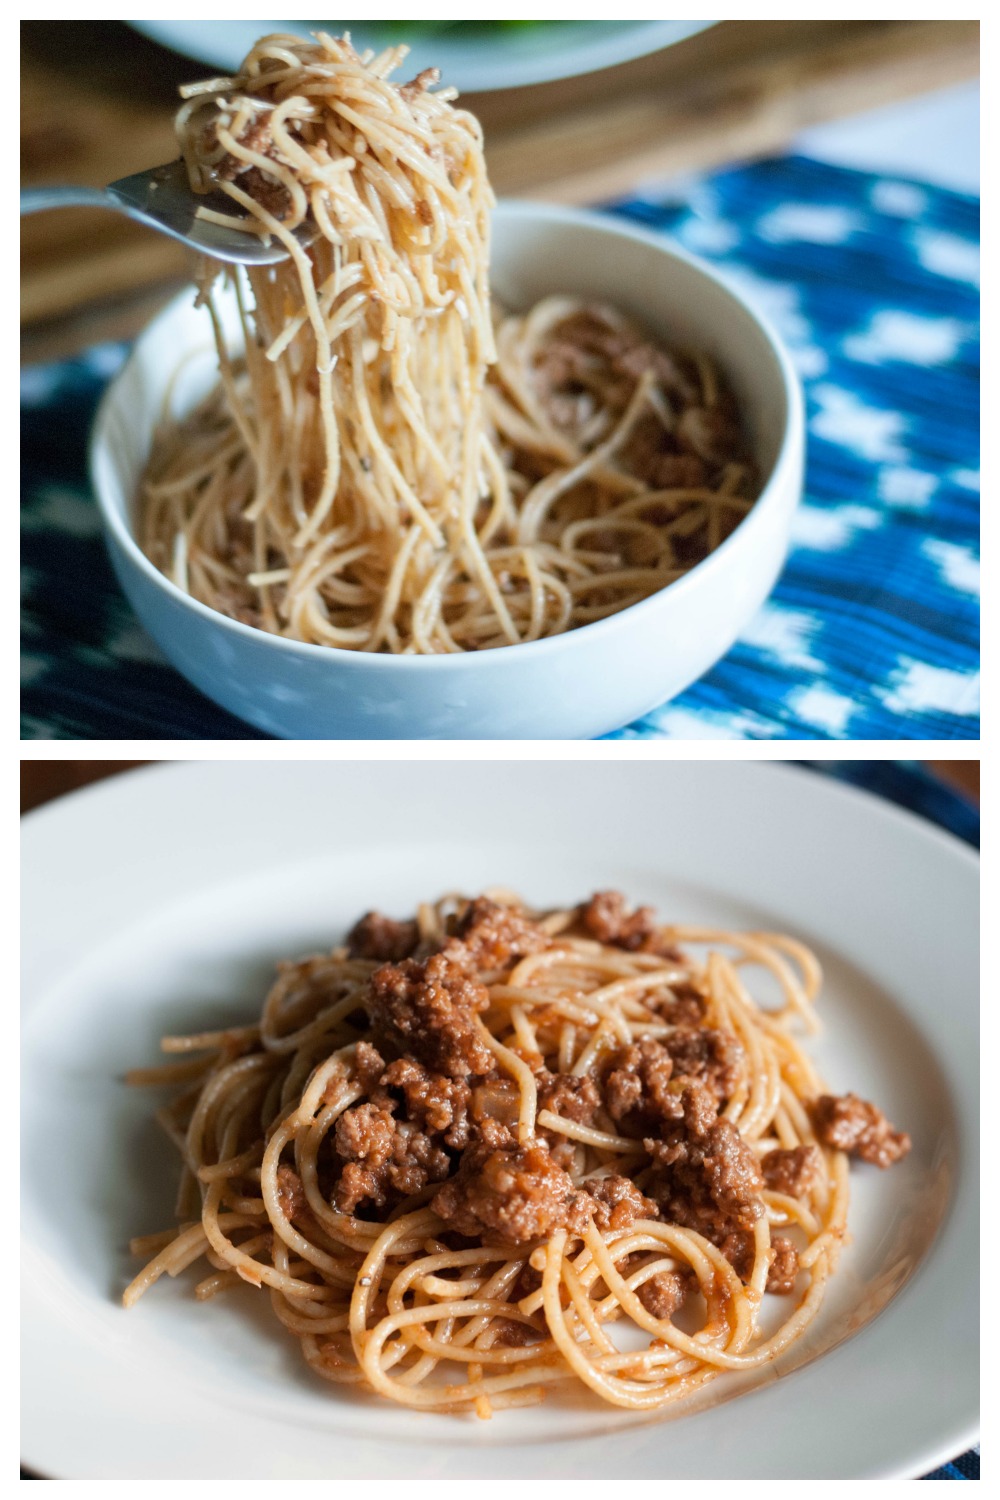
The really unique thing about this sauce is it is actually made in a food processor instead of on the stove. Of course the meat portion of this sauce is cooked on the stove but the sauce itself is just a whole lot of flavor blended together and combined with the cooked beef and onions. After you combine the meat and sauce, just toss in pasta and top with fresh asiago cheese (or parmesan) and that is it! It doesn’t stop there people… this pasta is also amazing cold! I was actually inspired to create this after I created a cold pasta salad using the same flavor combination a few weeks ago. Not only is this a great dinner, you can throw it in your lunch the next day and you have an amazing pasta that would be great over a bed of spinach or by itself.

Pineapple Chicken Stir-Fry Over Cauliflower Rice

If you like Chinese takeout, but hate the fact that there may be some unknown ingredients in it, this Pineapple Chicken Stirfry recipe is for you. I was never really a Chinese takeout type of person but my husband really loves it. When we really started thinking about what we were putting into our bodies and why, we began realizing Chinese takeout food really doesn’t fit the bill so to speak. There are a few reasons I’m going to discuss but let’s get to the deliciousness that is cauliflower rice!
My real goal isn’t to cut calories, and try to make a bunch of “low fat” or “low carb” substitutions to make my meals healthier. Instead I prefer to use 100% real ingredients as much as I can (which is pretty much 99% of the time). I don’t really have any issues with rice but I’ve been finding cauliflower so diverse and delicious lately that I just HAD to try cauliflower rice. Let me tell you, I saw so pleasantly surprised at just how good it actually is! Not only does it taste great it is super easy to make and has a really nice texture. I followed this Simpler Version of Cauliflower Rice from Nom Nom Paleo, however I used different seasonings in sticking with my takeout theme. If you are on the fence about cauliflower rice just take the plunge and try it because you will never look back! I promise you will be making it to go with everything and loving every bite. I love the feeling of eating a ton of veggies and this “rice” helps me do that without feeling like I’m missing something. I seasoned the rice with Tamari (Japanese soy sauce, GMO-Free, no additives or unnecessary ingredients), garlic, and white pepper and it was perfect for this stir-fry!

I mentioned the Tamari, and this has been one of my best finds at the grocery store to date! It is basically soy sauce without any sodium benzonate or caramel color. I also opted for a Non-GMO and Organic brand because we do stay away from GMO products, and when in doubt I will always purchased a verified brand over a brand that is not verified. I also opted for a reduced sodium Tamari because I’m a little bit salt sensitive and soy sauces are loaded with sodium. The brand I used and highly recommend is San-J, which is also gluten free. I found this brand in the organic section of my local grocery store. Here is a link if your interested in San-J Tamari sauce.

Nope, not missing any rice OR flavor here! Even my 2 year old gobbled this up like there was no tomorrow! One last thing I will mention about this recipe is that I used a homemade and unsalted beef bone broth. If you have homemade broth (chicken, beef, or vegetable), that would be ideal for this recipe because of the sodium content of boxed broths along with the sodium content of the Tamari (can someone say salt bomb)! Anyways, if you don’t have homemade broth on hand I would suggest a low sodium vegetable broth in place of the beef broth. You may need to adjust the amount of Tamari you put in, so start with less and add additional Tamari based upon how salty you like things.

Takeout Inspired Cauliflower Rice
Ingredients:
- 1 head cauliflower
- 1 tsp olive oil
- 1/2 onion
- 1 clove garlic
- 2 tsp tamari sauce
- 1/4 tsp paprika
- 1/8 tsp white pepper
Directions: Roughly chop cauliflower head and put in food processor or ninja. Pulse a few times to obtain a rice-like texture. Put olive oil in small sauté pan and allow to heat up over medium heat. Dice onion and garlic, add to pan, and sauté until translucent and tender. Add cauliflower, tamari sauce, and spices. Stir cauliflower together with onion and garlic, then place lid on pan and allow to cook for 5-10 minutes or until soft.
Caramel and Vanilla Bean Coffee Syrup
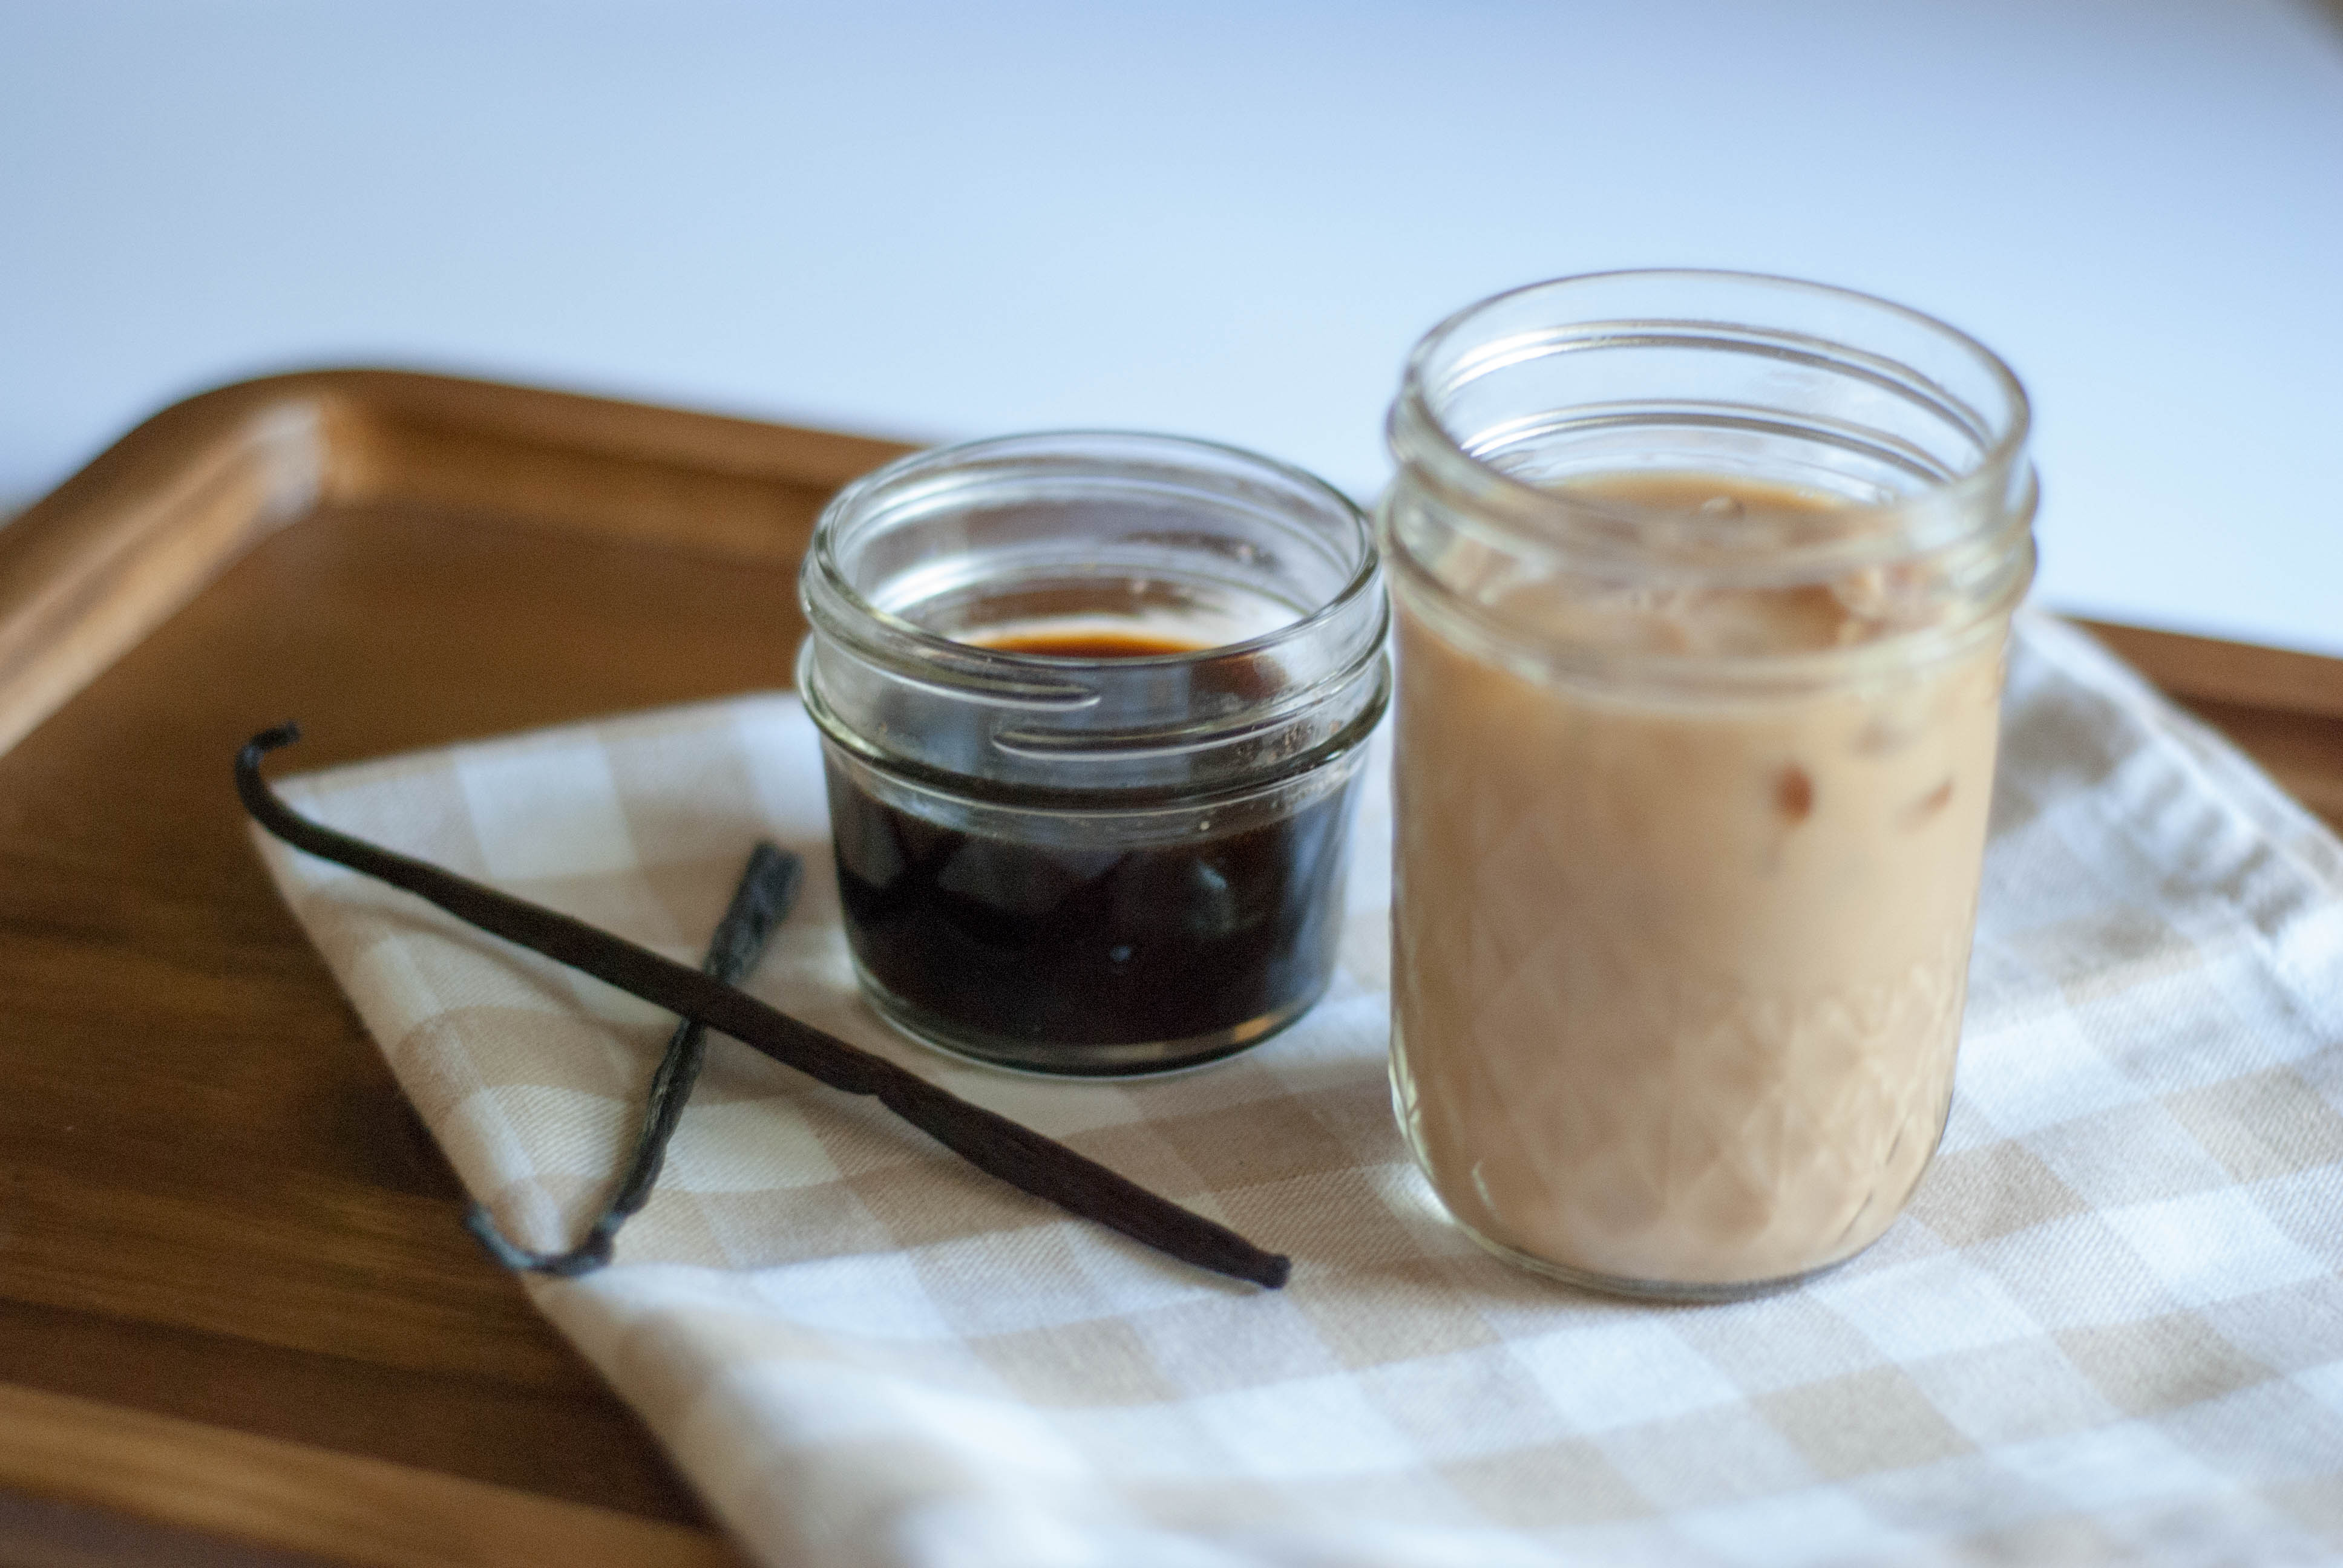
I’m just going to throw this out there… I love me some caramel and vanilla bean coffee syrup! Yes, I’m one of those “coffee people” and yes I have numerous coffee machines at my house. Generally I don’t put sugar in my coffee because I’ve realized that adding sugar is just a bad habit that I don’t want to get into. Yes, I do like coffee a little bit more with sugar but I just can’t justify drinking sugar on a daily basis.
Although I don’t drink sugary coffee drinks regularly, there are times I find a sweet coffee drink after dinner really delicious! I also know soooooo many people that have non-diary creamer at home and I absolutely LOATH that stuff! It is right up there with Cool-Whip on my “never ingesting again” list. Essentially non-dairy creamer will give you a healthy dose of trans fats, preservatives, GMO oils, and artificial flavors in your coffee. Thankfully, this DIY syrup is really easy to make, way more cost effective even with the use of a real vanilla bean, and uses a sugar that isn’t refined (Coconut Palm Sugar).
Here I go hand modeling again…. you know I’m just looking for a hand modeling contract… right? 😉
With my background as a pastry chef I’m familiar with this little thing we like to call “simple syrup.” Basically it is just sugar water that can be flavored to put into cake layers to make them moister and tastier. When I realized coconut palm sugar tasted just like caramel in liquid form I knew it would make a great simple syrup. I don’t have any real use for simple syrup at home, but being a coffee lover I thought it would make a tasty syrup to put into coffee when I wanted a sweet treat. I scored some vanilla beans for a great price at the grocery store, so it seemed natural to put a vanilla bean pod in the syrup to take it to the next level. The best part…. the ingredients are quality, real ingredients that are way more cost effective then buying non-dairy creamer or store bought coffee syrup (which also contain questionable ingredients).
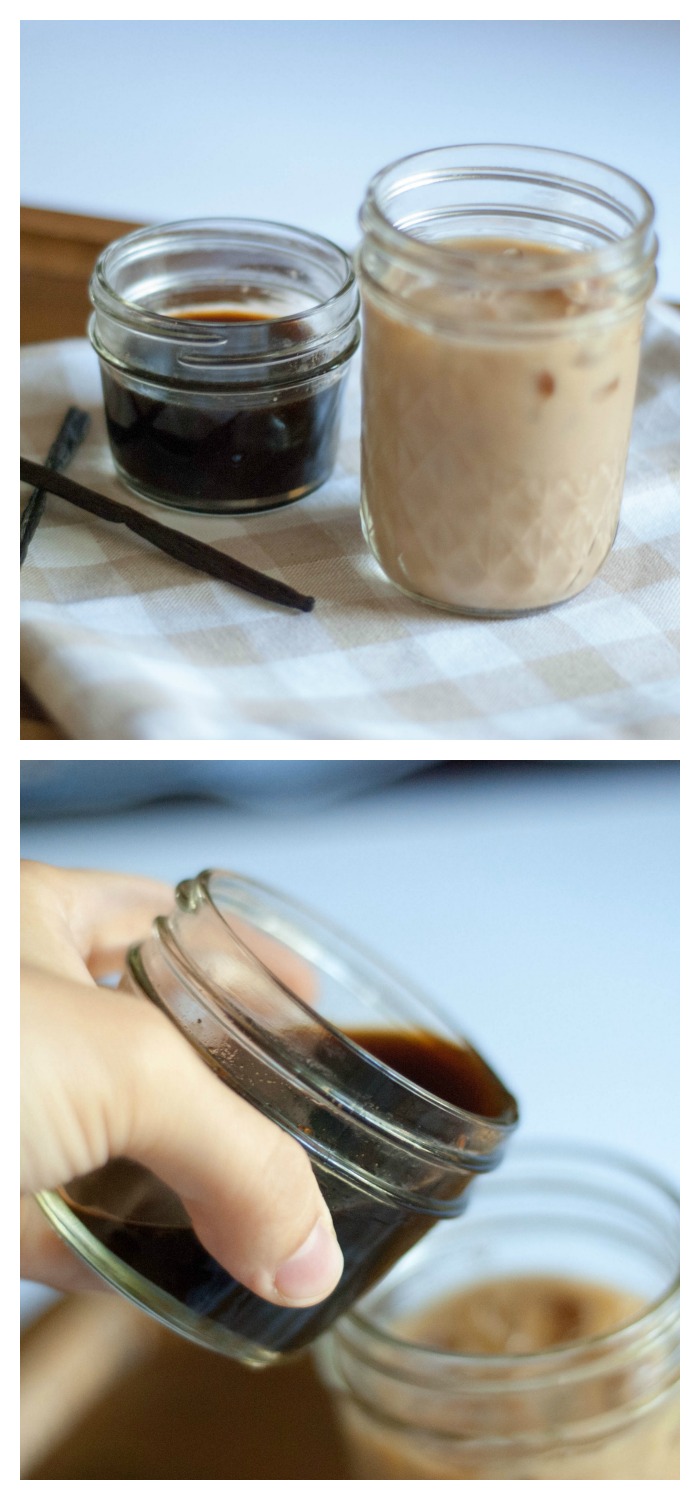
I know you might be thinking has she lost her damn mind? Did she just suggest I put a real vanilla bean in coffee syrup? YES! Here’s the reason why… one vanilla bean is going to run you about $6-8. I only used about 1/4 of a bean in this recipe which will give you enough syrup to flavor about 4 drinks. If you used the whole entire bean and quadrupled the recipe you could get about 16 drinks out of the batch (1 Tbsp per serving). Here’s the thing though, you can use the bean more then once and still get a decent flavor from just throwing the scraped out pod into the container you are keeping your syrup in. I threw my scraped out pods into my glass jar, and I’m going to transfer it to the next batch I make. So essentially you could get about a month’s worth of flavoring out of just one bean. If you really wanted to stretch it, you could use even less in each batch because there are TONS of little beans in every pod. When I compare that $6 bean to all the flavored drinks one person could purchase at a high end coffee shop in a month or two, it makes the $6 seem like a really frugal choice. Yes, you’d still have to purchase the Coconut Palm Sugar which runs about $5 a bag, but even $11 doesn’t seem like such an investment when you look at the price of just 1 coffee from Starbuck’s (a grande iced coffee is $2.60). Plus, you will never get this kind of flavor from the syrups coffee shops and grocery stores sell!
Making the syrup only takes about 5 minutes. After you cook your syrup just transfer it to a glass jar, put a lid on it, and enjoy it everyday in your favorite coffee (or on occasion for a special treat). It doesn’t get more delicious then this rich, aromatic, flavorful syrup. I’m telling you, one whiff of this stuff and you will never look at bottled syrup at the grocery store again!
Rhubarb, Mint, and Vanilla Bean Mini Pies
 If you are a sweet-tart fan you will love this Rhubarb, Mint, and Vanilla Bean Pie recipe! Rhubarb is a really interesting vegetable (yes it is a veggie), as it has a tart flavor. It isn’t something you can really cook up without the use of sugar but that doesn’t mean you can’t take a natural approach to sweetening it like I did for this recipe. Rhubarb is super duper easy to work with and requires just a minute or two of prep time before putting it into the pot to boil down. I decided to steep some mint leaves into the rhubarb because my husband threw them into the bag the rhubarb was in and they smelled so amazing. Fresh mint is one of my favorite smells, however it isn’t overwhelming in this recipe. The tartness of the rhubarb is overpowering so if you aren’t really a mint fan you can easily omit the mint.
 I scored the vanilla beans at the grocery store a few weeks ago for $1.50 a piece! If you know anything about vanilla beans, you know they are really expensive. Usually one vanilla bean is anywhere from $6-8 so when I saw those babies sitting there for that price I had to snag a few. I probably would have bought the whole box if I thought I could have used them all! Vanilla beans are also really easy to work with. After you do it one time, you’ll be a pro! All you have to do is take a paring knife and slice the bean in half lengthwise. You will have two long beans pods with all the little beans (like the black dots in vanilla bean ice cream). At a 45 degree angle scrape the beans from the pod. If you are making something that you can throw the shell of the pod into after you have scraped the beans, you can do that as well. I always try to throw the shell in just incase I missed any of the flavorful little beans !
 These mini pies feature my whole wheat pie crust that I use for pretty much any recipe that requires a crust. Making your own pie crust is so easy it almost makes me mad that the grocery store sells crusts that are loaded with dangerous and unnecessary ingredients. Pillsbury sells refrigerated pie crusts in tubes, and let me tell you the ingredient list is scary to say the least! Their crusts contain partially hydrogenated fats (trans fats!), BHT and BHA (banned in other countries), other preservatives, and even artificial food dyes. Companies love to take advantage of the laziness of American’s and this is a prime example. I made this crust in literally 2 minutes using a food processor, and if you don’t have a processor it takes about 5. I’ll spend 2 minutes to make my own instead of consuming dangerous crap any day! To shape your mini pies all you have to do is roll out your pie dough, take something you have that is a large circle (lid of a yogurt container, a cup, etc.), and cut a circle. Fill each pie with about 1 1/2 Tbsp of filling and fold over. Use your finger to press around the edges to seal the pie and that’s it! You’ll want to let your dough firm up in the refrigerator for about 10-15 minutes before you score it (cut the lines on the top).
Whole Wheat Pie Dough
Ingredients
- 2 cups whole wheat pastry flour
- 1 1/2 sticks unsalted cold butter (or 3/4 cup)
- 1/4 tsp salt
- 5-8 Tbsp cold water
Instructions
- Put flour, salt, and cold butter chunks in food processor or Ninja. Pulse a few times to “cut in” butter. If you do not have a processor simply cut butter into chunks, add to flour, and break up into pea sized pieces.
- Slowly add in cold water a tablespoon at a time until dough comes together.
Homemade Ranch Dressing-mayo free
We have all seen recipes claiming to be “the best ever”. I hesitate to call any recipe that because it is a little bit gimmicky. I’m sure at least one of those “best ever” recipes really wasn’t! However, if I were to start coining that term, this would be the recipe I’d start with. It truly is like no other ranch you’ve had. It is better… a lot better!
If you’ve been going the Hidden Valley route, fear not… you’ll never want to eat that crap again after tasting real ranch dressing. Real ranch dressing that doesn’t contain genetically modified soybean oil or any of it’s friends, like EDTA or MSG. The truth is, those ingredients don’t have to be in any dressing, including ranch. So instead of hitting up the middle of the grocery store just grab yourself a container of sour cream and a few spices and you will be all set to make your own ranch dressing.

This recipe is going to give you a dry mix of ranch dressing spices. All you need to do is simply add the spices to 1/4 cup of sour cream, and 1/4 of a cup of milk and stir. When you want fresh dressing, no need to measure all the spices out again. Just grab your pre-mixed ranch spices and add them to the sour cream and milk. You’ll have enough for that day, and maybe one or two more servings depending on how much you love ranch!
You may be wondering, where’s the mayo? Well mayo is kind of the same thing as bottled ranch dressing. It also contains soybean oil, preservatives, and other stuff that doesn’t need to be there. That is why I choose not to use mayo in my household at all. I’ve simply substituted sour cream instead of using mayo because sour cream doesn’t contain any random ingredients or additives. The simpler the better!
I just knew everyone was dying to know what my fingernails look like. I asked my husband to be the hand model but his hands just aren’t as pretty as mine (he is a construction worker). Well, here mine are in all of their unpainted and un-manicured glory. This is what life looks like with 3 kids people. No time for fingernail painting! Maybe someday… 🙂
Ceasar Encrusted Salmon with Lemon and Goat Cheese Asparagus

We were out for the day and dinner time was approaching. How easy it would be to just stop for something, we thought. Something in the back of my mind just kept saying NO, don’t do it, you know that food is junk. I remembered that we had frozen salmon at home, which is really easy to unfreeze and throw in the oven. We also had asparagus and sweet potatoes to make with the fish so I knew I had a complete meal that could be made at home. When I finally got to sit down and eat, I was so happy I chose the unprocessed route.
For the salmon, I prepared an olive oil based Ceasar dressing to coat the salmon with before putting the breadcrumbs on top. The dressing is really simple, and contains just a few real ingredients… olive oil, lemon juice, anchovy paste, Dijon mustard, and salt and pepper. If you just read the words anchovy paste and thought “Forget about this recipe!” let me ease your mind. All Ceasar dressings get their distinct flavor from either anchovies or anchovy paste. I have been making real Ceasar dressings for quite a few years in restaurants and I got over the whole anchovy thing a long time ago. If you are worried about the ingredient, step outside the box just a little and give it a try. I promise once you taste the salmon you’ll be thanking me! The real base of flavor from Ceasar dressing comes from the anchovy paste, so it isn’t an ingredient you can omit.
I don’t use store-bought breadcrumbs because they are actually one of the WORST products found in grocery stores. Who knew those seemingly simple breadcrumbs actually contain about 50 ingredients including trans fats (partially hydrogenated oils), and high fructose corn syrup? To make your own you simply place two pieces of bread in the oven while it is preheating and let them get a bit toasty (or you could use a toaster and toast them lightly). You don’t want your bread to get overly toasted, just a bit dry. Take them out of the oven, put them in a blender or food processor for a minute and that’s it! Once they are processed you season them and add a bit of olive oil to get a nice and crispy topping for your salmon. I promise once you do this, you will never be tempted to buy the store bought garbage again! Just an FYI, I use a whole grain, 100% natural bread from Food for Life. It is a sprouted grain bread that will knock your socks off because it doesn’t contain soybean oil, sugars, additives, or preservatives. Every single ingredient is identifiable and necessary. Please check them out in the frozen section of the organic isles in your grocery store!

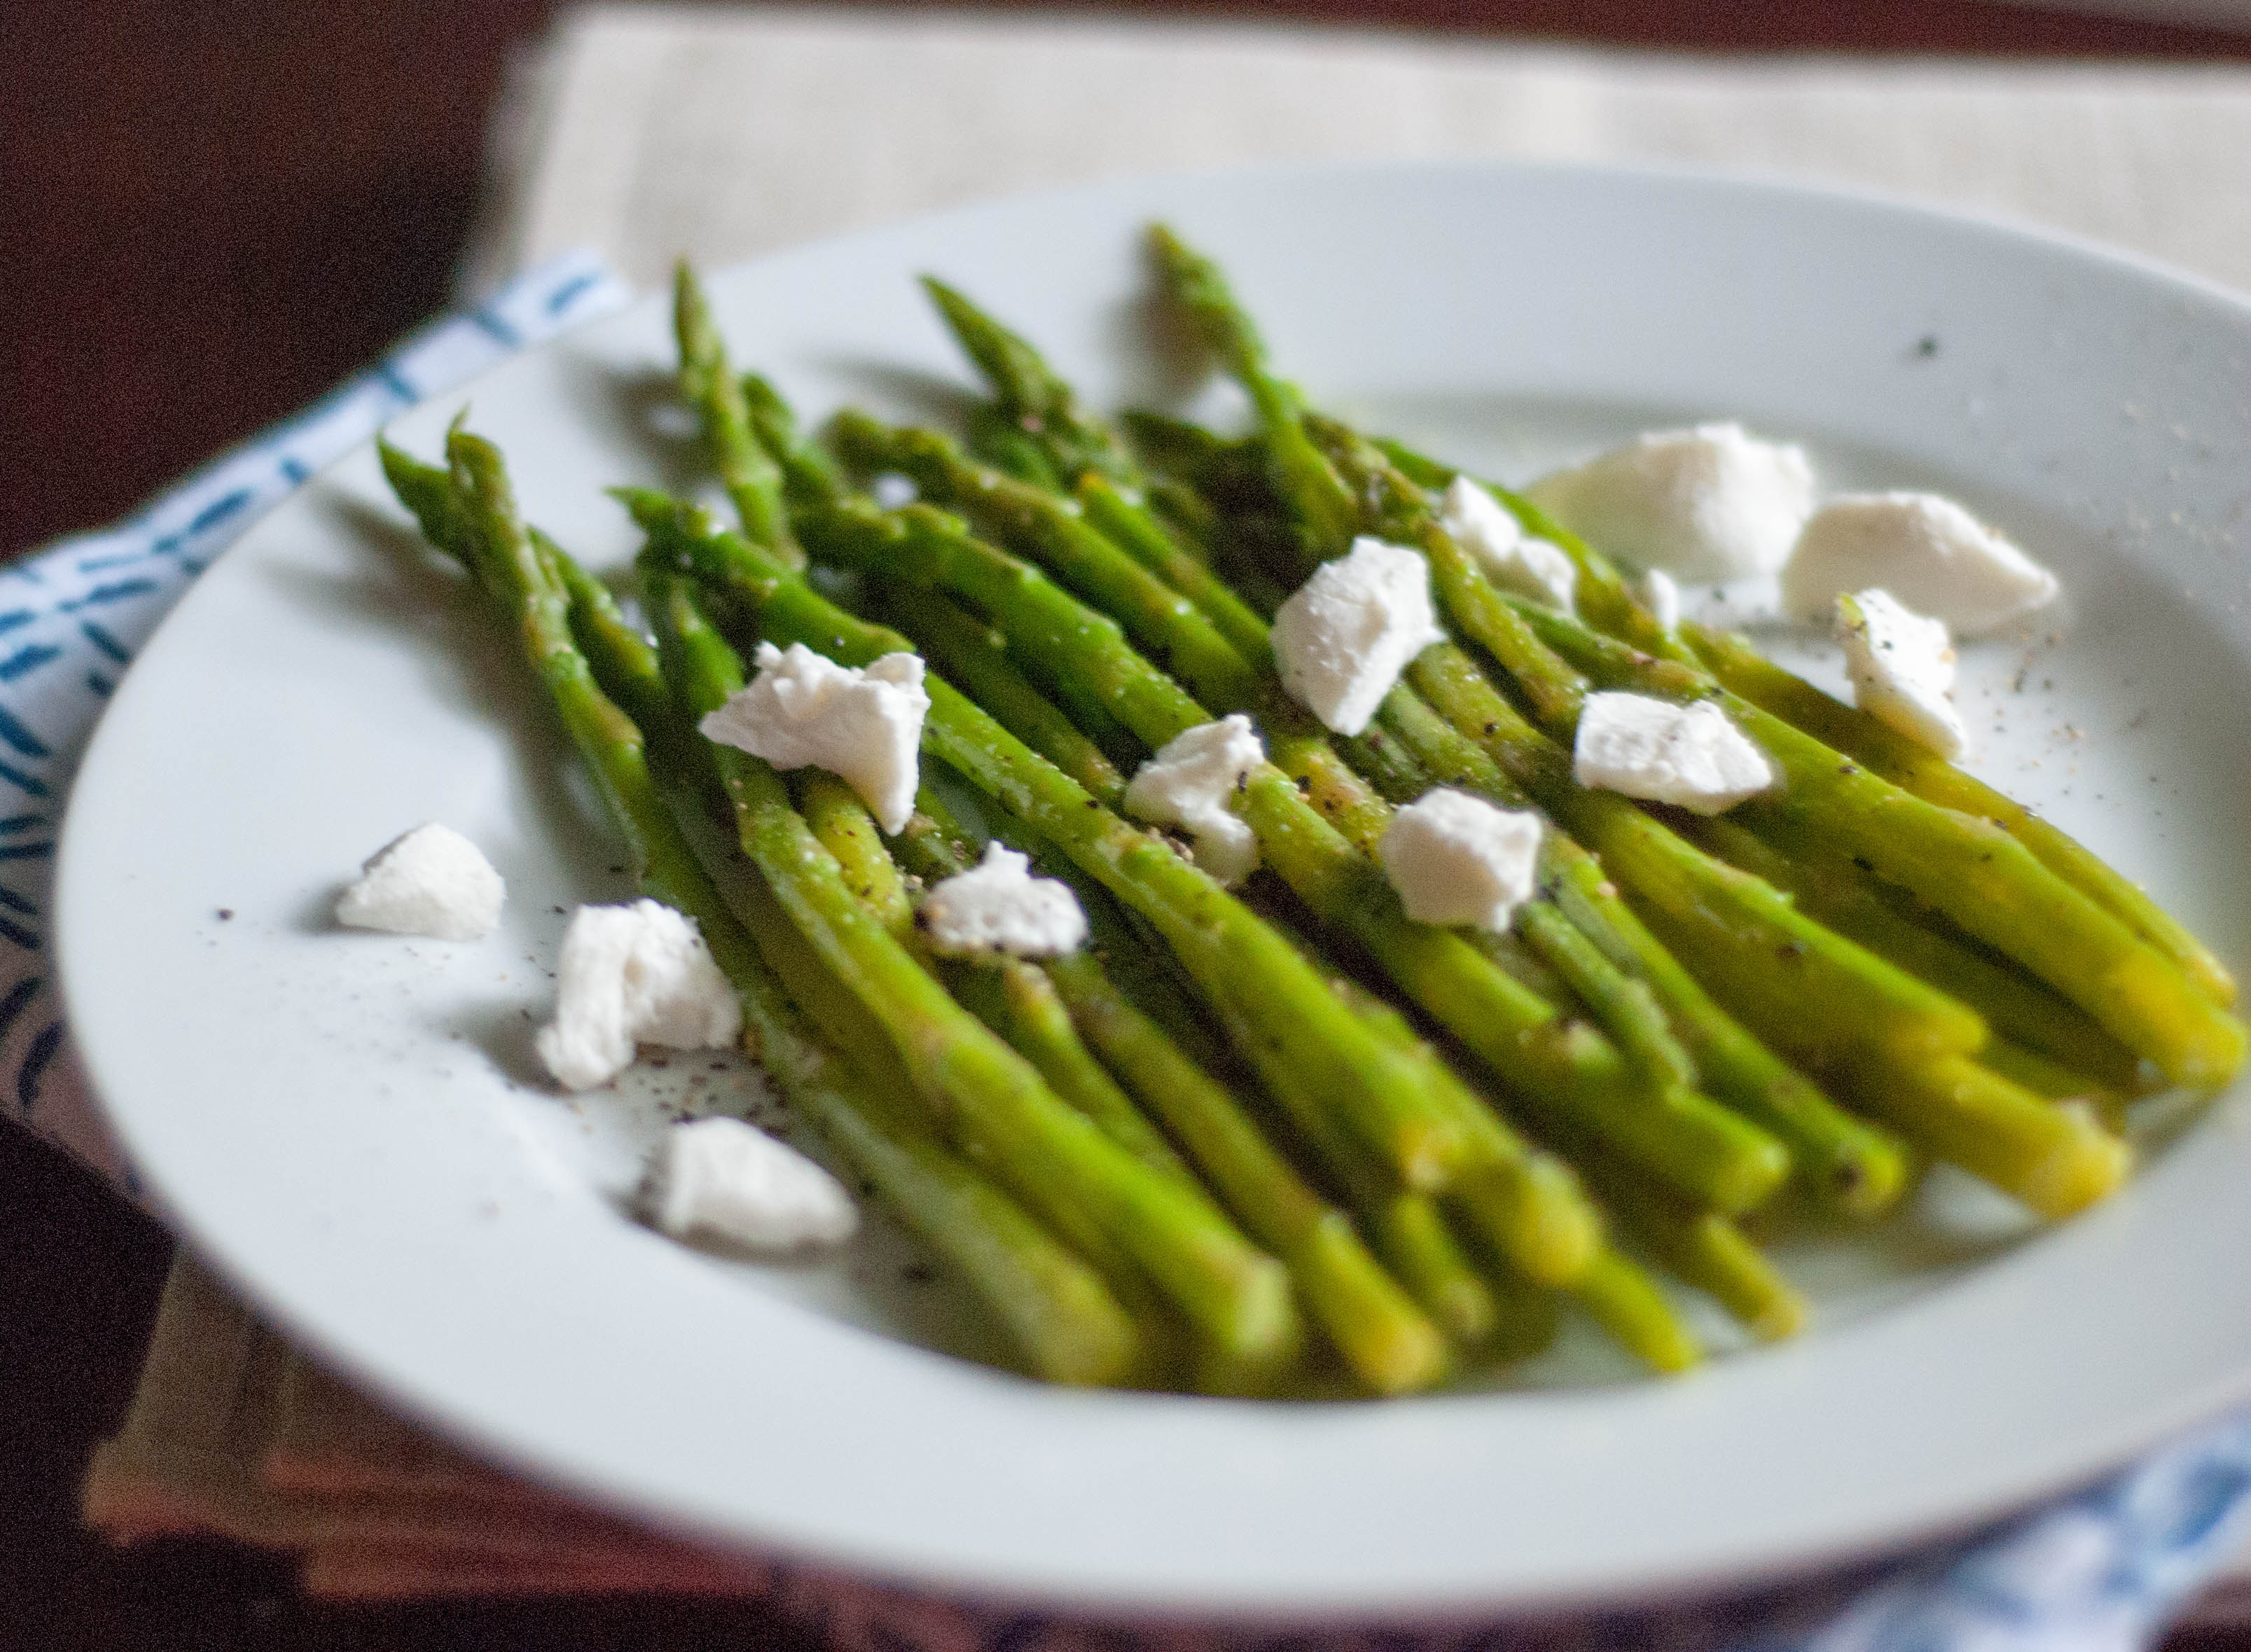
With the salmon I served this lemon and goat cheese asparagus. It is another really simple side to put together quickly that is nutritious and delicious. It is really as simple as steaming/boiling the asparagus, seasoning it, and adding the cheese. I love my asparagus with big chunks of freshly cracked black pepper as well!
Lemon and Goat Cheese Asparagus
Ingredients:
- About 25 asparagus spears
- 1/2 tsp lemon juice
- 1/2 tsp white wine
- 1/2 tsp olive oil
- sprinkle of salt
- sprinkle of pepper
- sprinkle of garlic powder
- 1-2 ounces goat cheese
Directions: Steam/boil asparagus. Put asparagus, lemon juice, olive oil, and white wine in a small sauté pan and allow wine to cook off (give it some heat). Add seasonings, remove from heat and crumble goat cheese on top to serve.
Pina Colada Cupcakes with Fresh Coconut

I picked up a fresh coconut at the grocery store and wanted to make a treat for the kids with it. We had an interesting time opening it, but it wasn’t as hard as people make it sound! It did require a large chef knife and a hammer but hey, it’s all in a day’s work I guess! My husband opened it and my kids loved the fresh and cool water inside. Even the baby was downing it like it was going out of style. There was about 2 1/2 cups of water in the coconut so we drank a little bit, and saved the rest for the cake. I mentioned in my Whole Wheat Black Raspberry Shortcake post that my husband had picked up a Cooking Light Desserts magazine for me while he was at the grocery store. Although I don’t agree with their stance on substituting low-fat and potentially harmful ingredients (like Cool Whip) for the real deal, I did find a lot of inspiration in the magazine. When I make desserts I try to find a balance between super sweet and bland, and these cupcakes fell right in the middle, and were absolutely delicious. There is a perfect balance that can be achieved by using real and fresh ingredients, whole wheat flour, and a nice fluffy homemade meringue icing that doesn’t skimp on flavor. When you use real ingredients, you don’t need cups upon cups of sugar to make a dessert amazing. These are truly “from scratch bakery style” and can be made for far less then what you would pay at an upscale bakery ($2-3 EACH!). I wanted to show you exactly how I filled these cupcakes just incase you have never done it before. All you need is a melon baller or the underside of a piping tip. I simply press each end of the melon baller into the cupcake very gently, and when I have impressed a circle in the middle I scoop it out. If you are worried about messing up your cupcakes don’t sweat it, because nobody will see what is underneath the fluffy meringue icing. It took me a few tries to get a really nice circular hole in the middle of my cupcakes, so just keep in mind practice makes perfect when it comes to baking.

Nothing compares to the light fluffy meringue style icing on these cupcakes! It is truly the perfect icing for any dessert because it is not sickeningly sweet. It is so beautiful and glossy, and pipes very well. It holds up well in the refrigerator for a day or two, so these are a cupcake that can be made the day before your event. To make a meringue style icing you will need a sugar thermometer which can be purchased at a crafty store, restaurant store or online. The sugar thermometer just clips to the side of your sauce pan and allows you to see exactly what temperature your sugar is. You will be looking for about 250 degrees, or soft crack, for this recipe. I started whipping my egg whites about 3-4 minutes into cooking my sugar and the timing was perfect. The egg whites were reaching stiff peaks when my sugar was reaching 250 degrees, which is what is ideal. If your whites are at stiff peaks and your sugar isn’t to 250 degrees yet, simply turn them off until your sugar is ready.
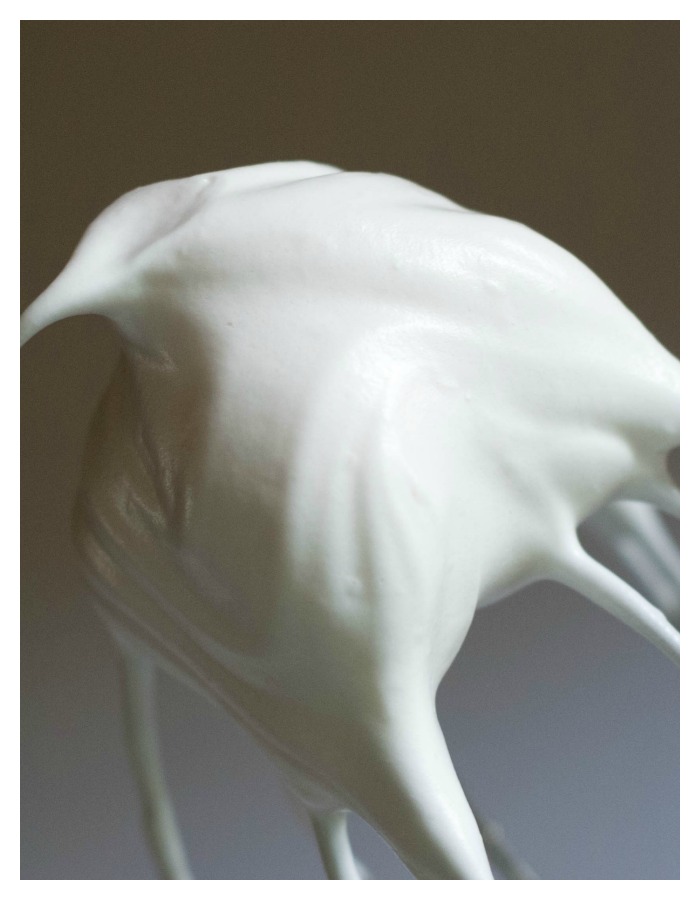
Here is the meringue on the cupcakes before I put any garnish on them.
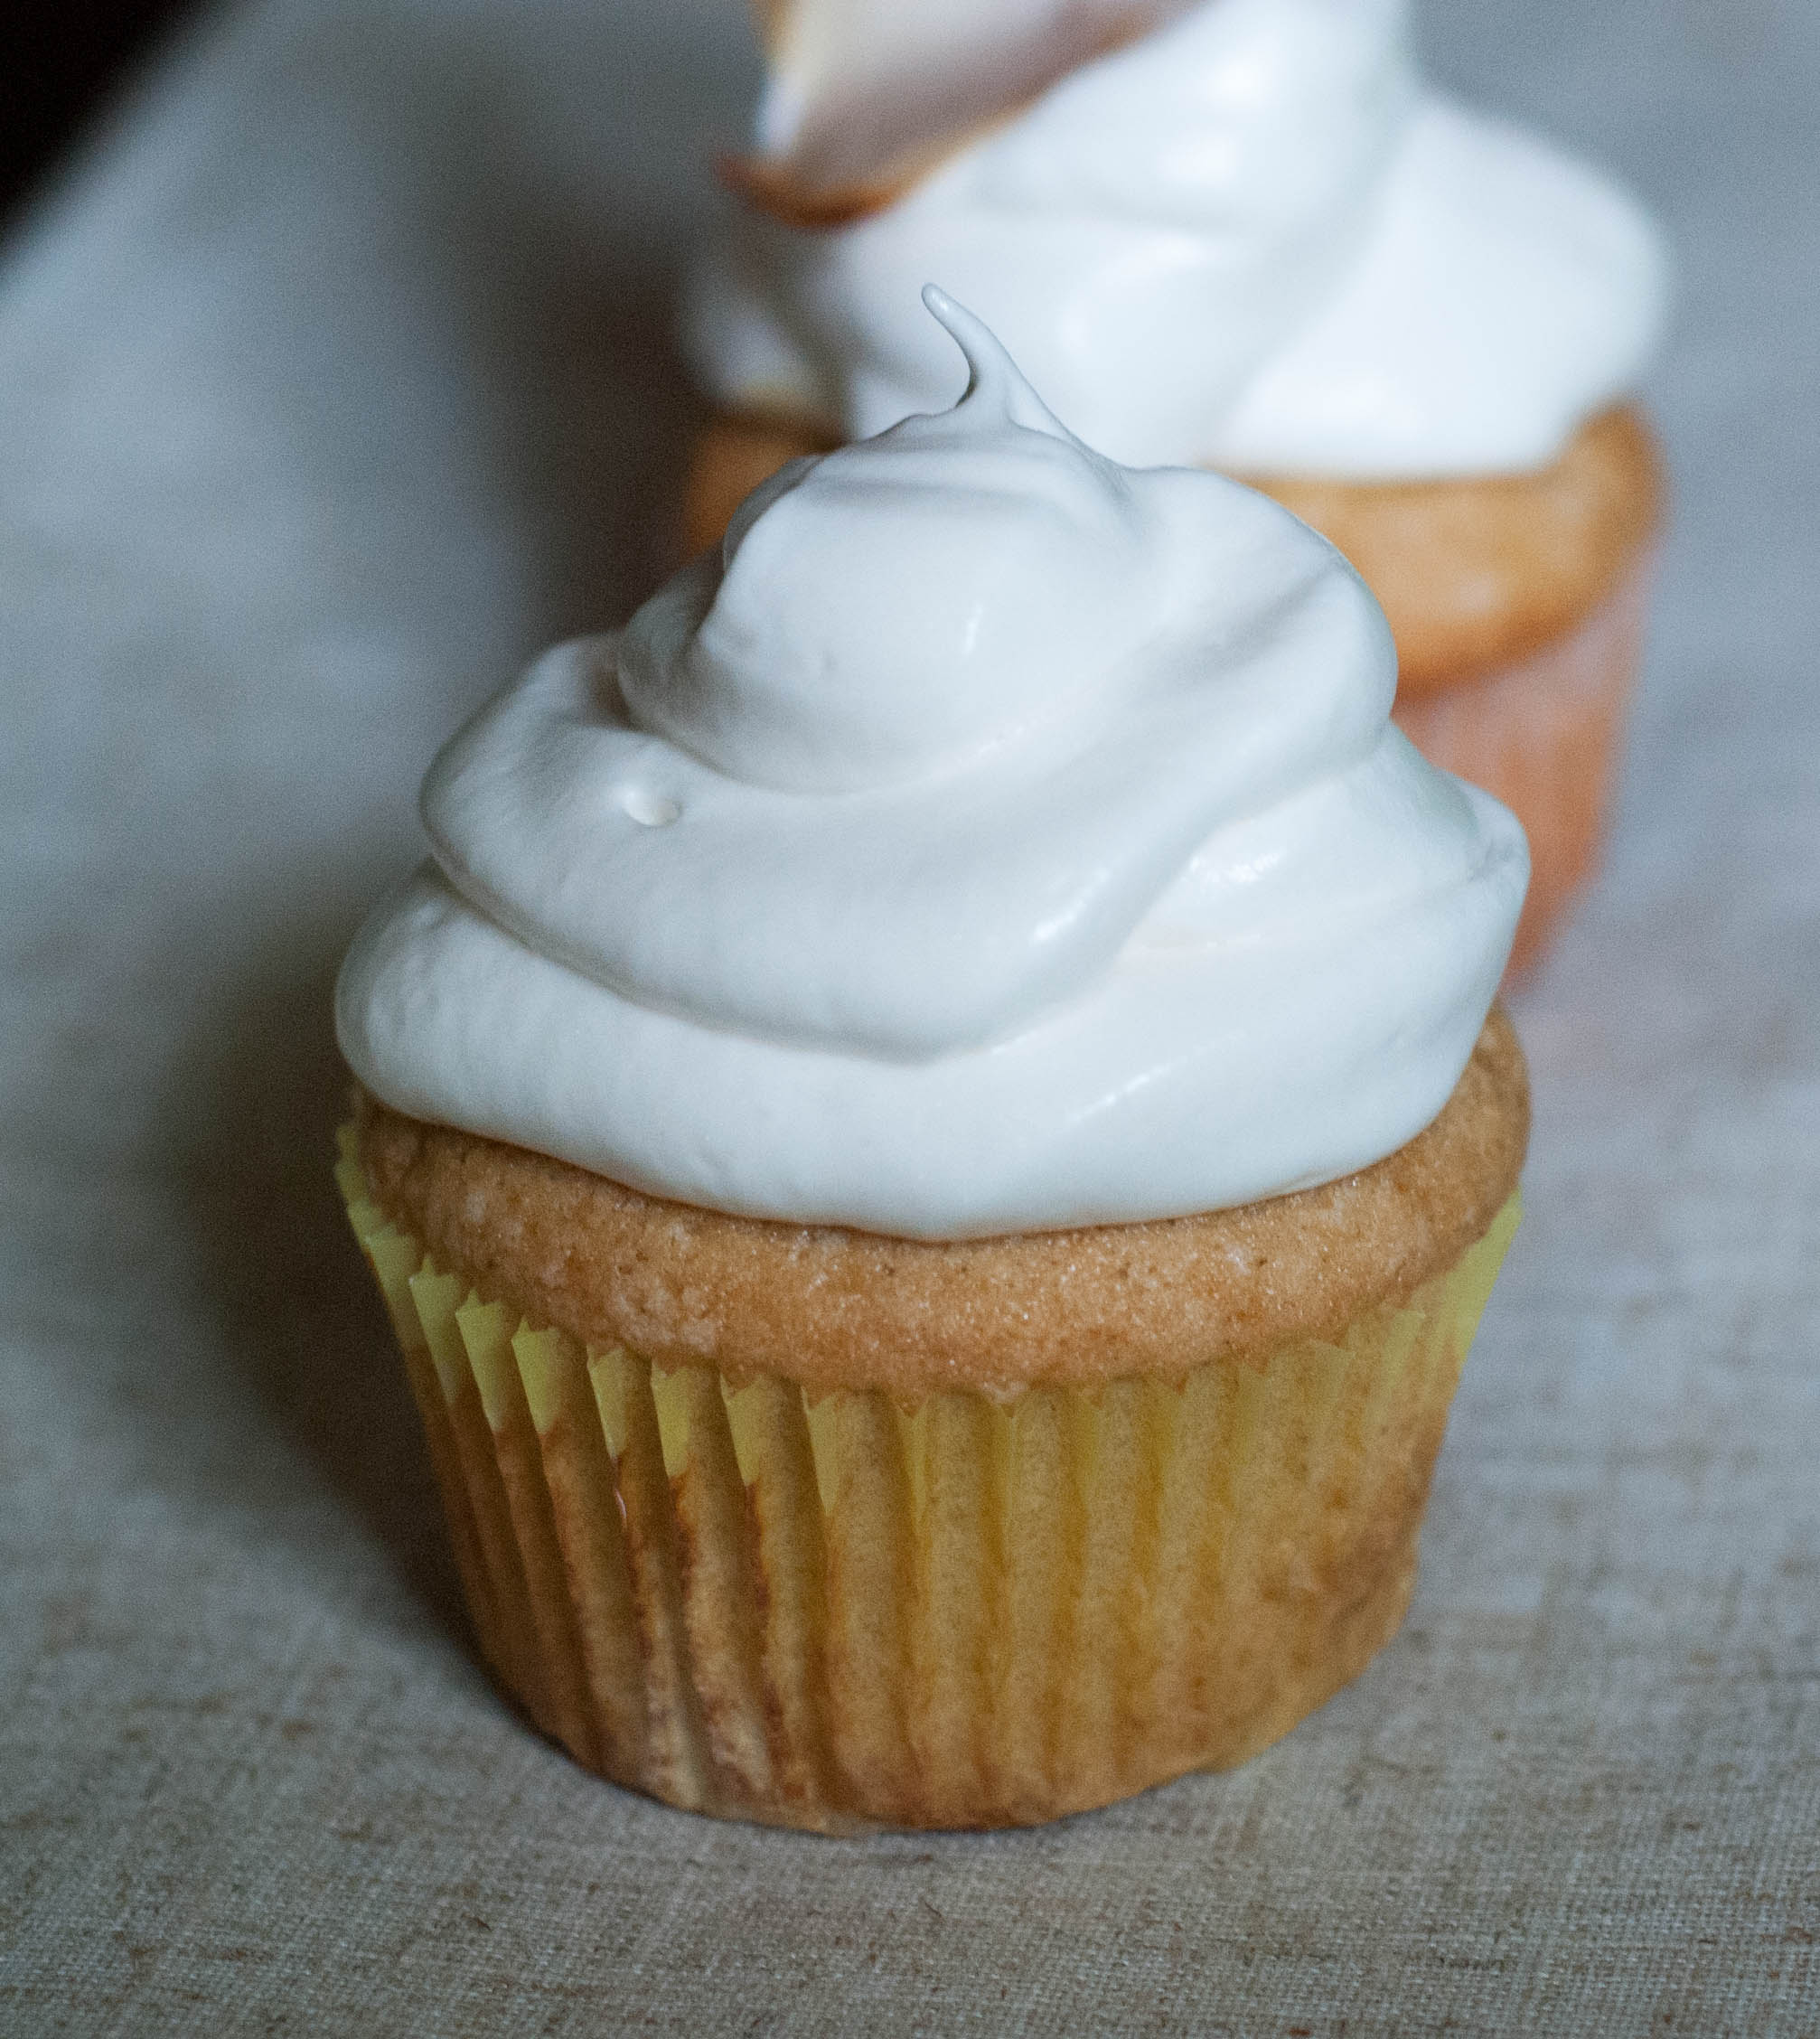
With this icing you can really garnish it however you’d like, or leave it as is which is pretty too! To garnish these I toasted the fresh coconut flesh in the oven in larger chunks. I decided I wanted to set these apart from all the other cupcakes I’ve seen that just use shredded coconut. I love the look of the slightly toasted coconut chunk and the fresh pineapple. The umbrellas can be found at Party City or online for pennies, so if you are planning a luau or party the umbrellas make an inexpensive and cute decoration. We recently had a luau for my baby’s 1st birthday so I have a whole box of umbrellas to use!
* You an find the items you might need to make these cupcakes here. 🙂
The Meringue Icing (Adapted from Cooking Light)
Ingredients:
- 4 large egg whites + 2 Tbsp raw cane sugar
- 1/4 tsp cream of tartar (or a squirt of lemon juice)
- 1/8 tsp salt
- 1 cup raw cane sugar (I use Woodstock Brand)
- 1/4 cup water
- 1 tsp pure vanilla extract
- fresh toasted coconut flesh (for garnish or topping)
Directions: Combine 1 cup raw cane sugar and 1/4 cup water in heavy bottomed saucepan and mix. Attach sugar thermometer to pan, and turn burner on high heat. Once you have turned your heat on, do not touch your sugar! Cook sugar to 250 degrees. While sugar is cooking put 4 large egg whites and 2 Tbsp raw cane sugar in bowl of stand mixer fitted with whisk attachment. Turn mixer on medium-high speed and whisk whites to stiff peaks. While whites are whisking, sprinkle in 1/4 tsp cream of tarter (or squirt of lemon juice) and 1/8 tsp salt. I have made meringue without the cream of tartar or lemon and it will turn out just fine without this ingredient if you do not have it on hand! When sugar reaches 250 degrees and whites are at stiff peaks, continue whisking whites on medium speed and slowly pour sugar into whites while increasing the speed slowly to high at the same time. Make sure you are pouring sugar in a slow, steady stream. Some sugar may get stuck to your bowl, and that is fine. When your sugar is combined allow to mix for another 30 seconds-1 minute. Add vanilla extract to finish.
Fresh Pineapple Curd
Ingredients:
- 2 cups fresh pineapple, diced small or pureed
- 1/4 cup raw cane sugar
- juice of 1 lime
- 1/4 cup water
- 6 large egg yolks (leftover from your meringue and cake)
- 2 Tbsp whole wheat pastry flour
- 2 Tbsp cold butter, in small chunks
Directions: If you’d like a smooth curd blend pineapple in a food processor, then strain through a mesh sieve. Also, omit water. Follow the rest of the directions the same. I left my pineapple in small chunks for a chunkier filling. Combine pineapple, sugar, lime juice, and water in a small saucepan over medium heat. Cook until sugar dissolves and pineapple changes color, about 8-10 minutes. When pineapple is tender and can be broken apart you may shred it if desired. Whisk egg yolks and flour in a separate bowl, and temper yolks using your pineapple mixture. Do this by adding a little bit of pineapple mixture to your eggs at a time, while whisking continuously. When eggs are warm, add eggs into saucepan and continue to whisk until mixture is thick. If your mixture is not thickening, give it more heat. Pour mixture into heat safe bowl and add chunks of cold butter. Stir until butter is melted and combined. Refrigerate until ready to use. Be sure to place plastic wrap directly on top of curd or you it may develop a skin on top. *I can’t seem to attach a link but here is the original recipe: http://www.myrecipes.com/recipe/fresh-coconut-cake-10000001973648/
Creamy Parmesan Peppercorn Cauliflower
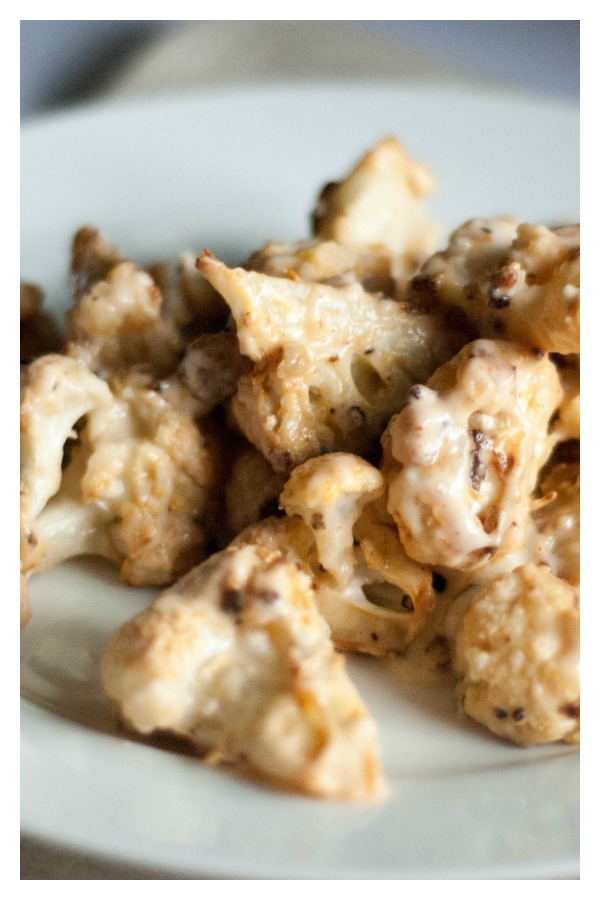
I am almost embarrassed to say this, but I ate almost all of this! My husband stepped outside to talk to the neighbor and I kept going back for more, and more, and more. Then finally when there was 2 pieces left I had to remind myself he had to at least give me his opinion on the recipe!
Everything about this recipe makes it delicious…especially the crunchy outside the cauliflower gets when you roast it. This is a recipe that could really wow a dinner party! The texture is just right, the cauliflower looks beautiful, and who doesn’t love cheese! Your friends will think you secretly went to culinary arts school or something when they taste this cauliflower because it is THAT good. Plus, cauliflower isn’t exactly the first side you think of when planning a dinner, but this s a great outside the box recipe to show people veggies can be delicious. I really wanted a good shot of the sauce, and here it is. Tell me that isn’t a beautiful sauce! I love the specks of paprika (secret to making roasted cauliflower look nice), and peppercorns.

This is a two step recipe. The cauliflower is prepared by seasoning it and tossing it in olive oil, then roasting it n a sheet tray in the oven. The sauce is prepared on the stovetop, then the cauliflower is tossed in the sauce to finish it off. The sauce only takes 5 minutes to put together, so I just waited until the cauliflower was just about done roasting to start the sauce, that way it wasn’t sitting around waiting for it’s buddy to come out of the oven. 🙂 Also, just to note, using 1 head of cauliflower makes enough for about 2 people. If you are cooking for more, I would suggest doubling it.
Whole Wheat Shortcakes with Blackberries and Fresh Whipped Cream
My husband picked some wild blackberries at his parent’s house. Right in their yard they have a blackberry bush, and down the street at a vacant house he found another bush with a ton of wild blackberries on it, ready to be picked! For all of his efforts I knew he would love a dessert. I really wanted to choose a dessert that wouldn’t take away from the berries because it isn’t everyday we get to eat wild blackberries that we picked ourselves. I thought back to a bakery that I worked at, who had a lovely strawberry shortcake. I always loved the fresh whipped cream that they served in their shortcakes, and nothing beats fruit with fresh whipped cream!

I found a recipe for the cakes in a Cooking Light magazine I have. I adapted the recipe to use whole wheat flour and raw cane sugar instead of all-purpose flour and refined sugar. One thing that I keep in mind when making desserts is the fact that no, desserts aren’t necessary and sugar itself isn’t an ingredient to over-consume. However, you can still make desserts “better” by using real ingredients that aren’t as refined. Instead of dumping a cake out of box that is filled with dangerous fats and calls for GMO oils, you can use whole ingredients and yield a product that outshines the boxed stuff times 1000. If you are already used to making from-scratch desserts, just look for recipes that use whole ingredient instead of refined (they are out there). If all else fails, just make substitutions and tweak recipes to fit your own “healthy”.
When I was reaching for my flour I accidentally grabbed the stone ground whole wheat instead of my whole wheat pastry flour. Typically I would use the whole wheat pastry flour for a recipe like this one, but I was pleasantly surprised how nice they turned out with the stone ground whole wheat flour. The cakes themselves were biscuit-like, just like a typical shortcake. They are a bit dry to begin with, but with the addition of the cream and berries they are just the right texture. I have to say, this one was really a home-run!

Obviously my husband ate all of his shortcake, but just incase you wanted the proof here it is!

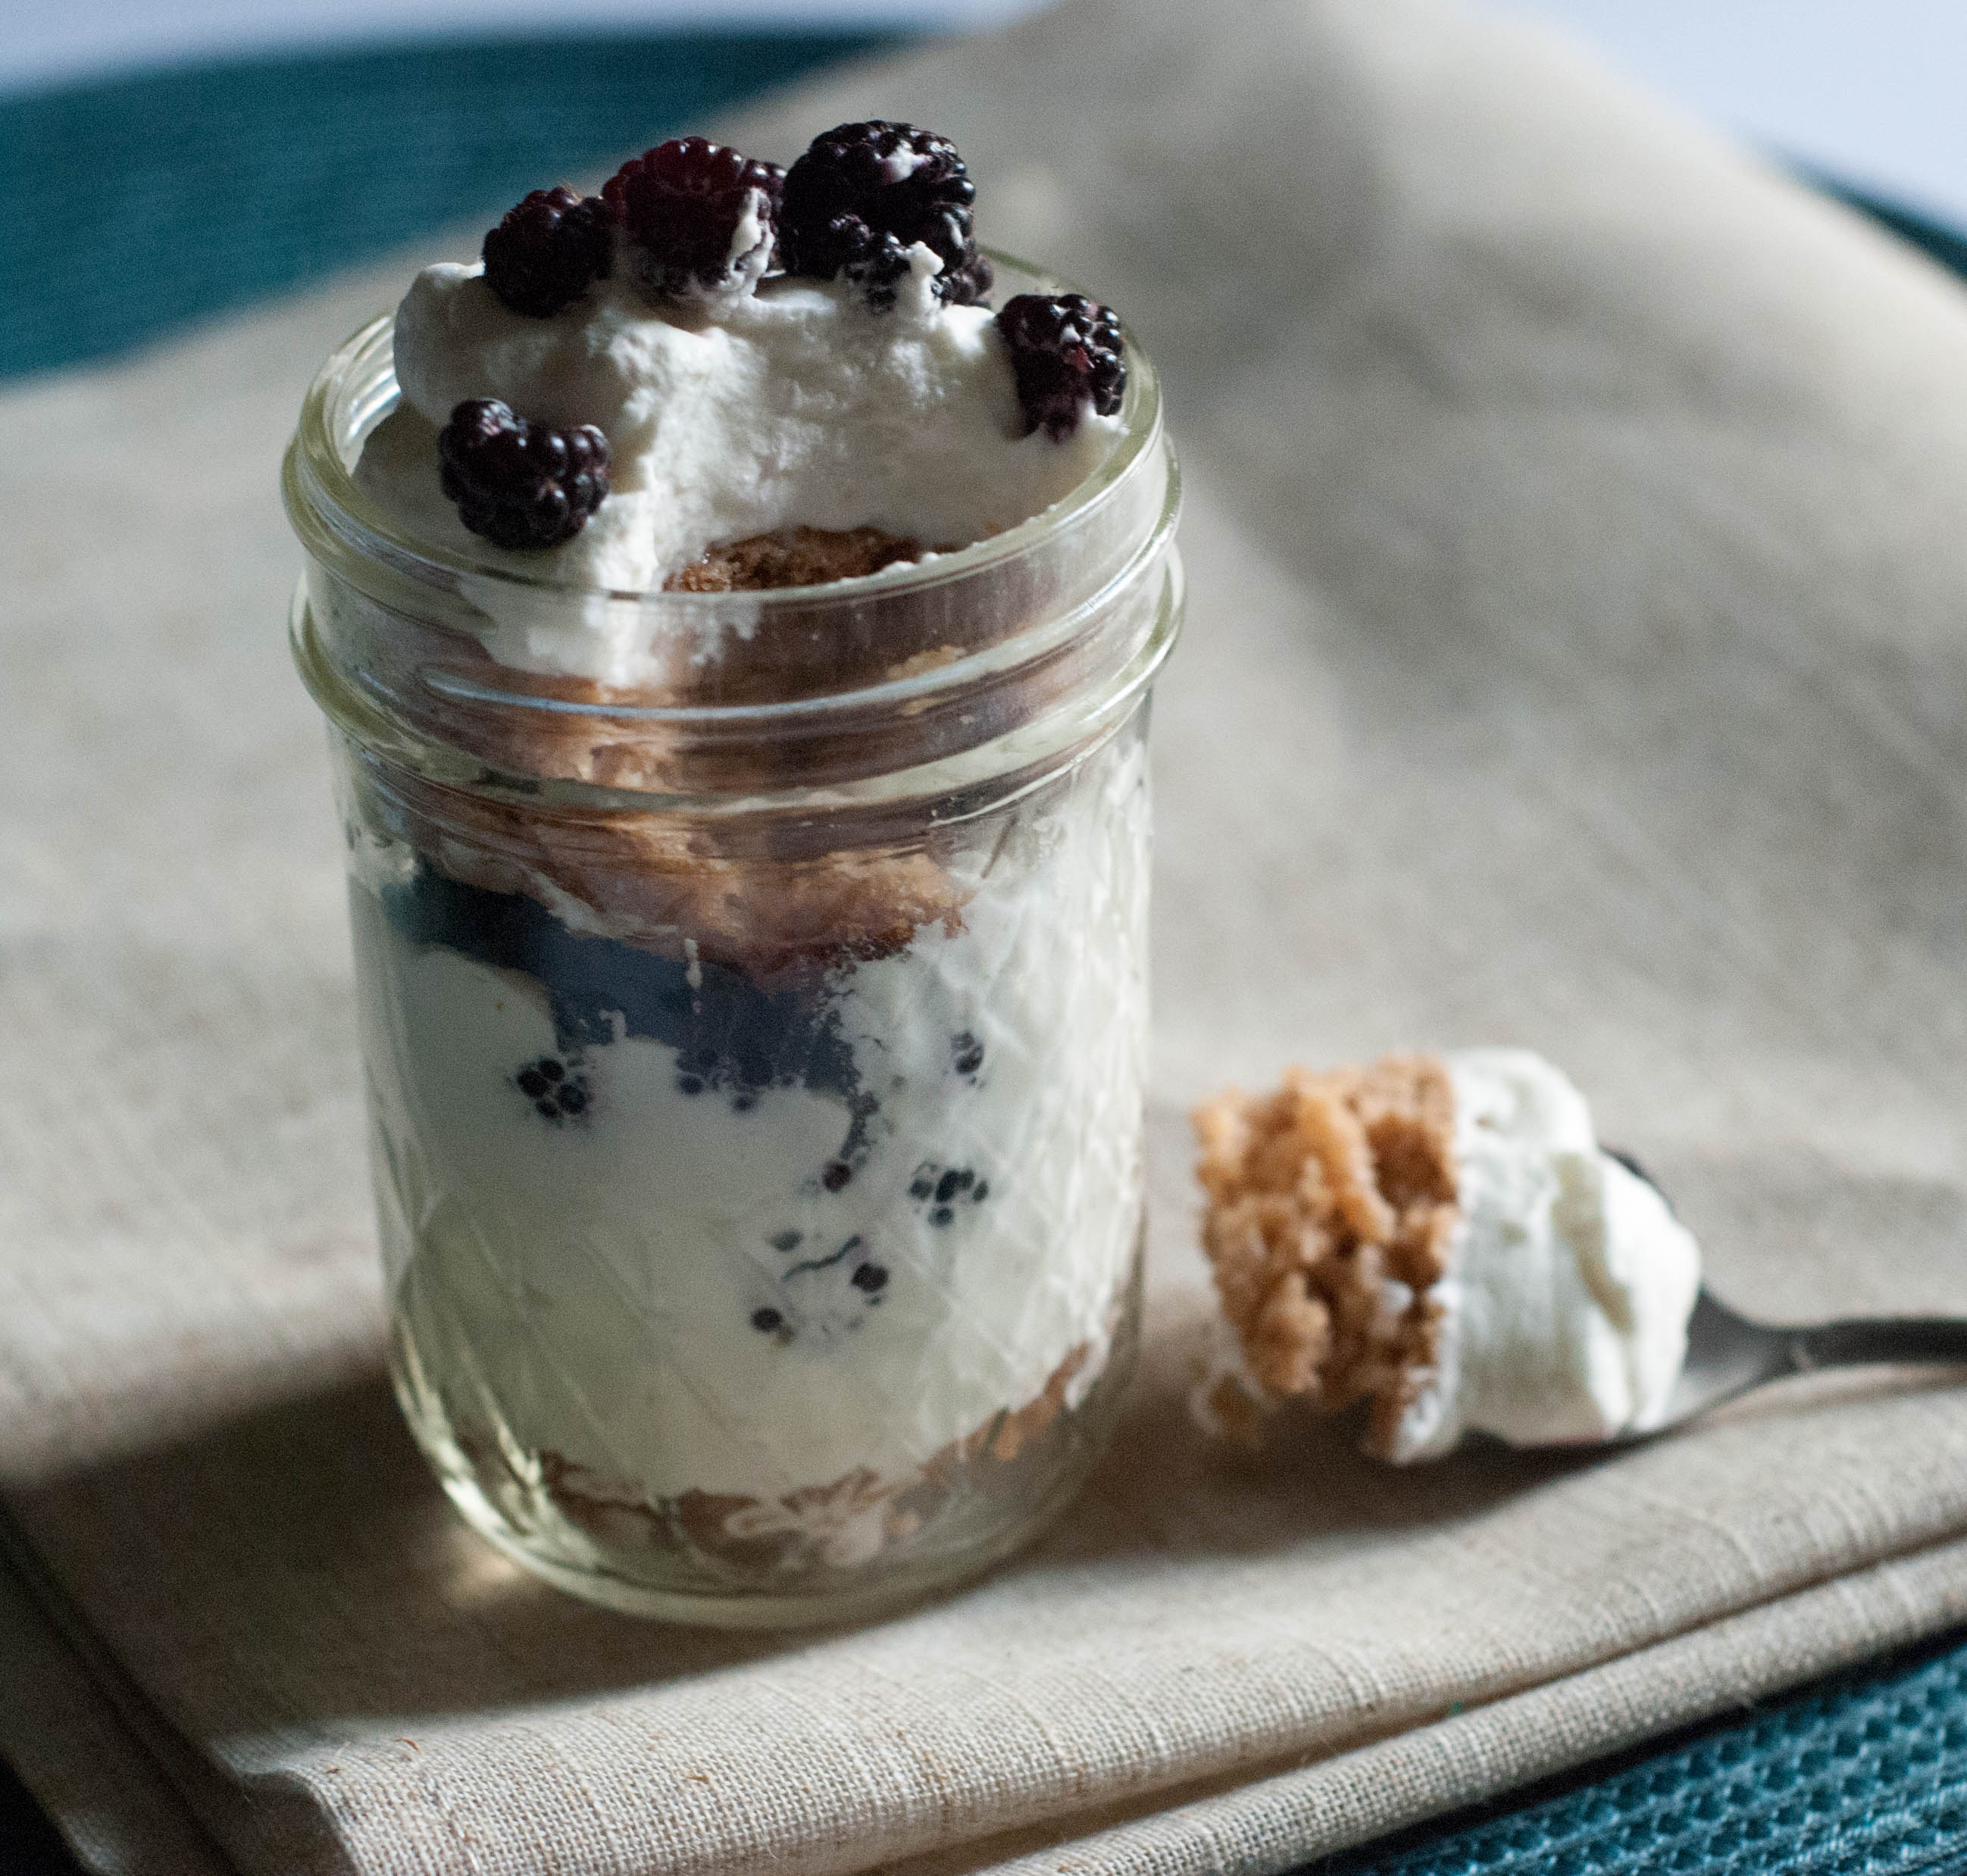
The best part about these babies is they can easily be served in mason jars to make them even more awesome! If you’d like to go the mason jar route, simply bake the cake part of this recipe on a parchment lined (or buttered and floured) sheet tray. Once the cake bakes and cools, use a circular Ateco cutter or the top of your mason jar to cut circles of cake.
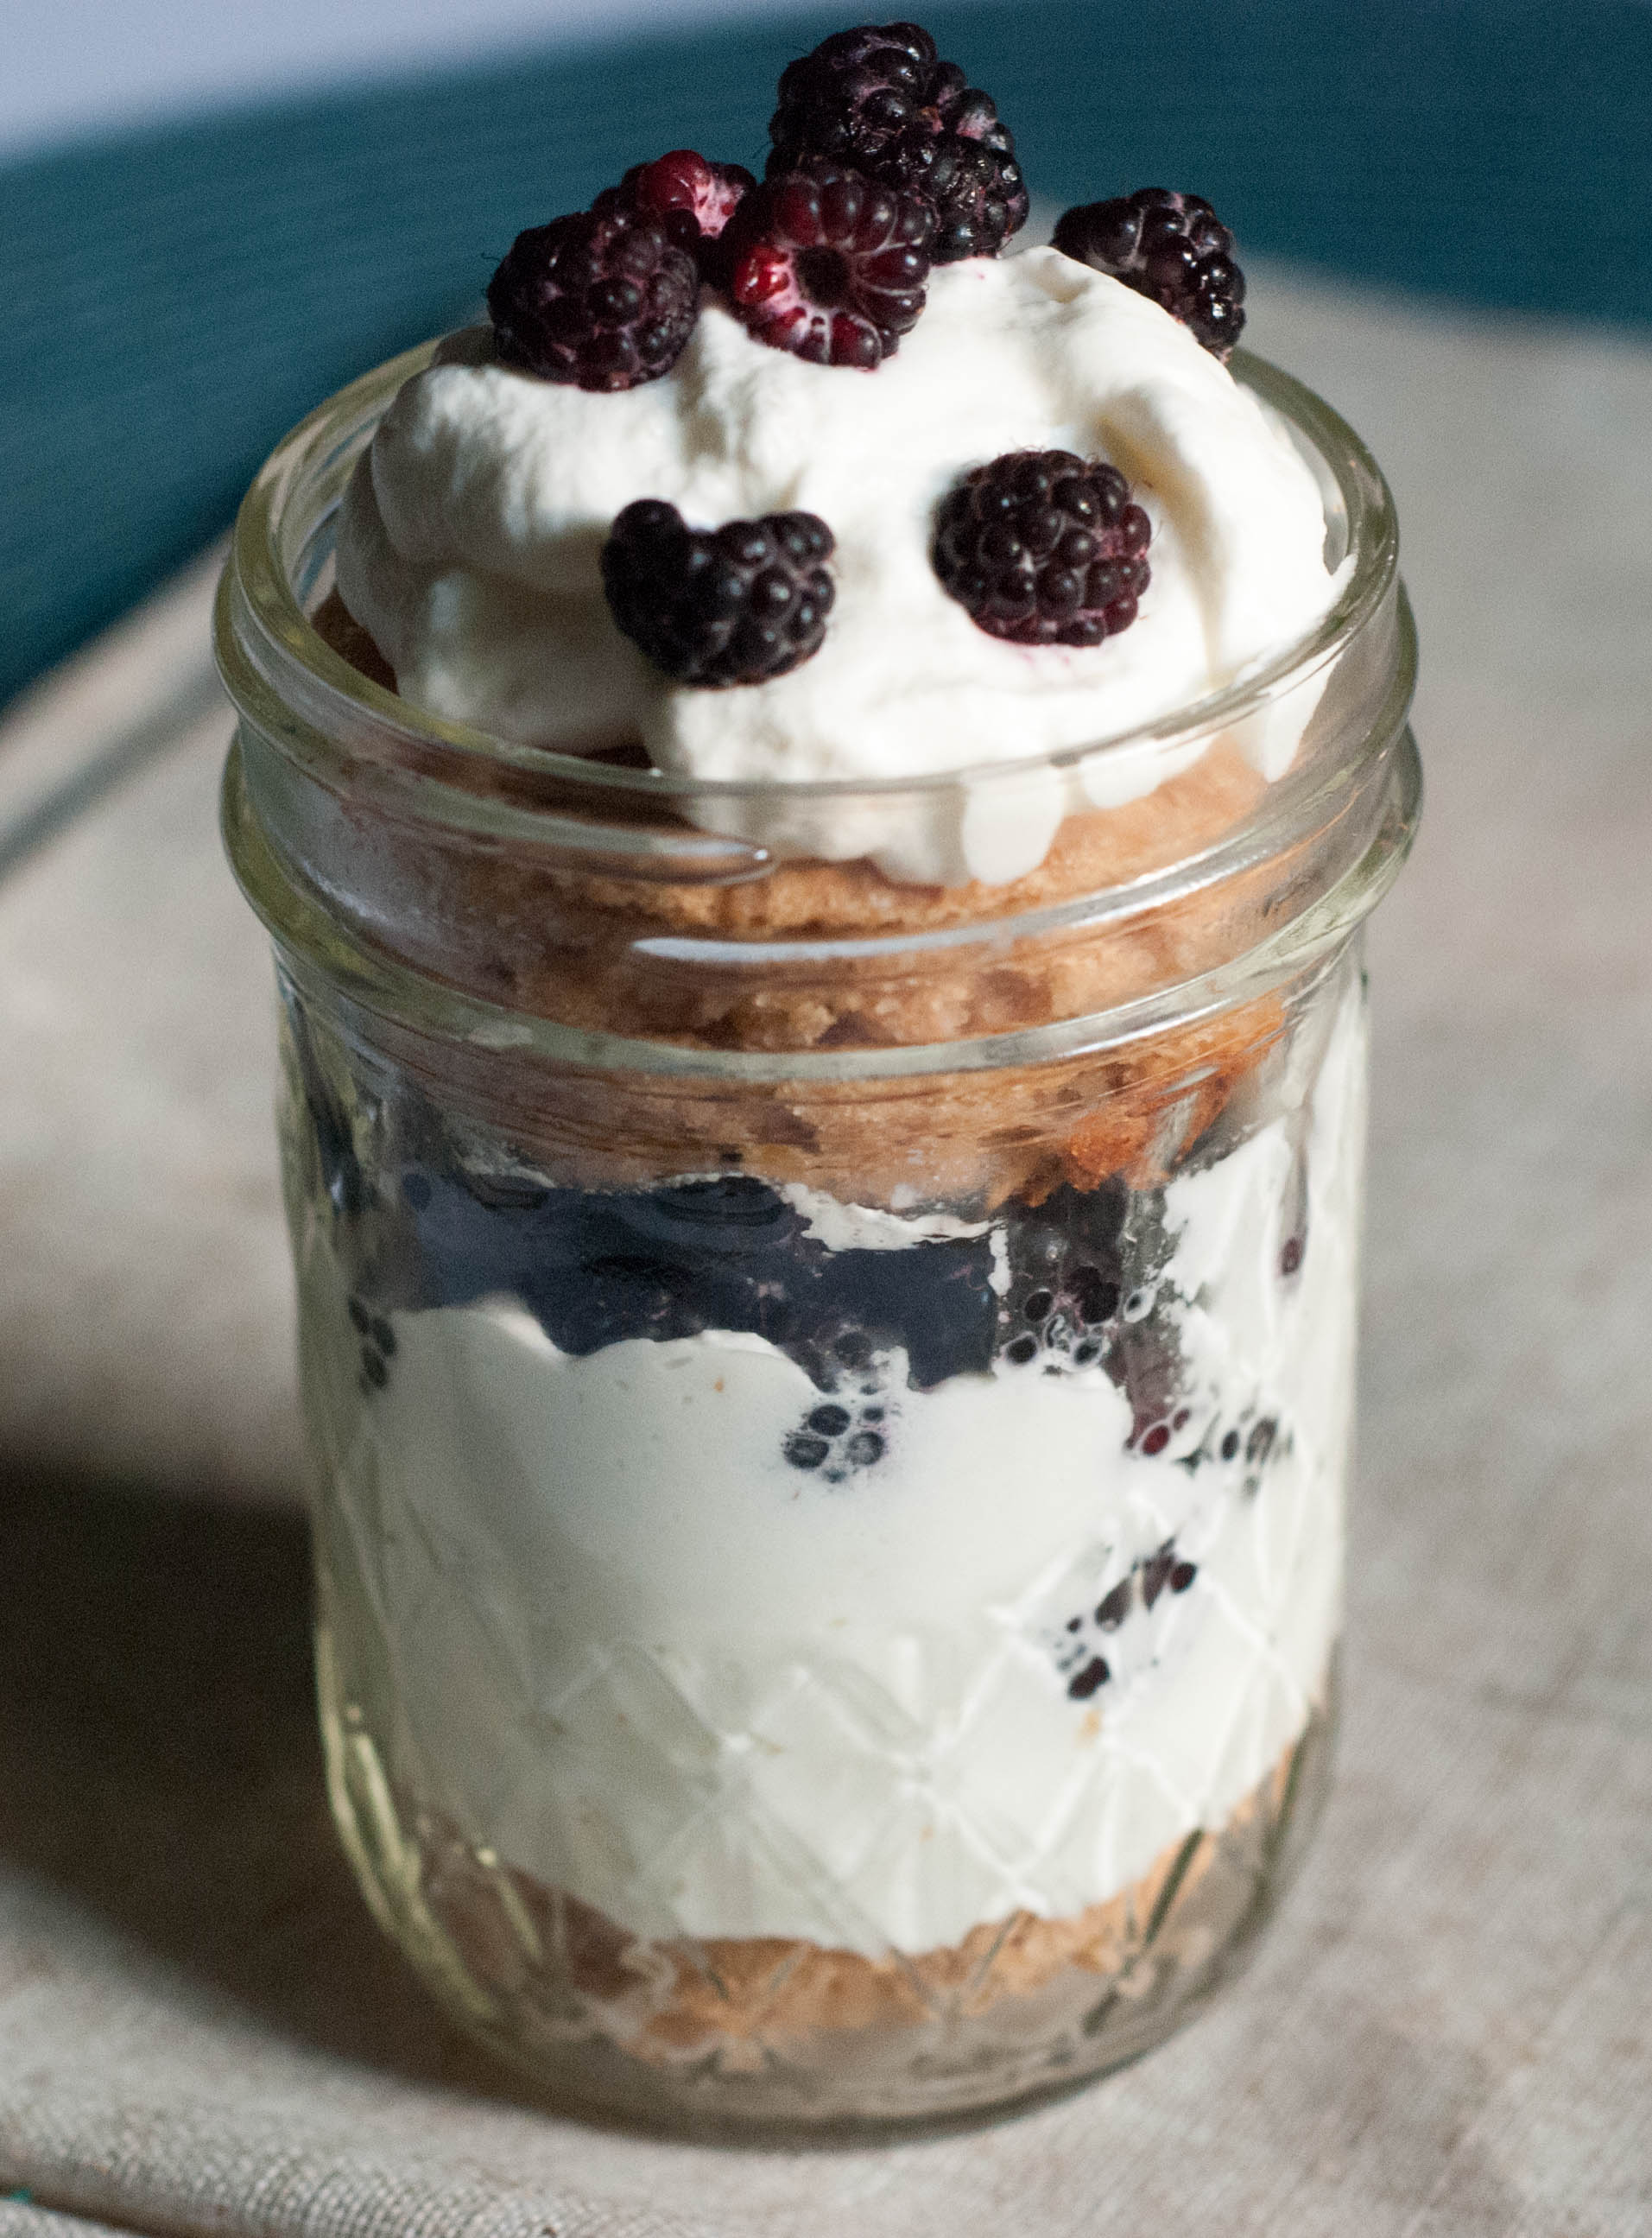
I layered cake, whipped cream, berries, cake, whipped cream, berries and wow! They were beautiful and delicious!
Everything You Need To Know About Making Your Own Chicken Stock
First, I should say I’m really excited about this one! If I had to choose one item I make from scratch that simply makes me happy it is my chicken stock. There is something really amazing about creating a flavorful and versatile ingredient to use in soups, casseroles, meat dishes, and so many other foods, all while knowing it is nourishing and simple. I actually feel guilty for ever purchasing this in a box because doing it yourself is a really rewarding experience.
To be honest, there was always something that disgusted me about boxed stocks. Not only do boxed stocks smell and taste weird, they also contain MSG. I have yet to find a boxed stock or bullion cube that doesn’t contain some form of MSG, even the organic versions. If you are on the lookout for MSG in products like these, it will be labeled as Monosodium Glutamate, Autolyzed Yeast, or Yeast Extract. Even products that use the phrase “No MSG added” on their packaging are most certainly using a different source of the same thing. I stay far away from MSG because I simply don’t want to be mind tricked into craving something. I want my body to crave what it needs, not what an additive is making me think I need.
When I began working in restaurants I realized the people really doing things from scratch were making their own stocks. Don’t get me wrong, there are some places that sell so much soup that it just isn’t a feasible thing to do, but in the chef world using stock bases is really frowned upon. Why? Because making your own is kind of like an art form. It is also budget friendly because employees can collect all of their onion, celery, and carrot scraps and create something out of them. Talk about not wasting anything! Making stock in your home is just as easy, and if you save onion peels, carrot scraps, and the parts of celery you aren’t using you could very well create a nice stock out of it if you have enough. My family doesn’t collect enough scraps to use scraps alone, but you may or may not find a random bag of onion peels in my refrigerator!
There are various ways to do this, but I prefer to make a meal out of it as well, which means I use a whole chicken. I do remove the meat about 45 minutes in, but that way I have meat to make meals with the stock. I also leave the skin on for flavor and if the chicken came with the giblets I will use them as well. The more you can throw in there, the better! Essentially you put everything into a large pot (I use an 8 Qt. KitchenAid stock pot), cover it with water, bring to a boil, and let it do it’s thing. There is nothing labor intensive about it, it just takes a long time. I let mine simmer for at least 6 hours. When I do this, I am not planning on using the chicken or the stock that day. If I am feeling really adventurous I might put the pot on the stove that morning and use the stock for dinner, but most of the time I use it the next day and freeze the remains in jars for various uses. The best part about making your own stock is you will have a freezer stash of stock to put into your other meals! This is a really basic recipe so you can pull this out of the freezer and add other herbs and spices to it to match the recipe you are using.
Other then a whole chicken, I use onions, carrots, bay leaves, black peppercorns, and salt in my stock. I don’t keep celery on hand but if you do I would suggest adding some. Other options to throw it are garlic cloves and fresh herbs. If you want to throw herbs in there, I’d go with thyme, rosemary, and parsley. This will liven your stock up a bit but I’ve made it in a pinch with no herbs and still got a beautiful stock. However, like I said this is a basic stock you can use for anything. As far as chopping your onions and carrots, just roughly chop them into big chunks and throw them in. Putting everything together literally takes less than 10 minutes. While the stock is cooking you may notice some “stuff” floating to the top of the pot. Just take a ladle and scoop it out. Sometimes I do, sometimes I don’t. When the stock is finished I strain everything out of it, keep the carrots, and throw the rest away. Straining it is really easy, I use a large colander over a large stainless steel bowl and carefully pour.
I’ve gone through pretty much the whole process, so here is the recipe with directions.
Homemade Chicken Stock
- 1 whole chicken
- 3-4 bay leaves
- About 1 Tablespoon whole black peppercorns
- 2 large onions
- 5-6 large carrots
- 3 celery stocks
- optional: garlic cloves (2-3), fresh herbs (rosemary, thyme, parsley)
- 1 Tablespoon Kosher or Pink Himalayan Salt ( added at the end)
- Freshly cracked black pepper to taste (added at the end)
Roughly chop onions and carrots. Put them into the pot along with all other ingredients except salt. Fill with water to cover everything and bring to a boil. Allow to boil for a few minutes then turn heat down and cover. While covered, allow pot to be simmering, but not at a rolling boil. About 45 minutes in remove chicken meat from bones for use later in soups and meals. Put all bones back into pot. Cook for 4-6 hours, checking pot frequently and making sure ingredients are still covered with water. I usually end up adding more water by the half-way mark.
Strain the stock by placing a colander over another large pot or bowl. Remove carrots from remains if you are using them in a soup. Be sure to check diligently for small bones that can occur with the use of a whole chicken! Now it is time to season your stock. Start with a teaspoon or two of salt and adjust it according to what you like. This is the trial and error part of the process and you have to decide how much salt you want to add. I add about a Tablespoon which gives me a nice balance between bland and super salty.
One thing to note, you want the cooling process to go quickly. I would suggest dividing your stock between 2 or 3 different containers, as a smaller amount will cool quicker. The Serv-safe rules are as followed: Within two hours you should be somewhere around 70 degrees, and within 4 hours you should be around 41 degrees or lower. If your stock is sitting around in a “temperature danger zone” harmful bacteria can grow. Once this happens, no matter how much you boil it, the harmful bacteria will still be there. To be honest in home cooking I have never had a problem with this, as long as I divided the stock between two pots and gave it breathing room in the refrigerator. Please don’t let this scare you into not making it, because really it isn’t a huge deal but something I wanted to mention.
The next day you may notice a layer of fat has surfaced on your stock. If you wish to remove it, simply take a ladle and submerge the bottom half of it into the middle of your pot (you don’t want liquid getting inside the ladle yet). Moving from the middle out, gently move your ladle in circles, pushing the fat to the outside. When you have reached the outside of the pot tilt your ladle and allow just the fat to spill into the ladle.
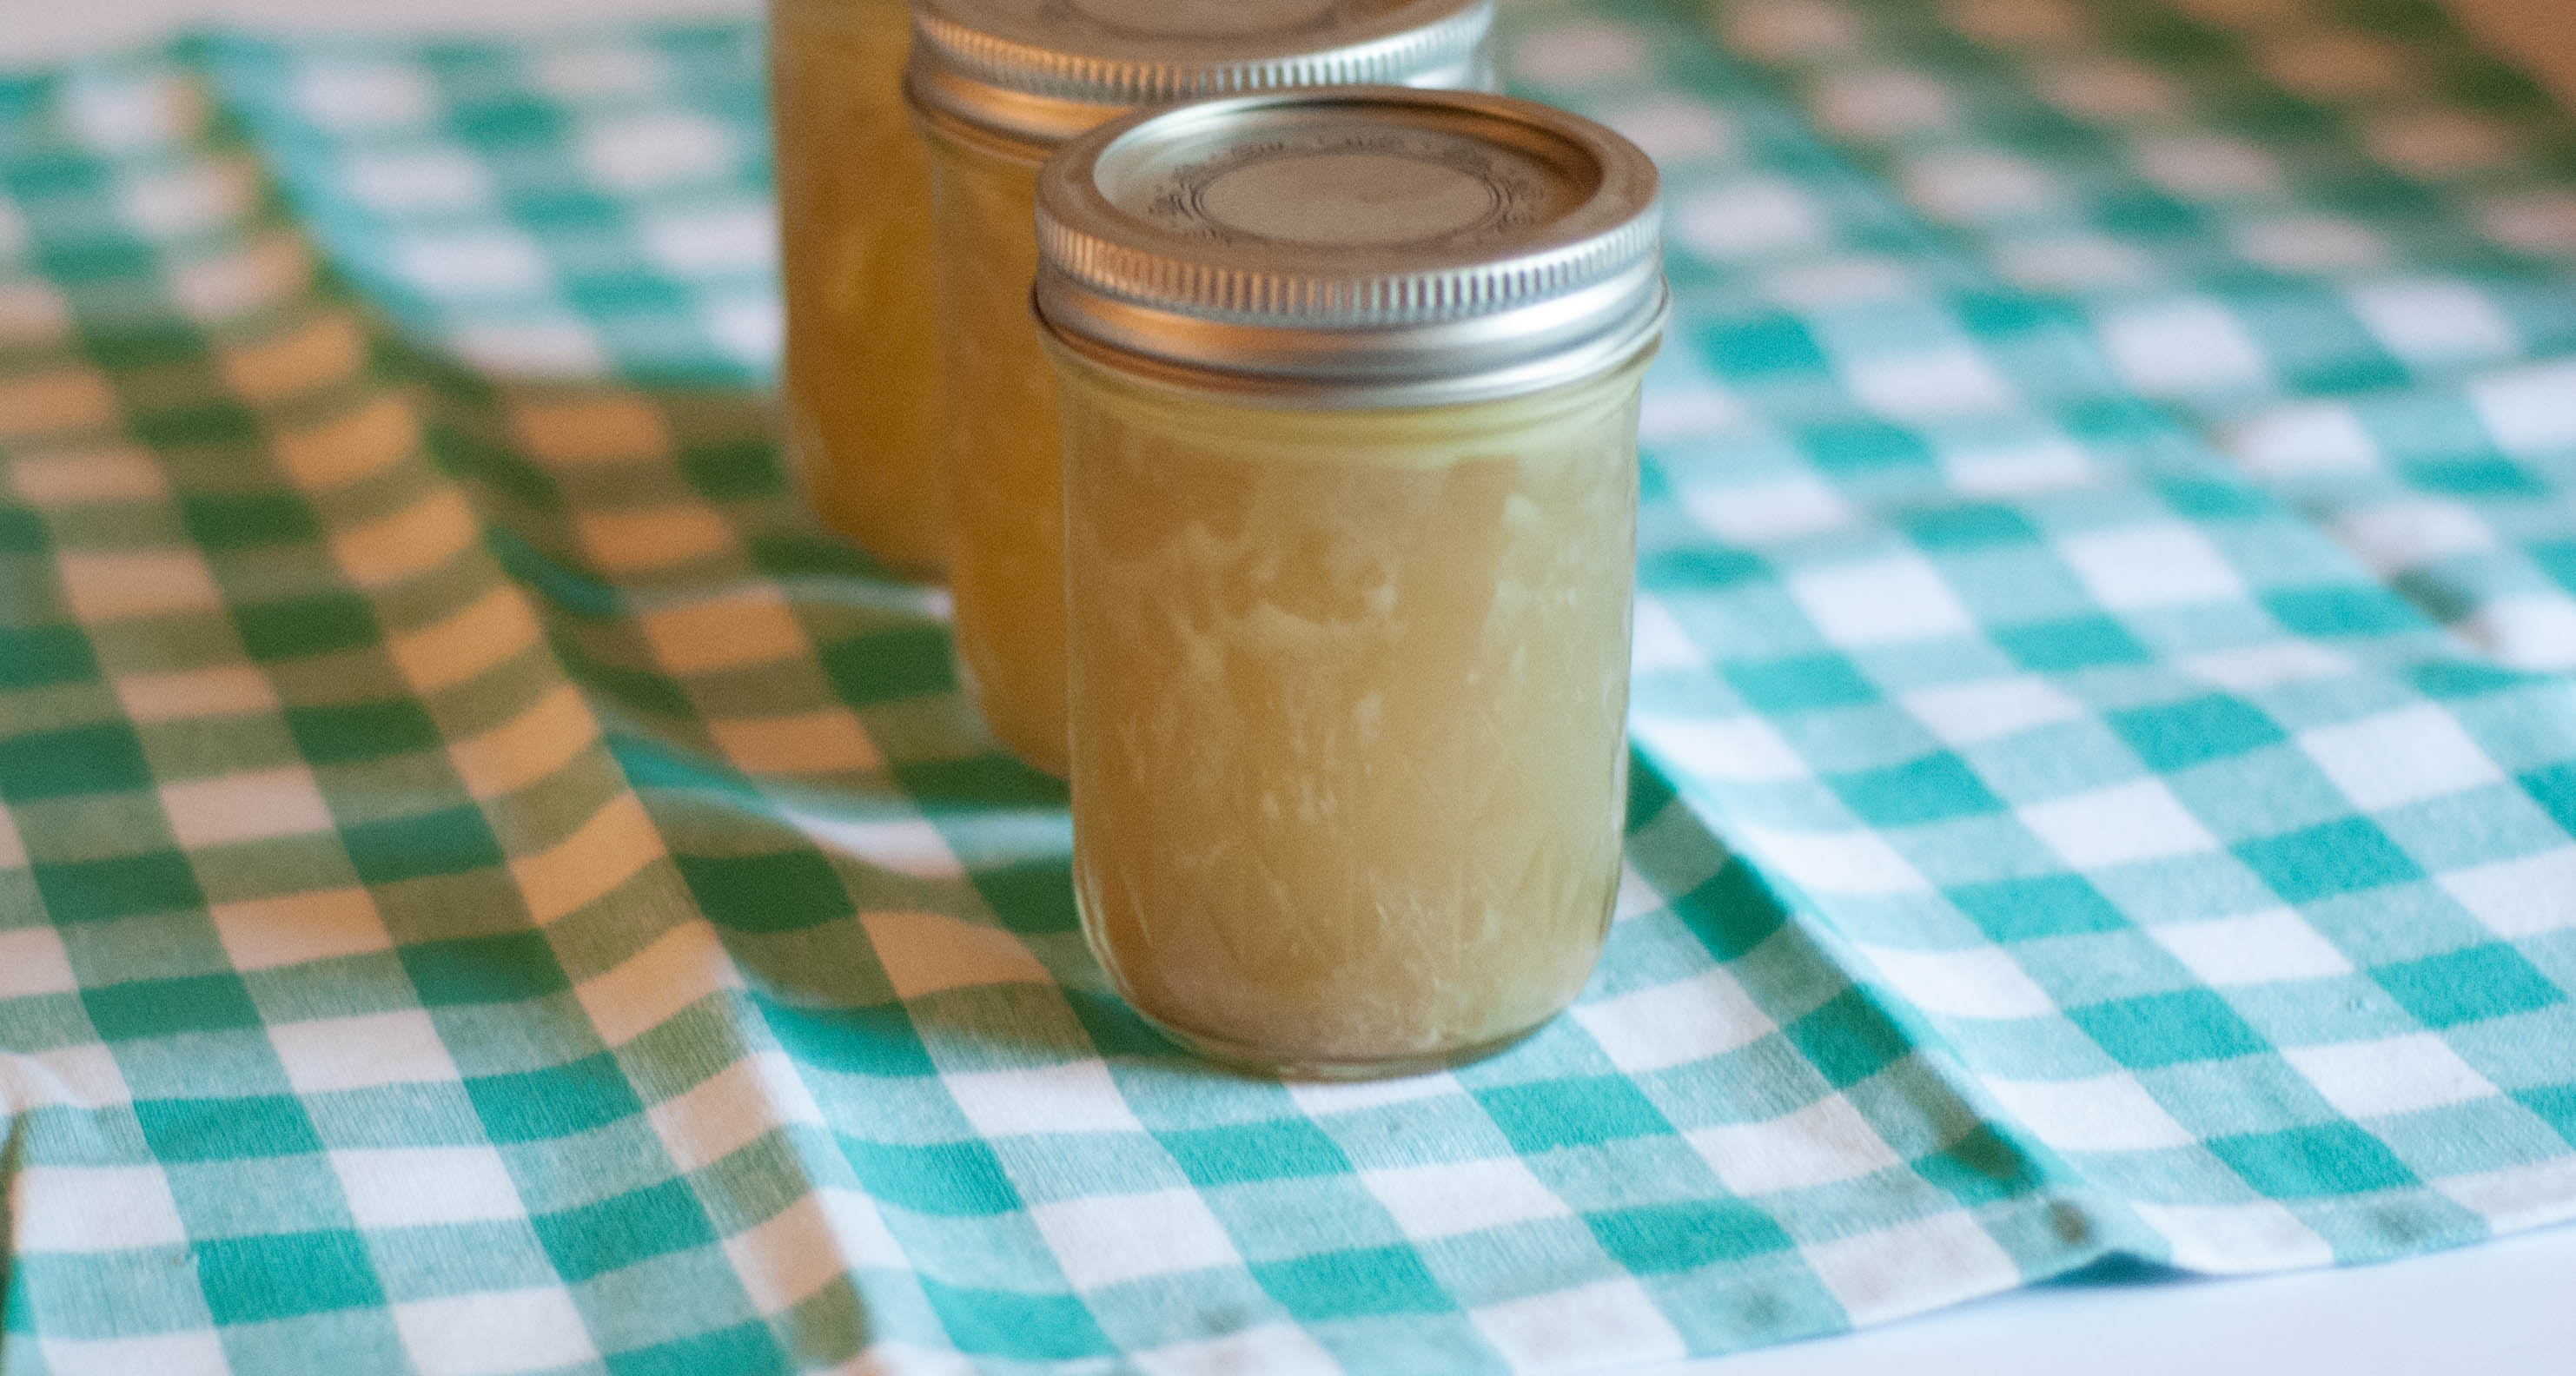
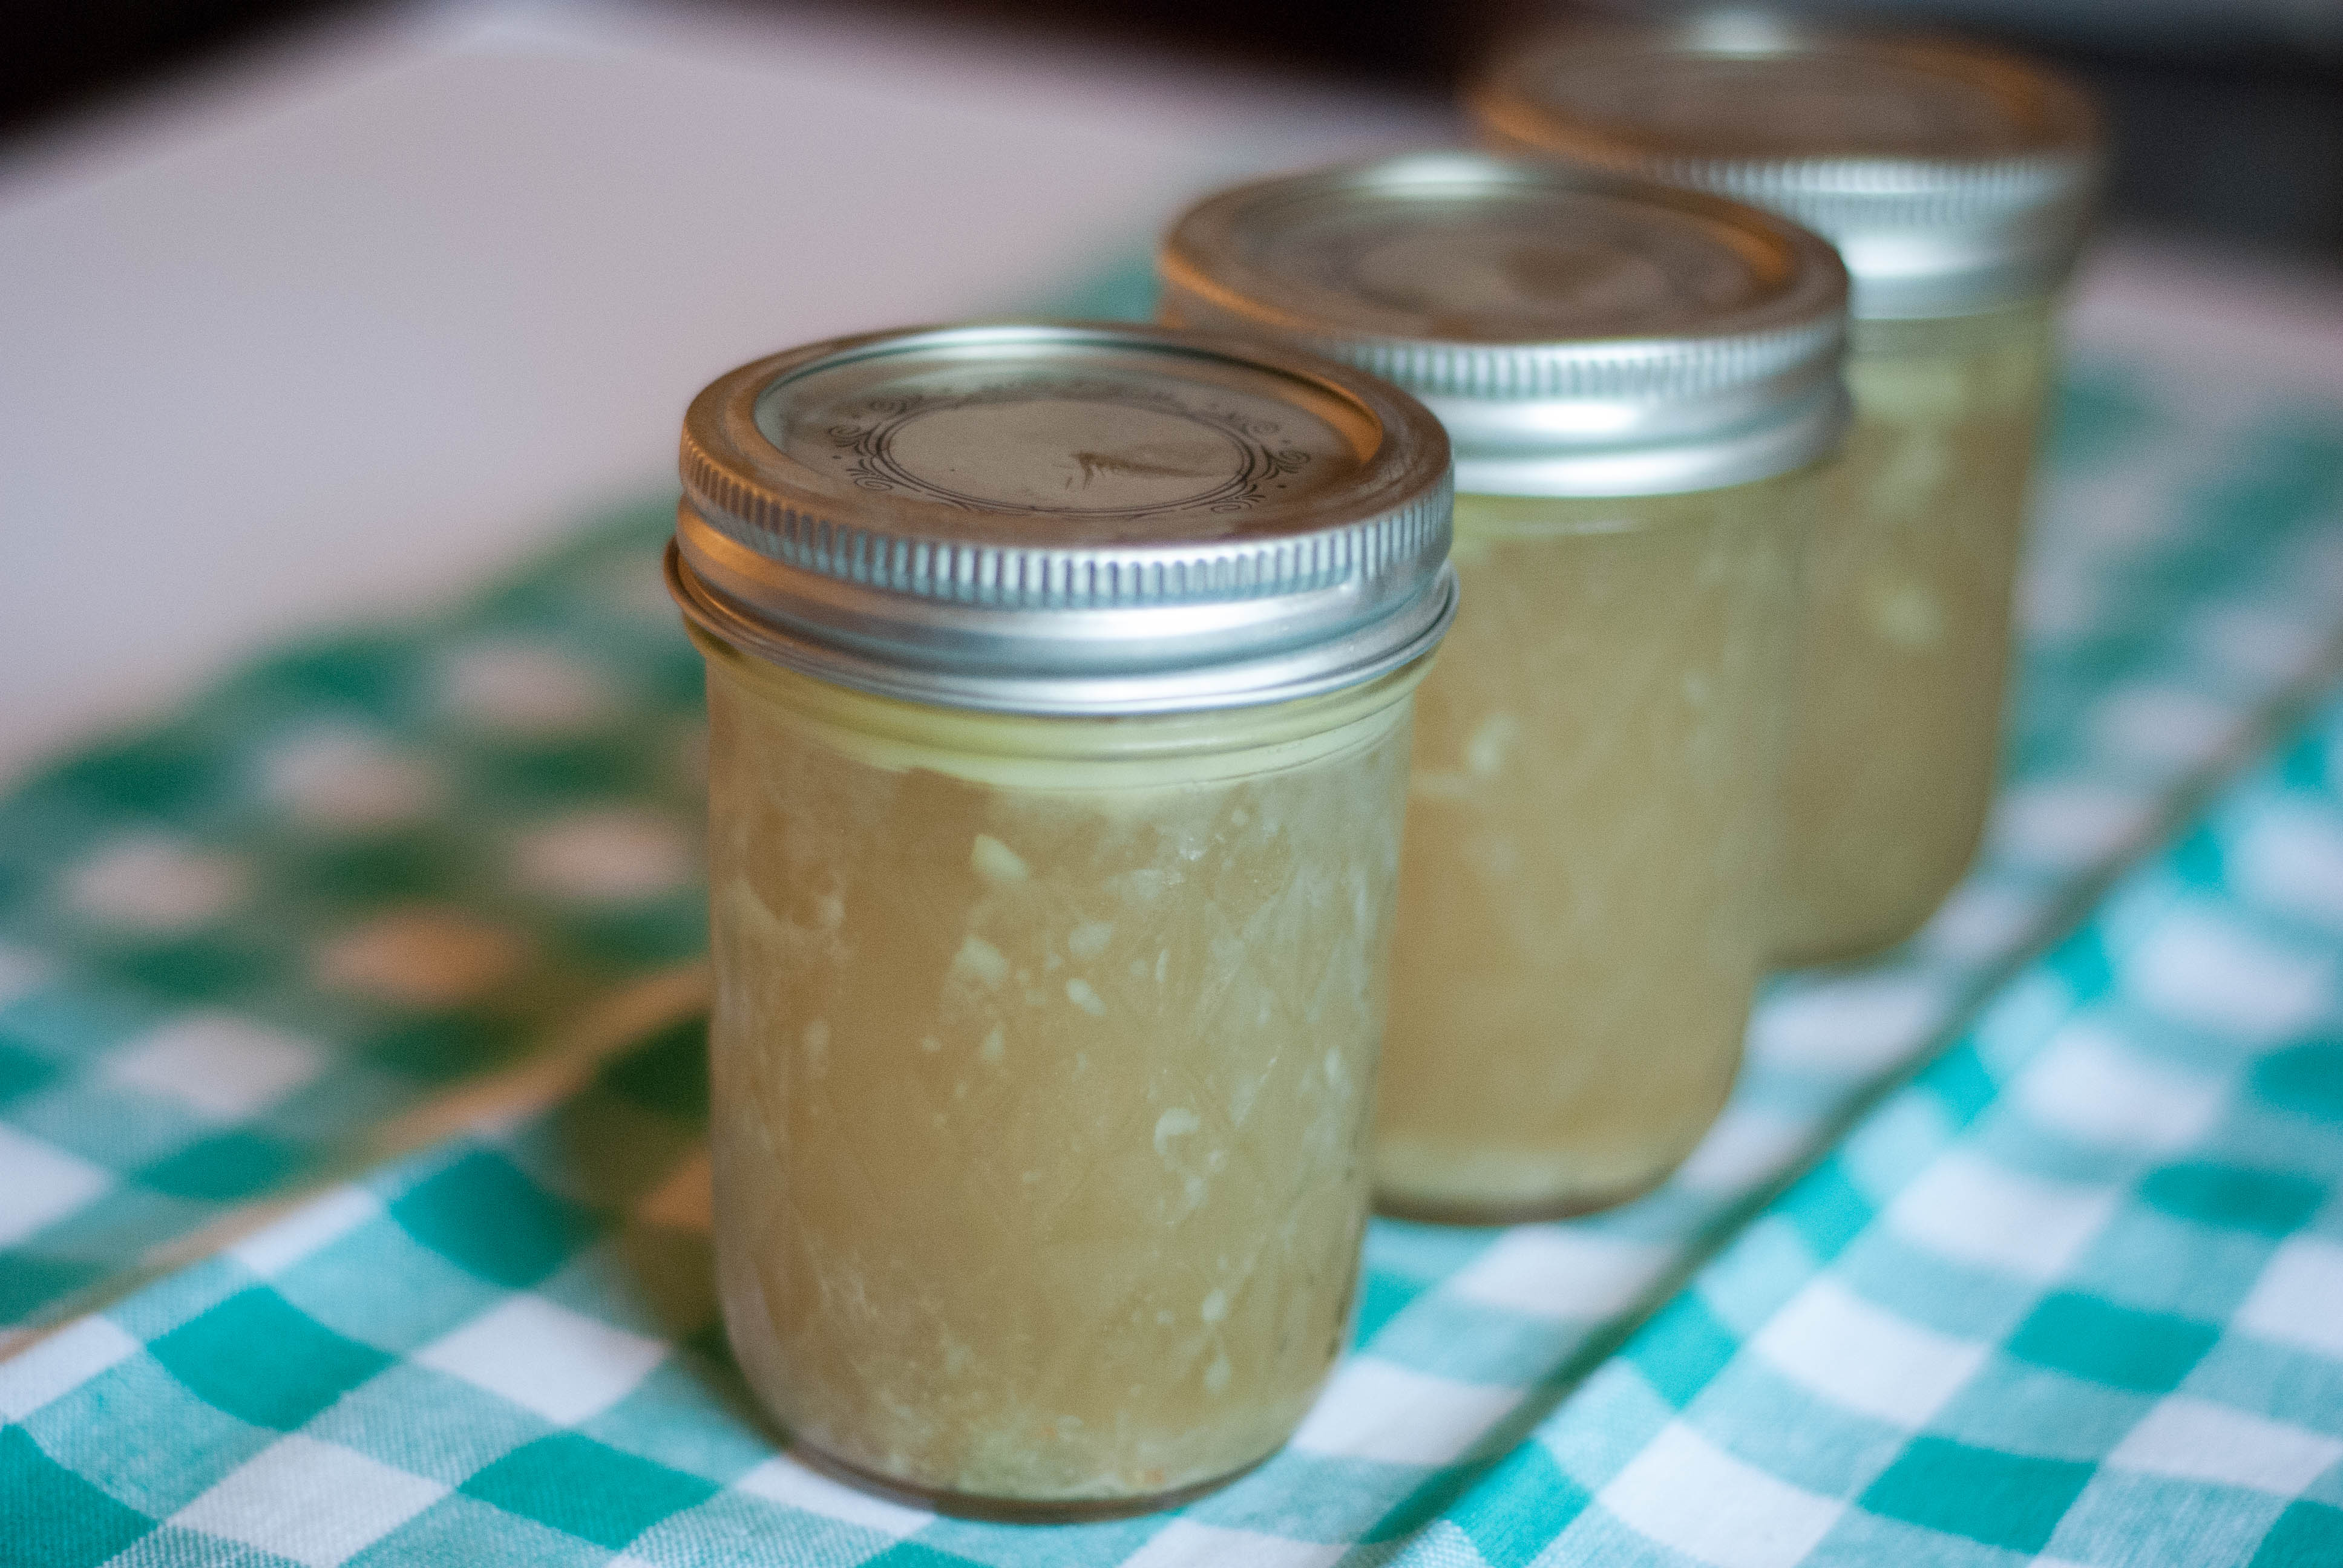
*As pictured and mentioned I do freeze extra stock in mason jars to use for other meals. Once your stock is cooled, just fill a jar leaving extra room at the top for expanding, and freeze.

Strawberry and Poppy Seed Salad

We’ve discussed store-bought dressings and how horrible they actually are for our health a few times before. To catch anyone who missed those posts up, turns out store bought dressings are nothing more then highly refined and cheap oils, MSG, abbreviated chemicals, and preservatives. My theory on store-bought dressings is this: If you are going to make a beautiful and nutritious salad why pour a bunch of crap on top of it? It kind of defeats the whole purpose! The other problem with store bought dressings are the unethical companies who make them. They love to pretend they are using olive oil, when in fact if you turn the bottle over you will see the main ingredient is soybean oil. Why label the front “Olive Oil” when olive oil is the 5th or 6th ingredient? Nothing makes sense about the marketing tactics they use, and I hate to see consumers who are trying to be healthy be fooled by these companies!

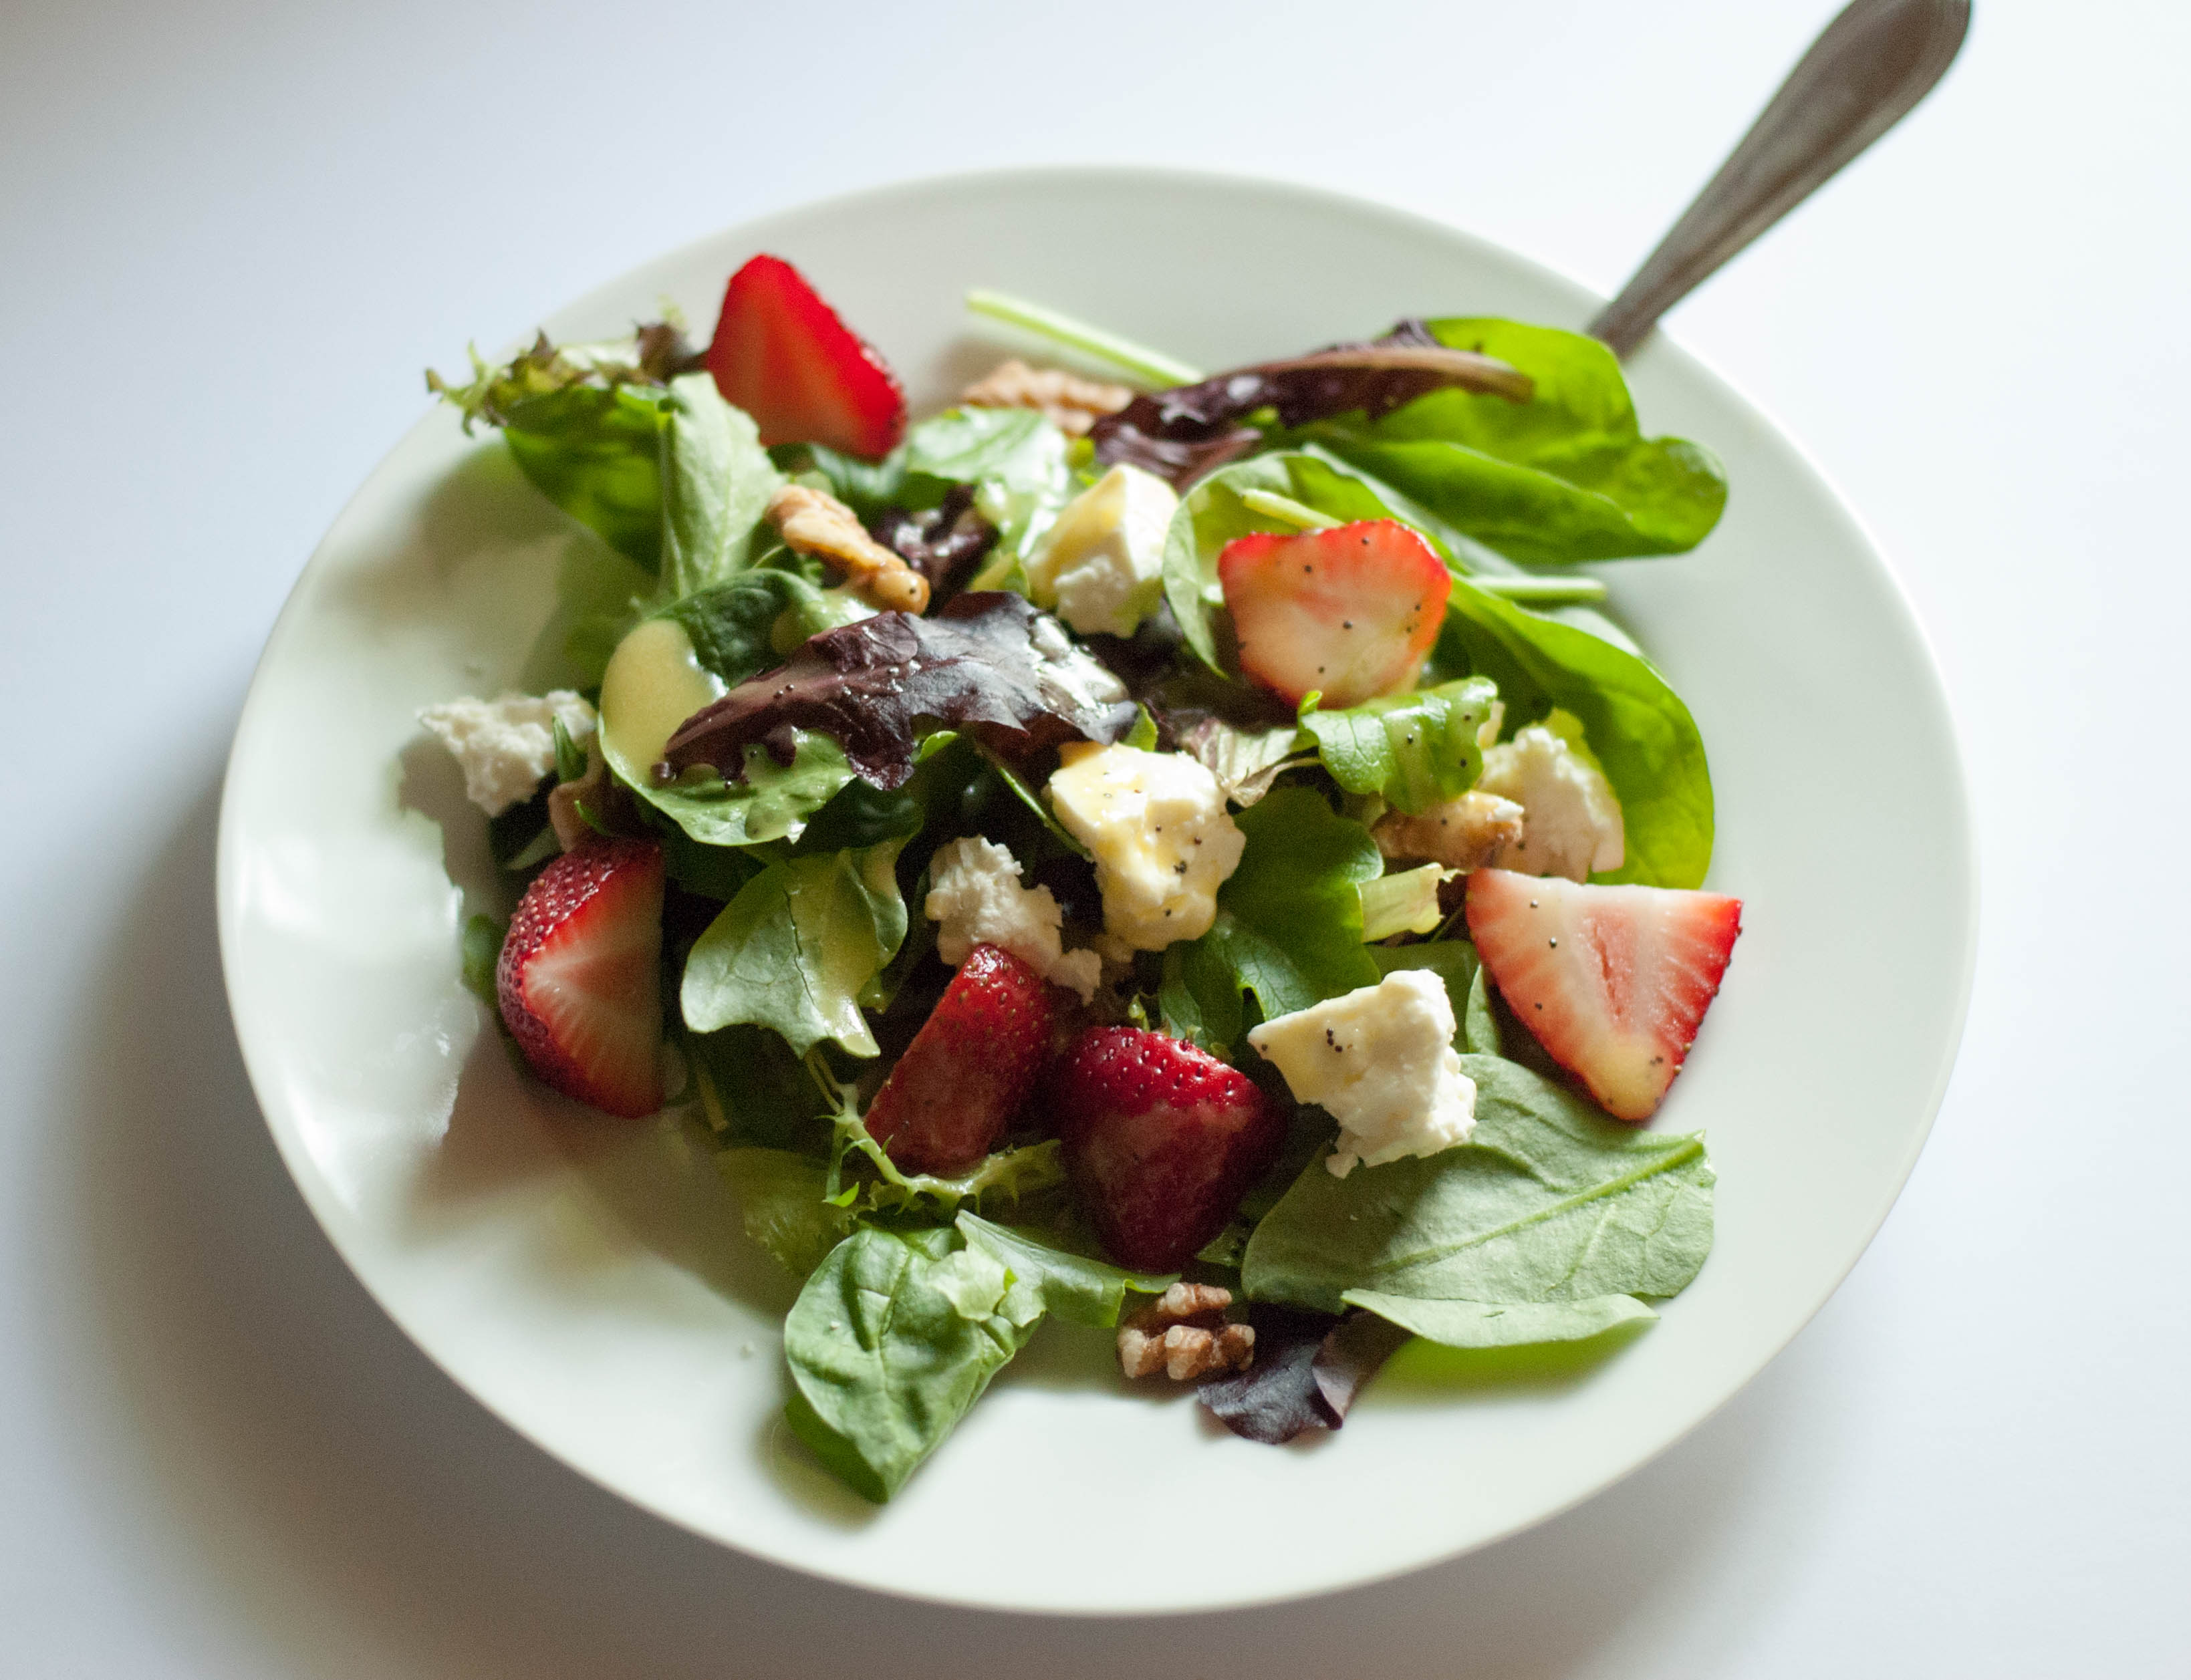
With that being said, I am so happy to share this recipe with you! Nothing says “summer” quite like a strawberry and poppy seed salad. My favorite season is summer simply because of the delicious local produce stands that pop up along the country roads of Central Pennsylvania. I love, love, love local strawberries that are red throughout, small, and sweet. They are vastly different then the grocery store strawberries, and so much tastier!
For the salad I used dark, nutritious, leafy spring mix along with feta cheese, strawberries, and walnuts. For the dressing, all you have to do is put a few simple ingredients into a food processor, and drizzle olive oil into it. After the oil is in, add the poppy seeds and your done! There is no reason to even use store bought dressing when making your own healthy dressing is this easy!
Thick and Creamy Cheeseburger Macaroni Soup
Ok, I admit my husband was right on this one. Don’t expect that I’ll be singing his right-praises any time again soon, but this one was a homerun! No, it was a grand slam. But don’t ask me anything else about baseball because those are the only two terms I know so let’s just move on.
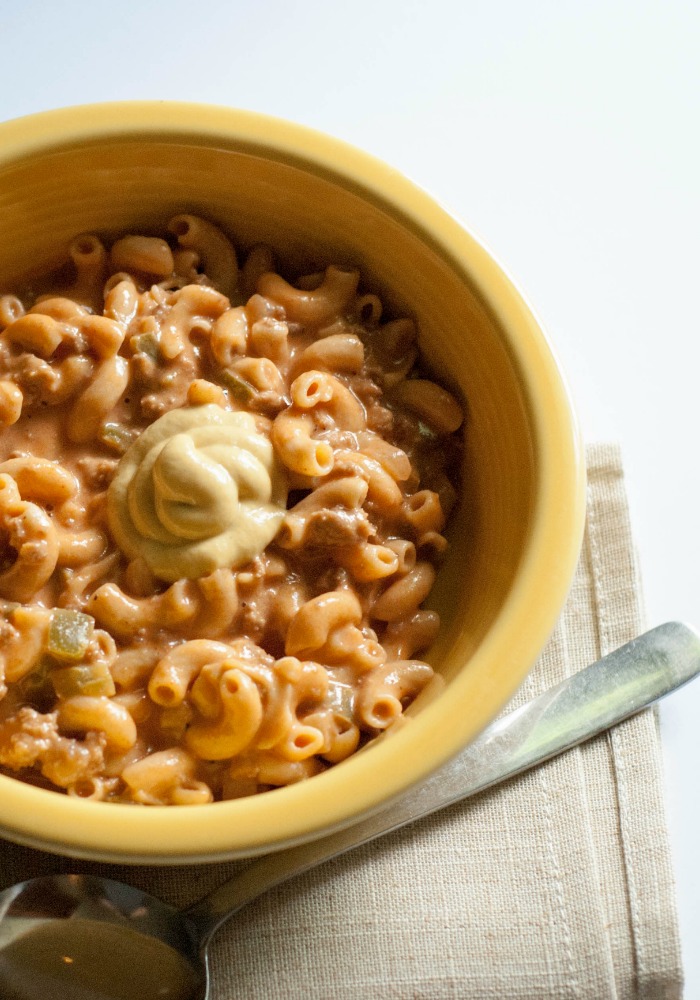
While I was slaving over a hot pot of soup my husband walked by and suggested I add some mustard. Like, for real. Sometimes he is the voice of reason, but I was skeptical about this one for a minute. Then I remembered this genius little pizza we used to make at a café I worked at and I thought maybe he was on to something. I reluctantly added a little and it was pure manly goodness. It was reminiscent of those two love birds ketchup and mustard coming together on one bun, and oozing out in some sort of orange goodness that only ketchup and mustard can produce. If you are totally salivating right now this one is for you! Now where’s the bacon!?!
This is one of those dishes that just won’t go away. You think you are done but you just keep coming back for more until your day is officially a fat day now. You know, one of those days where you’ve eaten like a cow for the past 10 hours but your still considering a huge bowl of ice cream after the kids go to bed? Yeah, this may or may not induce a day of shameless eating because it is just so good and you can’t get away from it. Don’t say I didn’t warn you!
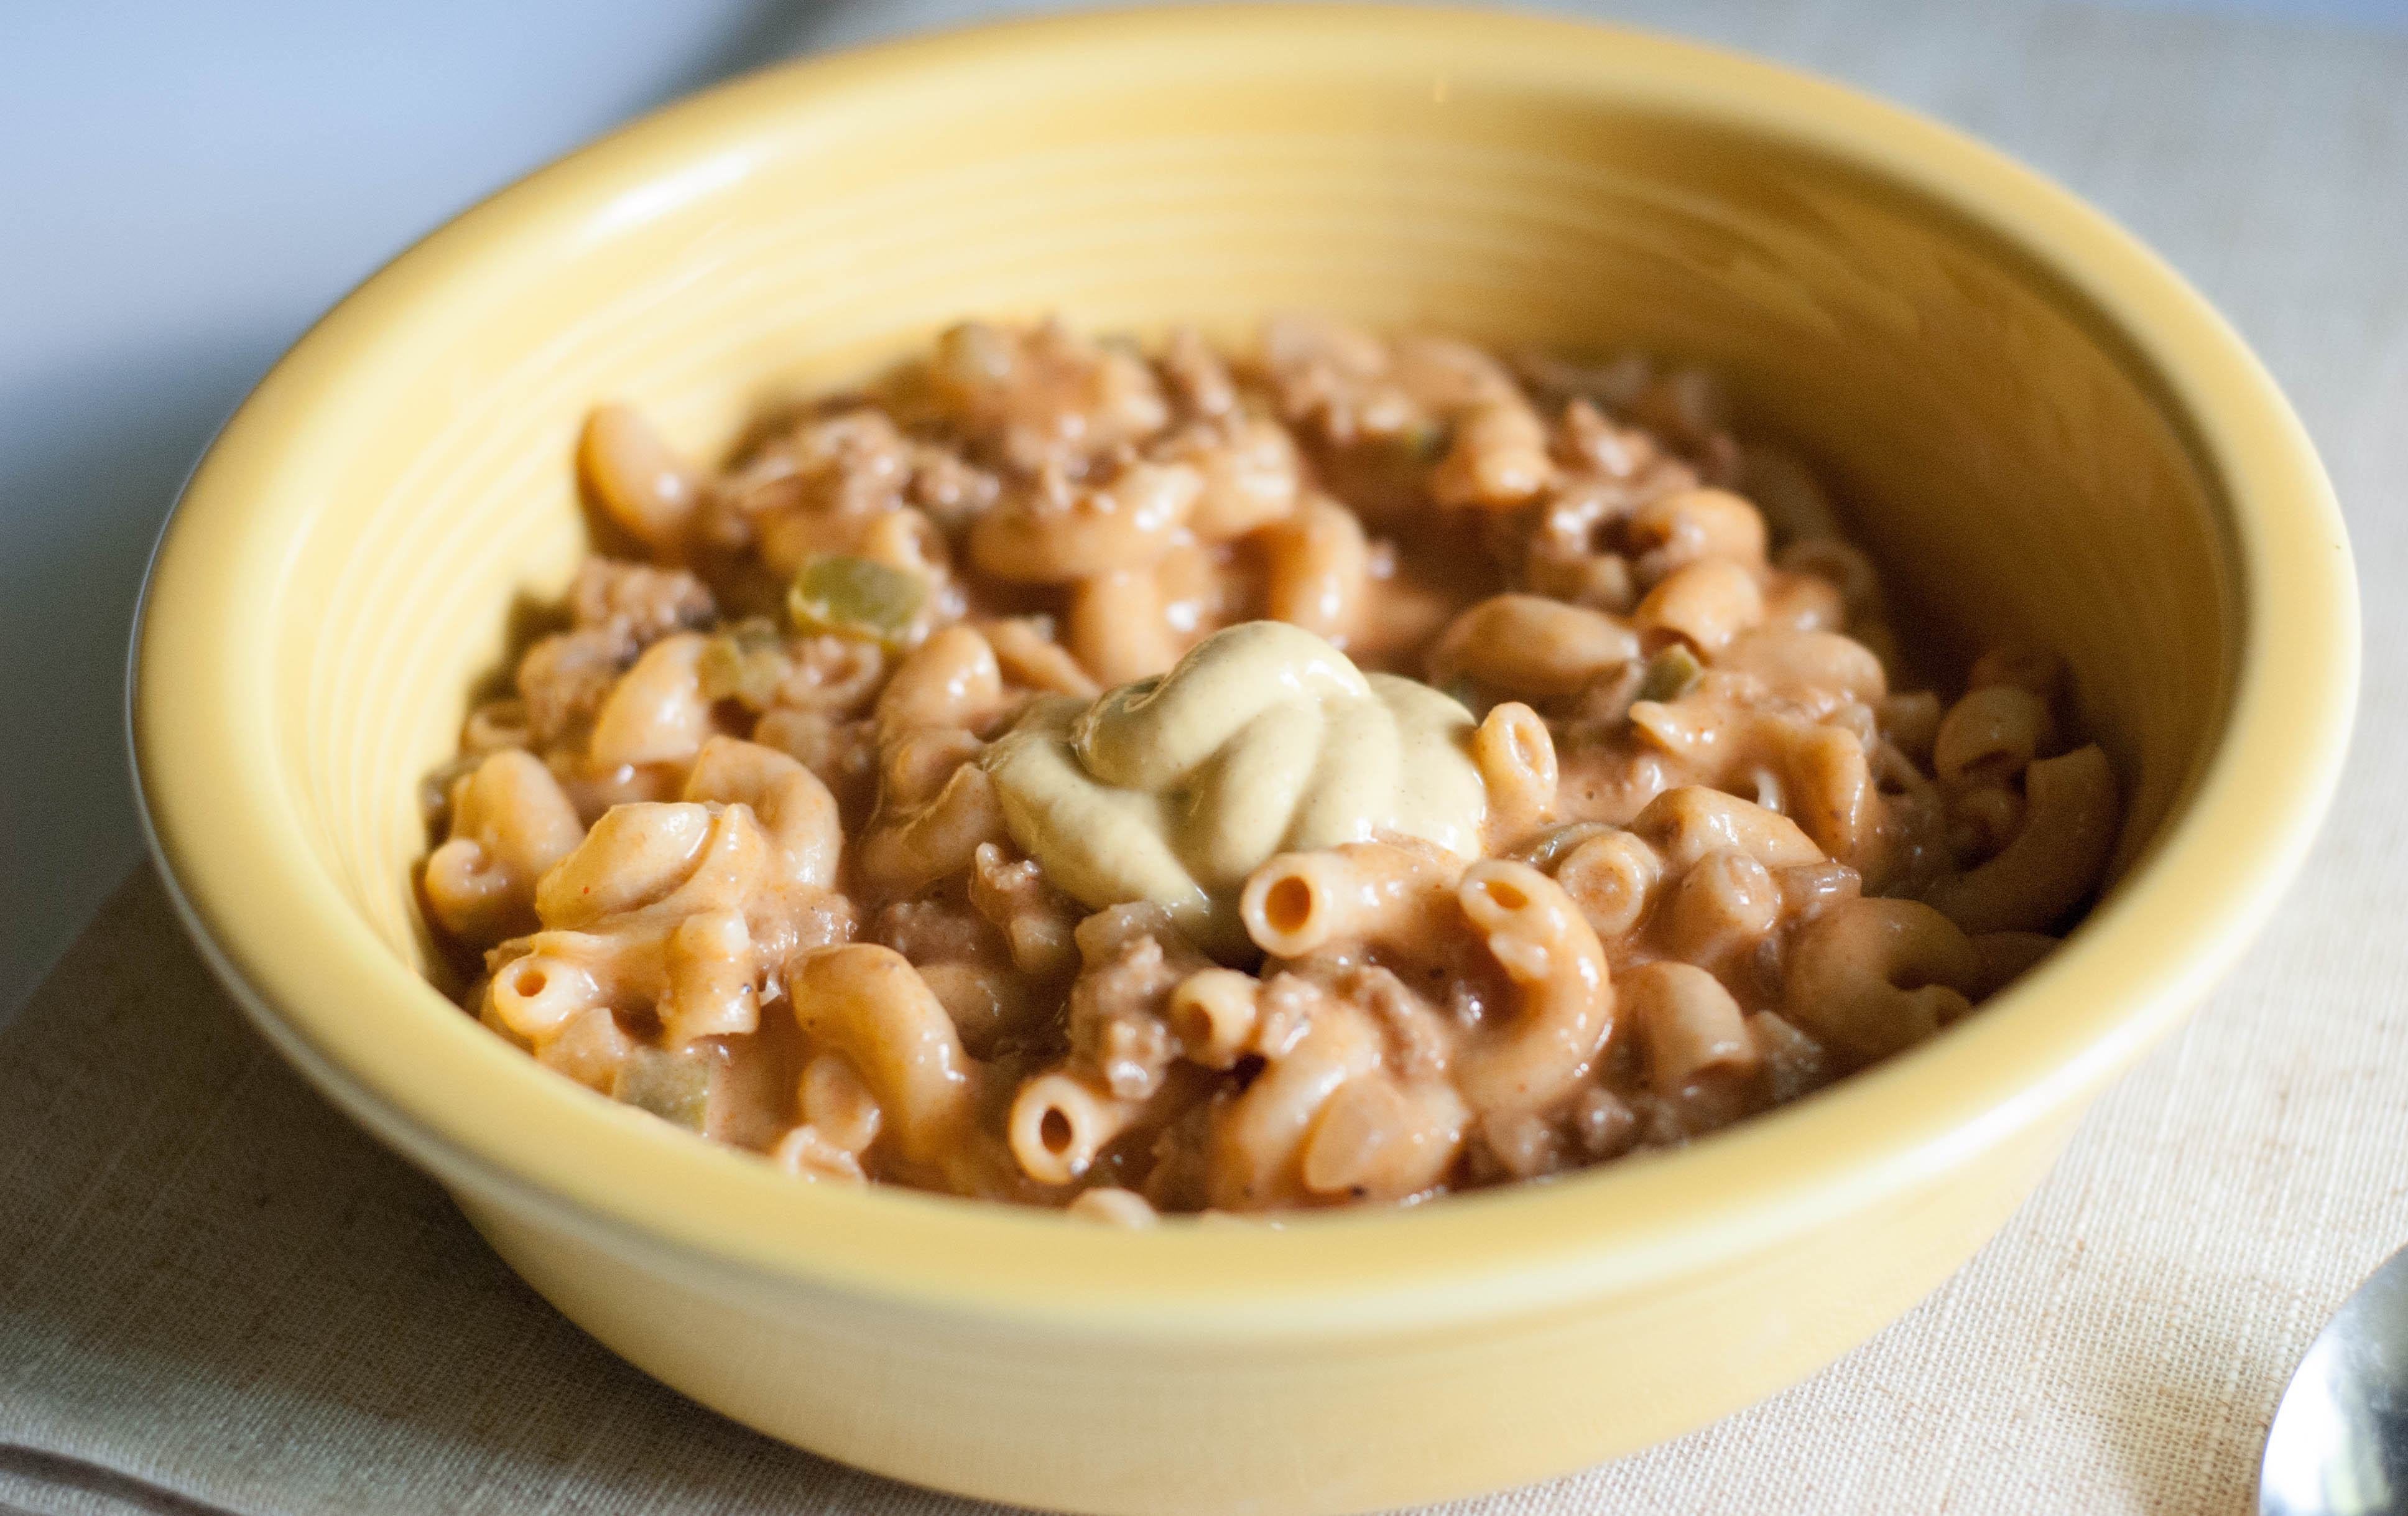
Some tips for this recipe… you may need to adjust the seasoning to taste. Also, if you prefer a thicker soup add 2 Tablespoons of flour at the end to thicken it up more. This will reduce the amount of broth you will have. This isn’t a super brothy recipe to begin with, so if you’d like it thinner I would suggest adding an additional cup of milk.


